5-74
MAINTENANCE
ADJUSTING THE GAP BETWEEN THE
BUCKET AND ARM (IF EQUIPPED)
• Before performing maintenance or
repairs under the machine, lower all
working equipment to the ground or in
the lowermost position.
• To prevent unexpected movement,
securely block the working equipment
when adjusting the gap.
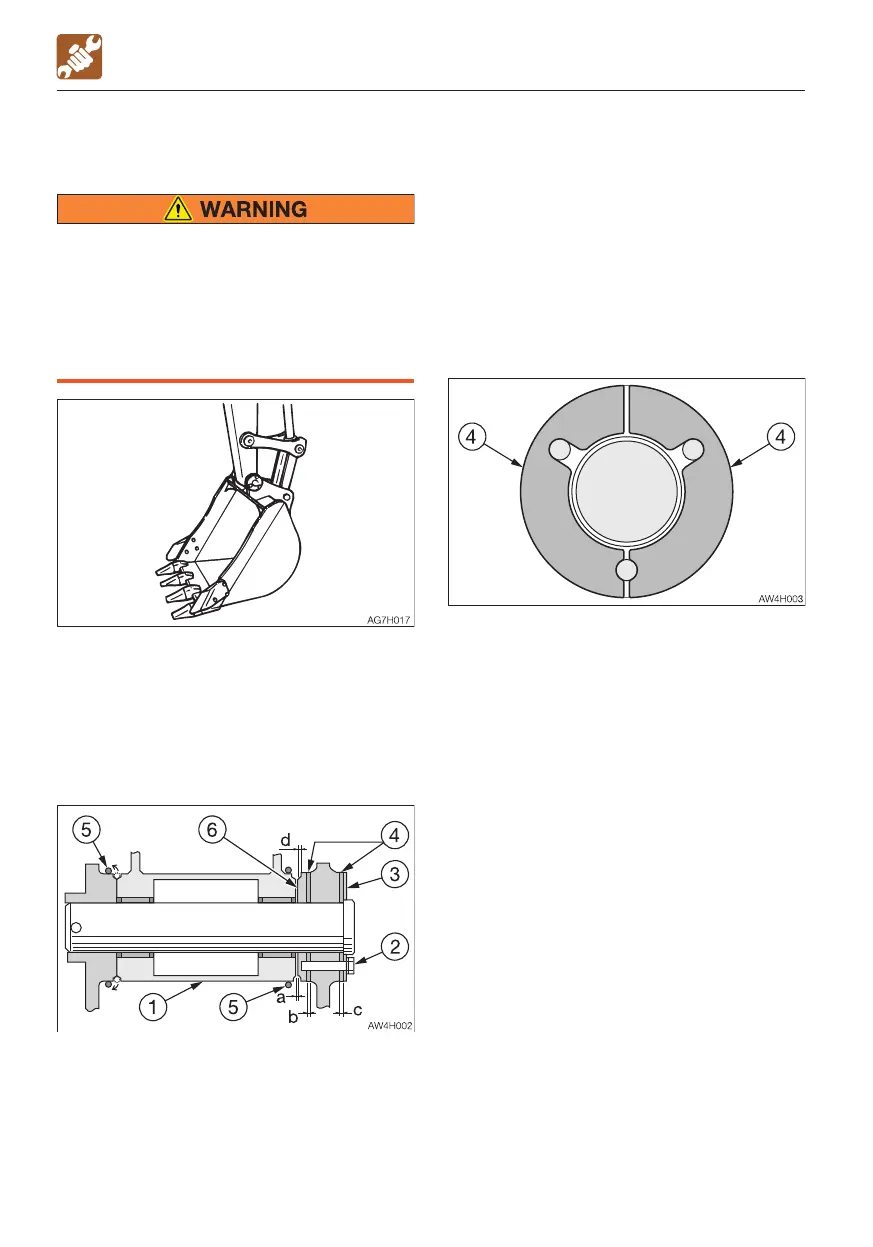
1. Lower the bucket to the ground in a stable
position as shown in the figure above.
2. Slew the upperstructure slightly to the left
and lightly press the arm to the left side of
the bucket (the side without an adjuster).
3. Set the safety lock lever to the lock
position and stop the engine.
4. Slightly loosen the 3 bolts (2) (using a 22
mm (0.87 in) wrench) and remove the
shims (4) from “gap c” between the blade
(3) and bucket. The shims (4) are in two
parts and can be removed easily when the
bolts are slightly loosened by sticking a
screwdriver in the seam between the left
and right shims.
5. Move the O-ring (5) to bring the gap (a)
into view and measure the width of the
gap (a).
6. Press the head of the bolts (2) with a finger
to eliminate gap (a). This increases gap (b).
Insert the shims removed above into gap
(b), using as many shims as can be
inserted easily.
7. Set the remaining shims back in gap (c),
then tighten the bolts.
Tightening torque : 83 N·m (61.5 ft-lb).
This completes the adjustment.
Note: The proper total number of shims for
gaps (b) and (c) is 6 x 2 = 12. If you forget to
set the shims remaining in step 7 above
back in gap (c), the tip of bolts (2) will extend
past the boss (6). This may damage the boss
at the arm’s tip or cause the bolt to break. If
the end face of boss (6) wears and the width
of the groove (d) for the O-ring reaches 5
mm (0.2 in), replace boss (6) with a new one.
WHEN REQUIRED

 Loading...