34 H9 ASD Installation and Operation Manual
EOI Installation Precautions
Install the unit securely in a well ventilated area that is out of direct sunlight using the four mounting holes
at the rear of the EOI. The ambient operating temperature rating is 14° to 104° F (-10° to 40° C).
• Select a mounting location that is easily accessible by the user.
• Avoid installation in areas where vibration, heat, humidity, dust, metal particles, or high levels of
electrical noise (EMI) are present.
• DO NOT install the EOI where it may be exposed to flammable chemicals or gases, water, solvents,
or other fluids.
• Turn on the power only after securing the front cover of the ASD.
EOI Remote Mounting w/o the ASD-MTG-KIT9
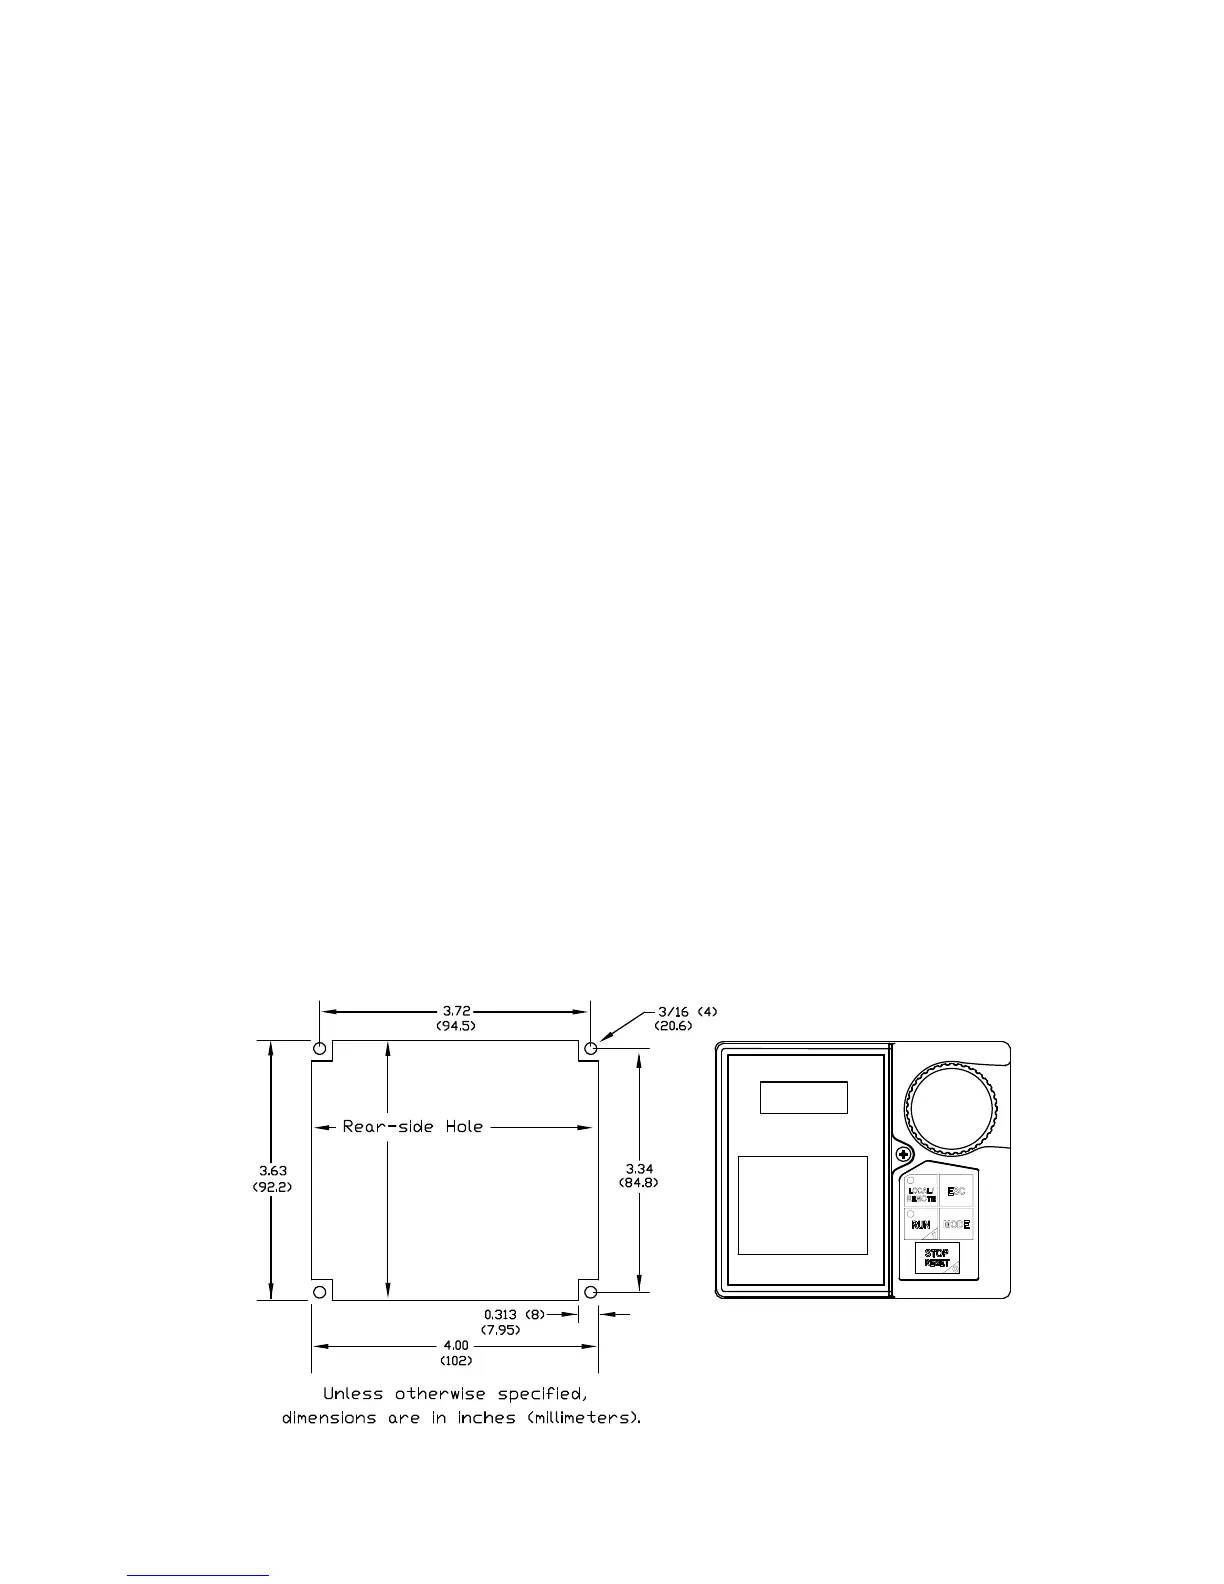
Note: See Figure 25 for the dimensions and the item locations referenced in steps 1 through 5.
1. At the EOI mounting location, mark the 4.00” by 3.63” hole and the four 3/16” screw holes.
2. Cut the 4.00” by 3.63” rectangular hole.
3. Drill the four 3/16” screw holes.
4. Attach and secure the EOI to the front side of the mounting location using the four 6-32 x 5/16” pan
head screws, the #6 split lock washers, and the #6 flat washers.
5. Connect the extension cable.
EOI Mounting Dimensions
Figure 25. EOI Mounting Dimensions.
Phone: 800.894.0412 - Fax: 888.723.4773 - Web: www.ctiautomation.net - Email: info@ctiautomation.net
 Loading...