H9 ASD Installation and Operation Manual 35
EOI Remote Mounting Using the ASD-MTG-KIT9
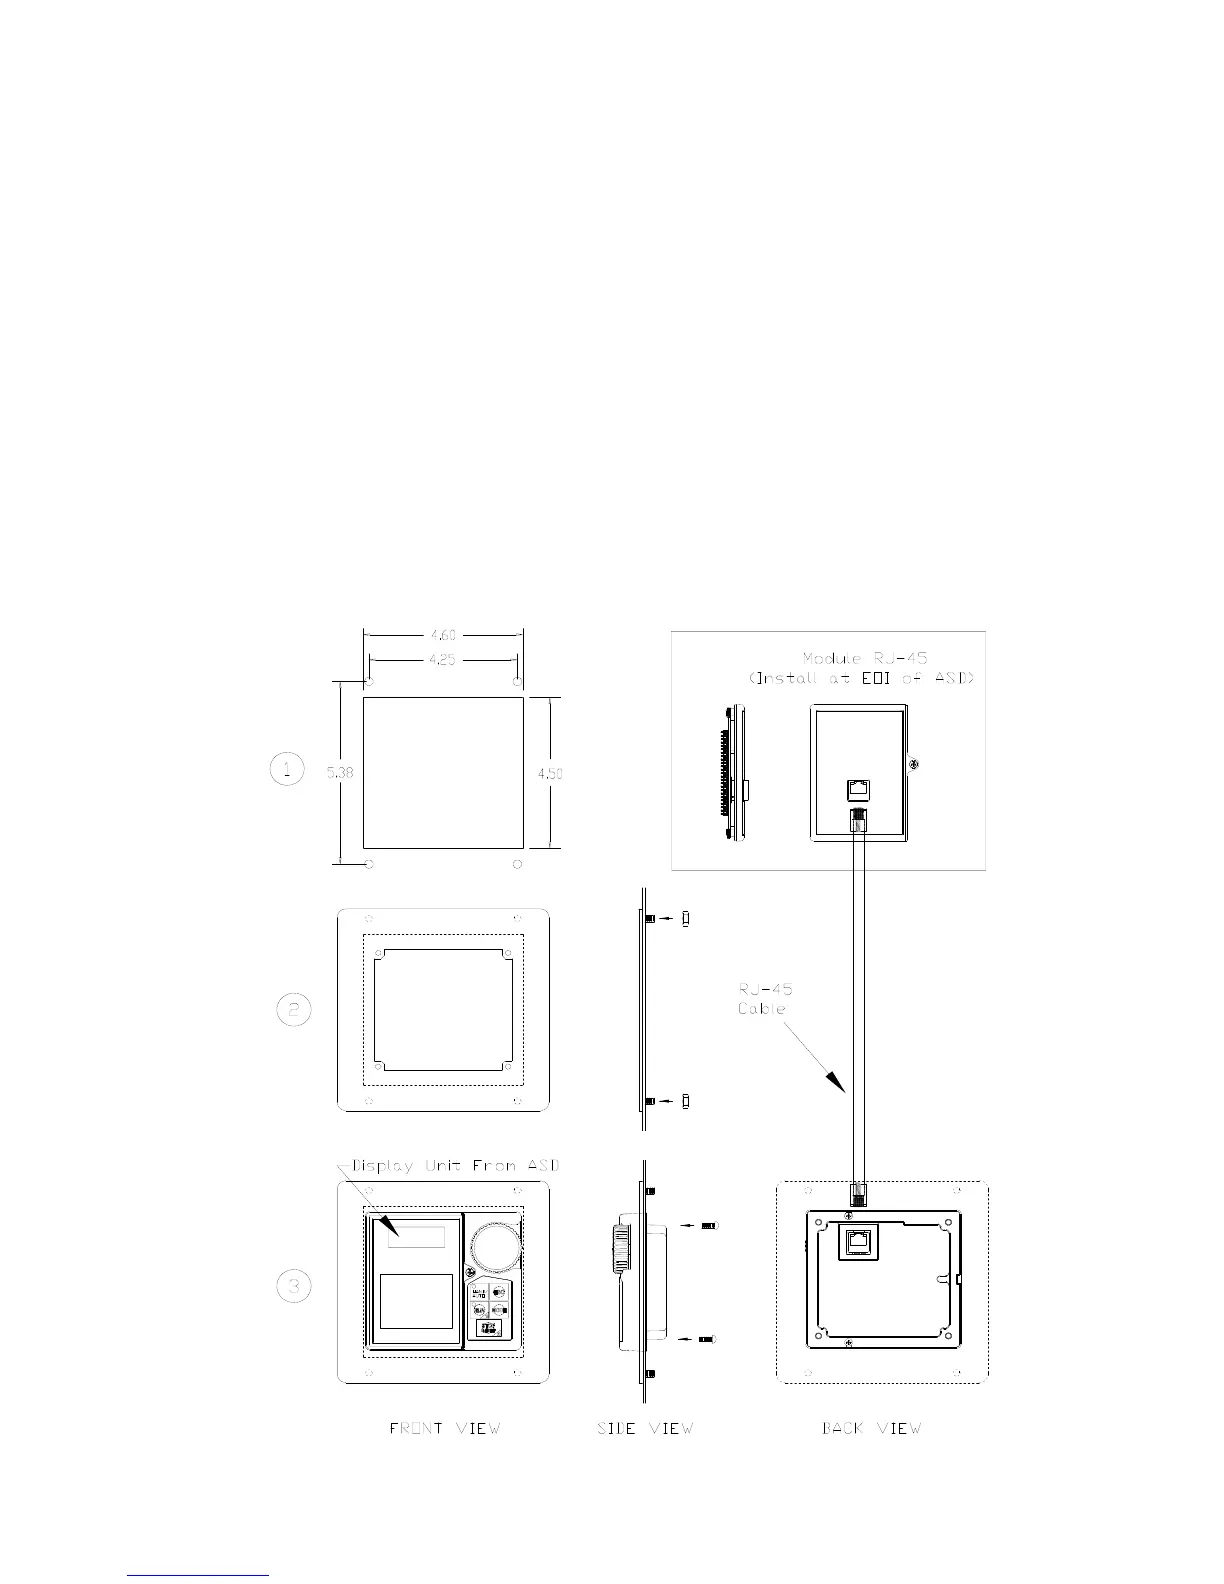
Note: See Figure 26 for the dimensions and the item locations referenced in steps 1 through 6.
1. At the EOI mounting location, mark the 4.60” by 4.50” hole and the four 11/32” screw holes.
2. Cut the 4.60” by 4.50” rectangular hole.
3. Drill the four 11/32” holes for the Bezel Plate mount.
4. Attach and secure the Bezel Plate to the front side of the mounting location using the four 10-32
hex nuts, #10 split lock washers, and the #10 flat washers.
5. Attach and secure the EOI to the front side of the Bezel Plate using the four 6-32 x 5/16” pan head
screws, #6 split lock washers, and the #6 flat washers.
6. Connect the extension cable.
EOI ASD-MTG-KIT9 Mounting Dimensions
Figure 26. EOI Bezel Plate Mounting Dimensions.
D-MTG-
T9
Phone: 800.894.0412 - Fax: 888.723.4773 - Web: www.ctiautomation.net - Email: info@ctiautomation.net
 Loading...