REP
9.1
Xerographic Module
Parts
List
on
PL
10.1
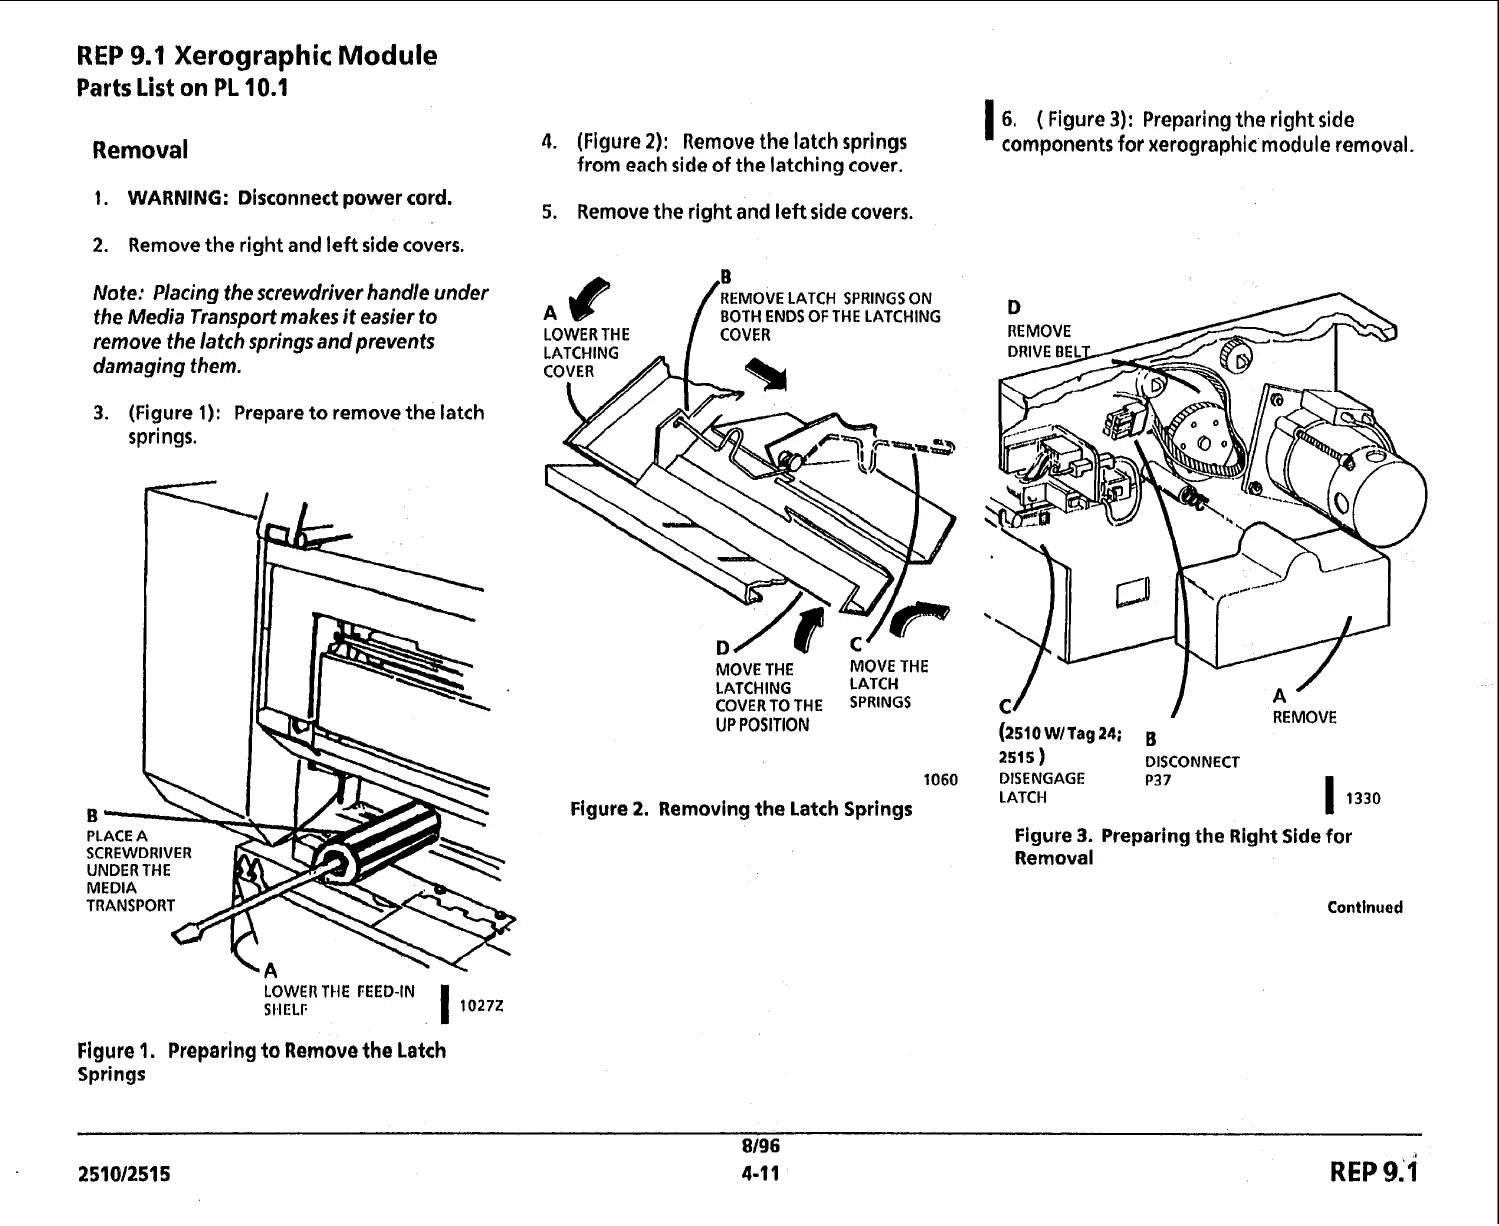
Removal
1.
WARNING: Disconnect power cord.
2.
Remove the right and left side covers.
Note: Placing the screwdriver handle under
the Media Transport makes
it
easier to
remove the latch springs and prevents
damaging them.
3.
(Figure
1):
Prepare to remove the latch
springs.
LOWER THE FEED-IN
SI,IELF
1
1027Z
Figure
1.
Preparing to Remove the Latch
Springs
4.
(Figure
2):
Remove the latch springs
from each side of the latching cover.
5.
Remove the right and left side covers.
REMOVE LATCH SPRINGS ON
BOTH ENDS OF THE LATCHING
LOWER THE COVER
MOVE THE MOVE THE
LATCHING LATCH
COVER TO THE SPRINGS
UP
POSITION
1060
Figure
2.
Removing the Latch Springs
1
6.
(
Figure
3):
Preparing the right ride
components for xerographic module removal.
/
REMOVE
(2510
WIT^^
24;
B
-
2515
)
DISCONNECT
DISENGAGE P37
LATCH
I
1330
Figure
3.
Preparing the Right Side for
Removal
Contlnuad
8/96
251812515
4-1
I
REP
9:l
 Loading...


