June 2014
6-11
Xerox® Phaser® 3052/3260 Service Manual
GP 4, GP 5
General Procedures and Information
GP 4 Machine Settings
Purpose
This procedure is used to provide information on how to configure machine settings.
Procedure
To change settings Using Easy Print Manager (EPM):
1. Connect to the Phaser® 3052/3260 Printer with a USB cable.
2. Open Easy Print Manager at your workstation.
3. Select <Advanced Mode> then select <Machine Settings>.
4. Select from the following menu items to change the machine settings.
•System
• Earth Smart
• Input Tray
• Layout
• Printer
•Emulation
• Copy
•Fax
•Scan
• Network Setttings
From CWIS
1. Connect to the Phaser® 3052/3260 Printer wirelessly, or via a USB cable.
2. Open Easy Print Manager and select the [CWIS] icon.
3. Login in to CWIS. User name: (Admin) Password: (1111)
NOTE: It may be necessary to obtain the user name and password from the customer if
they have been changed.
4. Select [Properties] and select from the following menu items to change the machine set-
tings.
•Firmware
•System
• Printer
• Copy
•Fax
•Scan
• E-mail Notification
• Network Settings
• Security
GP 5 Altitude Adjustment
Purpose
Print quality is affected by atmospheric pressure, which is determined by the height of the
machine above sea level.
Requirements
• WiFi or Network connection
Procedure
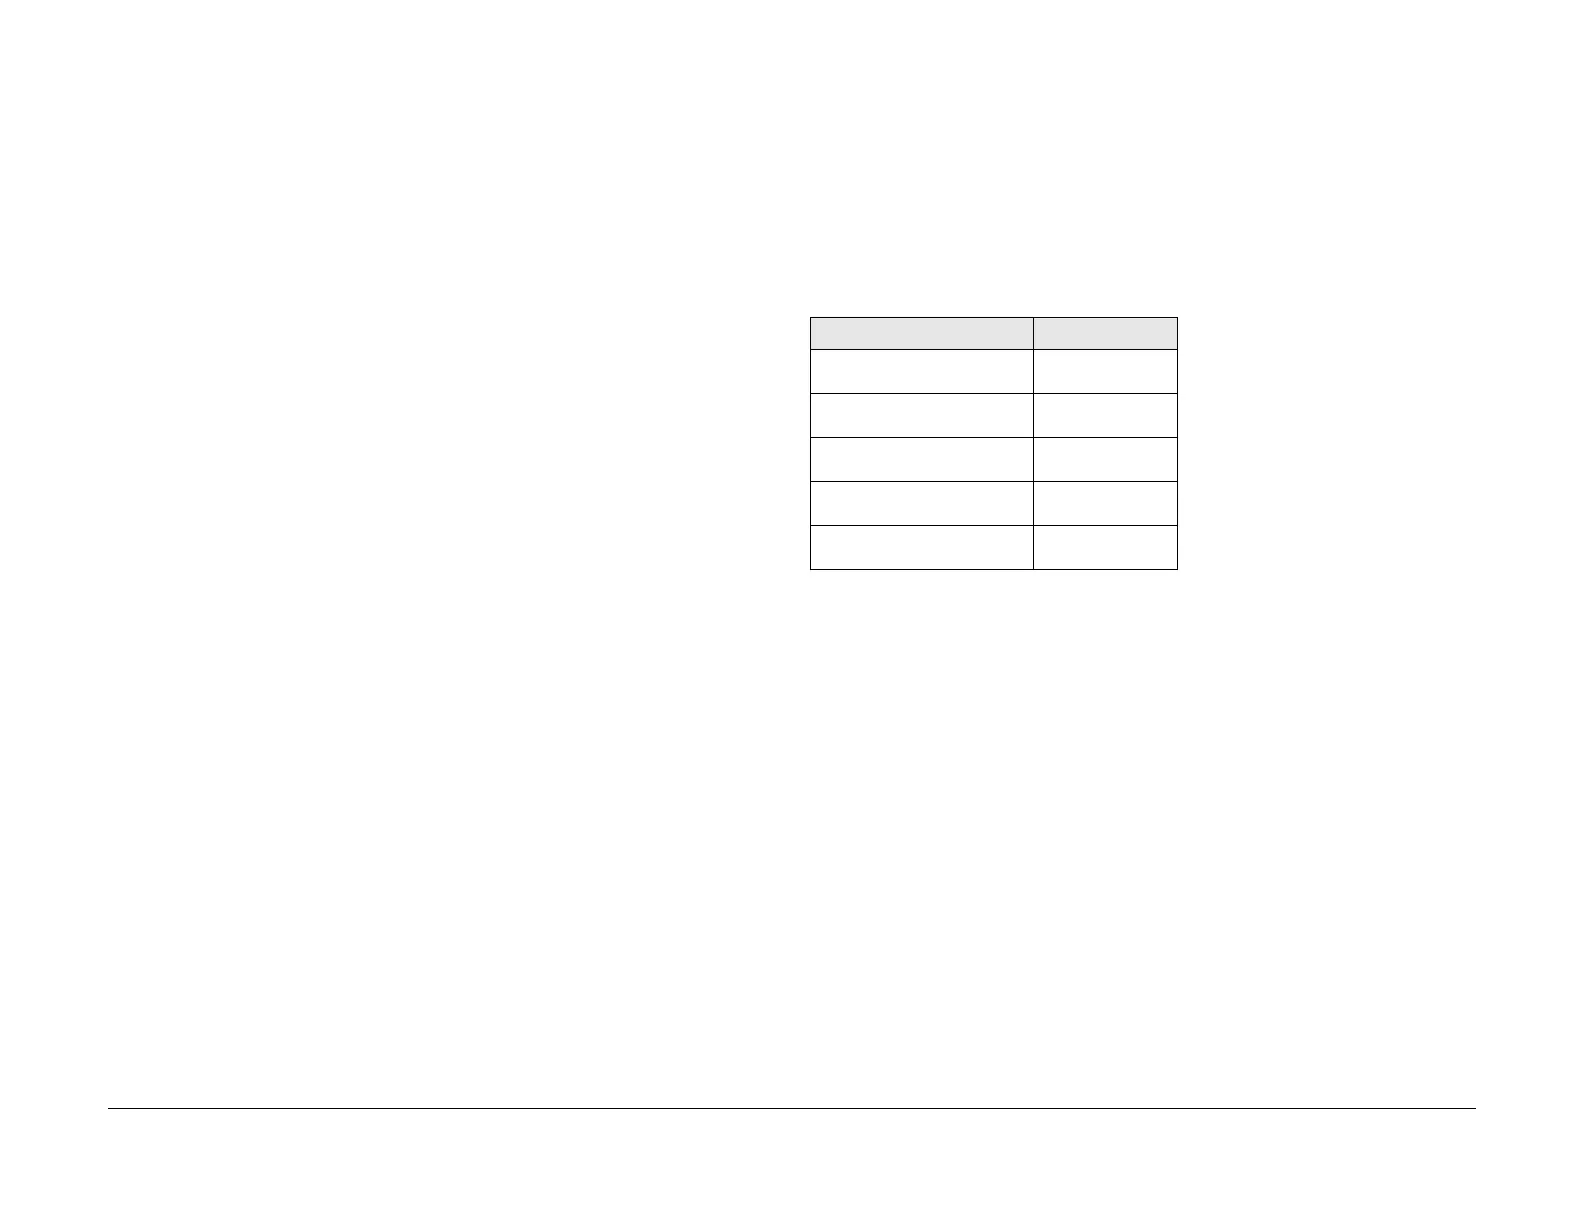
1. Determine altitude of machine placement:
2. Connect to the printer via USB cable from the PWS.
3. Open Easy Printer Manager. Select: [Machine Settings, System, Altitude Adjustment].
4. Select correct value from the drop down menu.
To adjust altitude settings using a wireless connection, refer to the Phaser® 3052/3260 User
Guide, Section 2. Installation and Setup
Table 1 Altitude Values
Altitude Value
0 - 1000 M
0 - 3,280 ft.
Normal
1000 - 2000 M
3,280 - 6,561 ft.
High 1
2000 - 3000M
6,561 - 9,842 ft.
High 2
3000 - 4000 M
9,842 - 13,123 ft.
High 3
4000 - 5000 M
13,123 - 16,404 ft.
High 4
 Loading...