June 2014
4-12
Xerox® Phaser® 3052/3260 Service Manual
REP 1.8, REP 1.9
Repairs
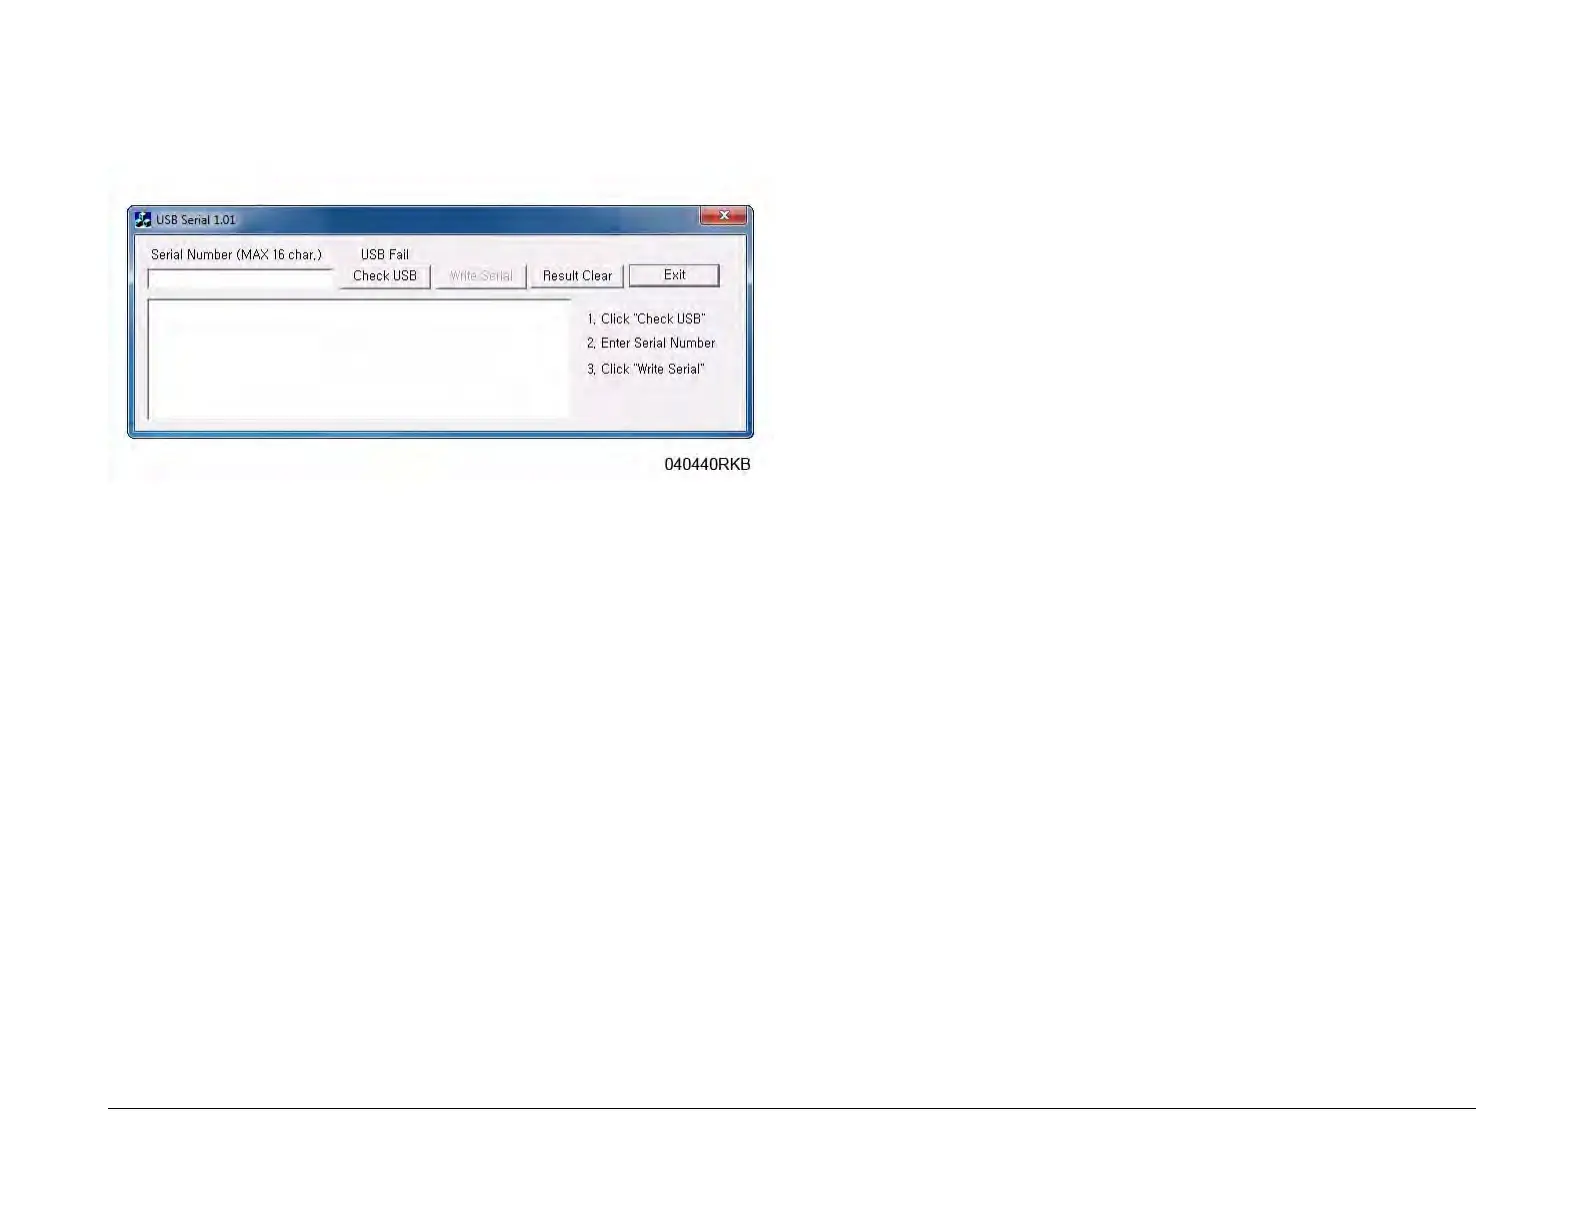
NOTE: Select the [Check USB] button to ensure that there is a good USB connec-
tion BEFORE entering the serial number. If the connection is good, “USB Success,”
will display in the area above the button. If there is an problem with the USB connec-
tion, “USB Fail“ will display.
Figure 2 PWB Serial Number Screen
b. After successfuly entering the serial number, exit the PWB Serial Number writing
application.
4. Print a Configuration Report and check that the original machine serial number is dis-
played under the “Device Profile” heading.
REP 1.9 Drive Motor
Parts List on PL 4.6
Removal
1. Switch Off the Printer and disconnect the Power Cord.
2. Remove the following covers:
a. Remove the Left and Right Side Covers (REP 1.2).
b. Remove the Front Cover (REP 1.1).
c. Remove the Rear Cover (REP 1.4).
d. Remove the Top Cover (REP 1.3).
 Loading...