June 2014
4-35
Xerox® Phaser® 3052/3260 Service Manual
REP 1.25
Repairs
REP 1.25 Paper Drive Roll
Parts List on PL 4.5
Removal
1. Switch Off the Printer and unplug the Power Cord.
2. Remove the Top Cover (REP 1.3).
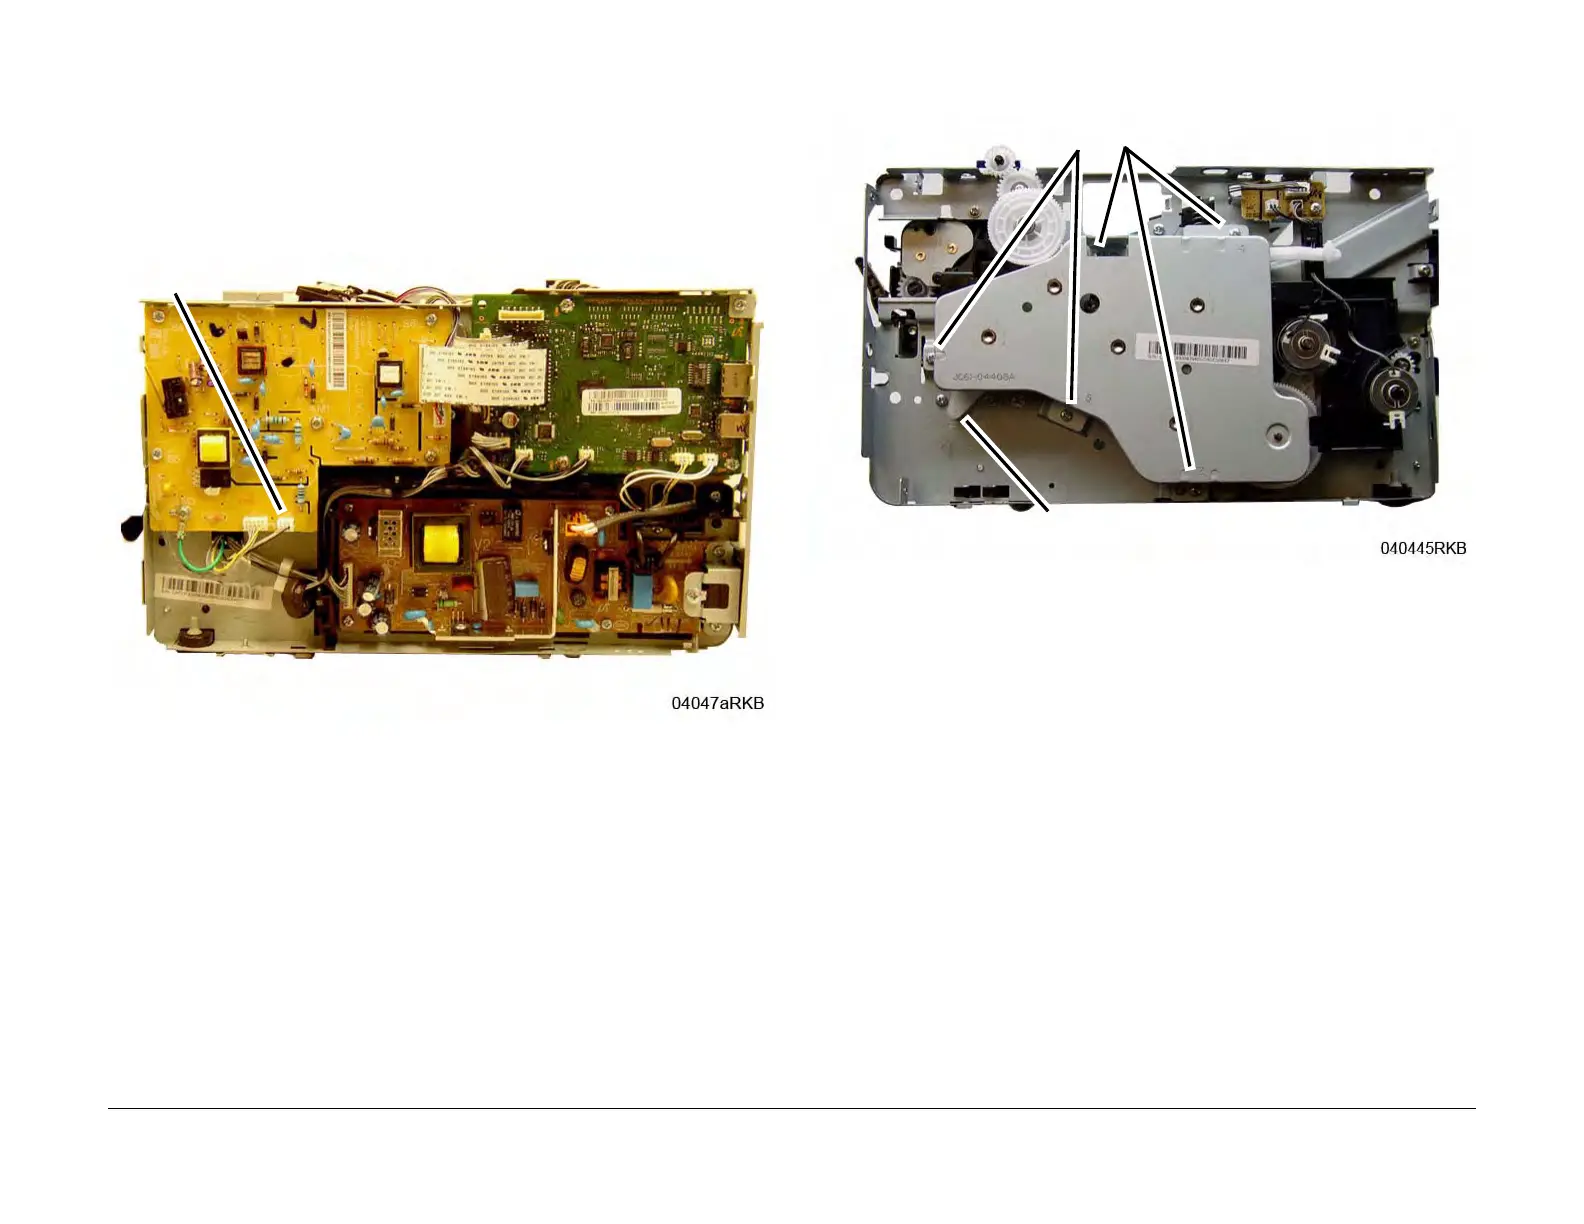
3. Disconnect connector CN6 from the HVPS PWB, and route the wires through the frame
(Figure 1).
Figure 1 HVPS CN6
4. Remove the Main Drive Unit (5 screws) and move the Fuser Drive Locking Lever to the
Unlock position (Right) (Figure 2).
Figure 2 Main Drive Unit
CN6
Screws
Locking Lever
 Loading...