June 2014
4-39
Xerox® Phaser® 3052/3260 Service Manual
REP 1.25, REP 1.26
Repairs
Replacement
NOTE: Tapered Plastic Screws and Round Machine Screws are used to hold the cover to the
frame. Make sure that the Plastic Screws go into plastic components and Machine Screws go
into the metal frame.
Install the components in the reverse of removal.
1. When replacing the Drive Roll in the Feed Assembly lower half make sure the flat on the
bushing aligns with the flat on the assembly
2. After installing the Feed Assembly upper half; install the Feed Assembly bottom screws
(2) first, and route the wires through the frame (Figure 6).
REP 1.26 Registration Roll
Parts List on PL 4.4
Removal
1. Switch Off the Printer and unplug the Power Cord.
2. Remove the following covers:
a. The Front Cover (REP 1.1).
b. The Top Cover (REP 1.3).
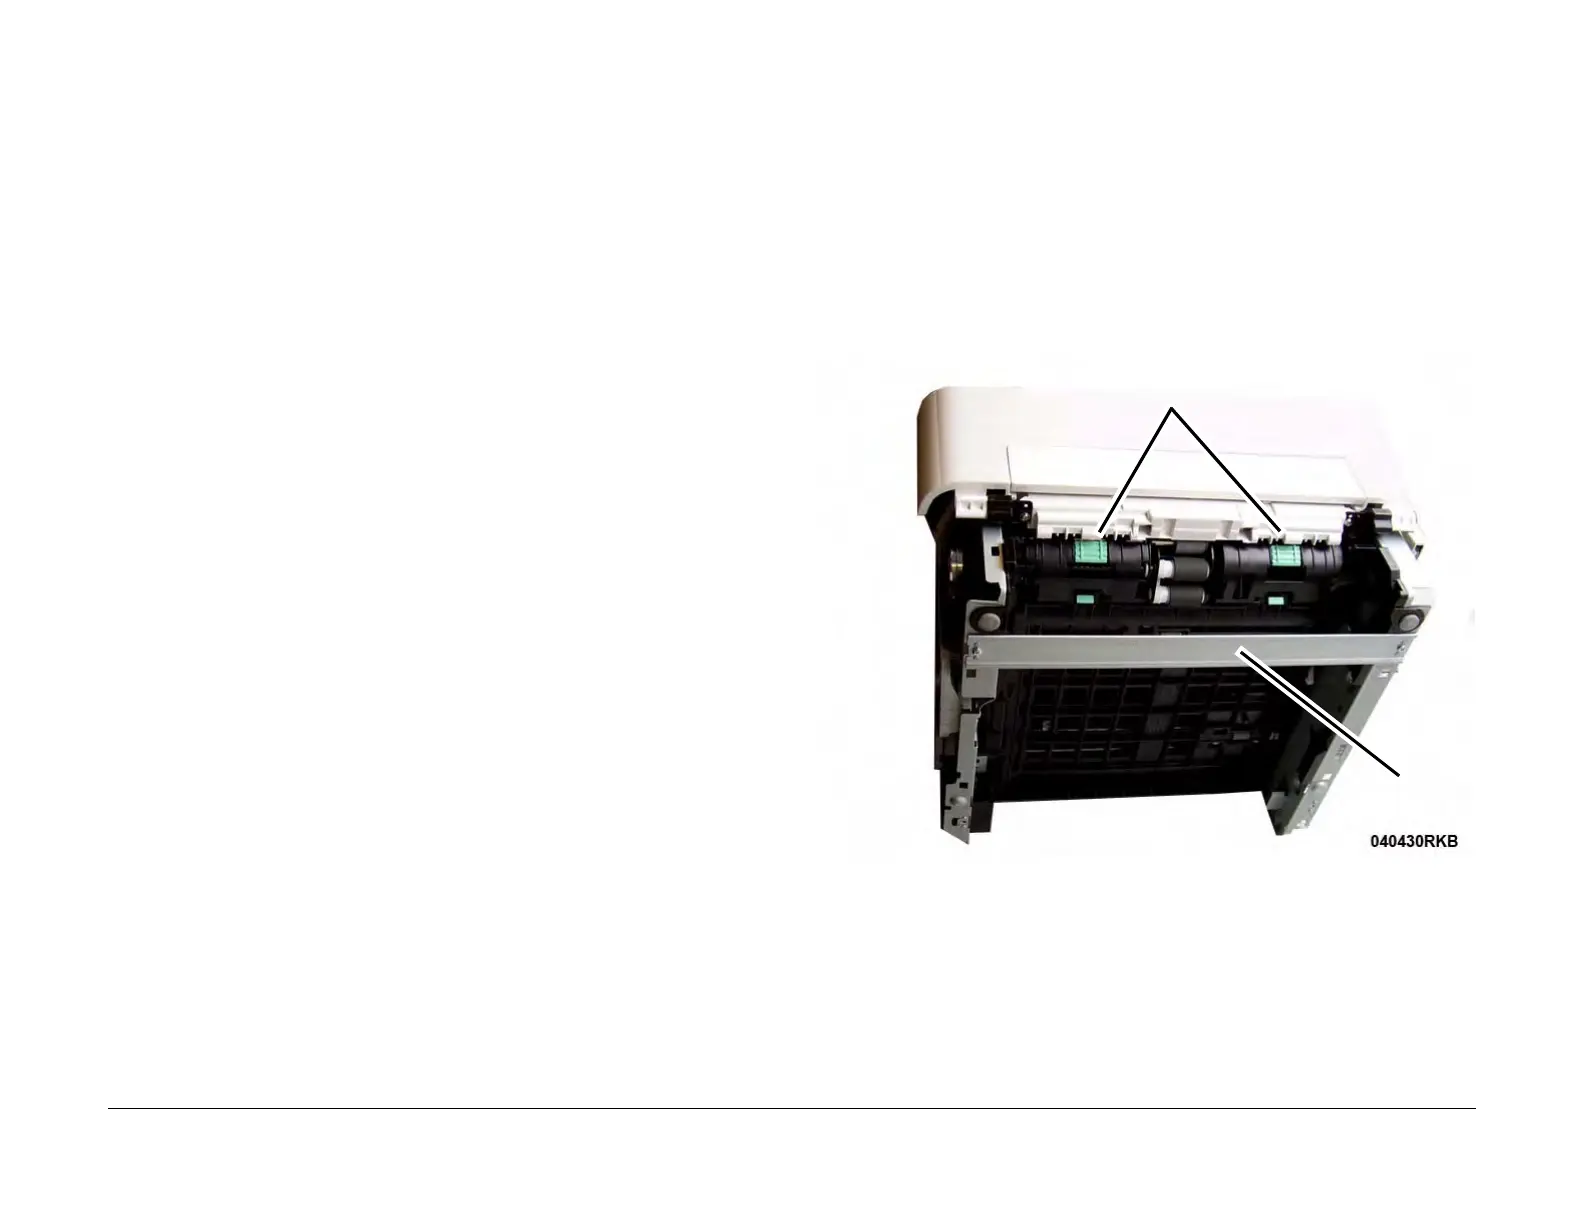
3. Remove the Bottom Bar and Duplex Assembly (Figure 1).
a. Remove the screws (2) and the Bottom Bar.
b. Press the Green Tabs (2) to unlatch the Duplex Assembly.
Remove the Duplex Assembly through the rear of the printer.
Figure 1 Bottom Bar and Duplex Assembly (Bottom View)
4. Remove the Fuser Module (REP 1.17).
Duplex Tabs
Bottom Bar
 Loading...