Print-Quality Troubleshooting 5-11
4
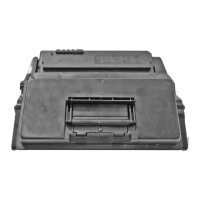
Remove the Toner Cartridge and
check for toner starvation in the
Imaging Unit.
Is there evidence of toner starvation?
Replace the Toner
Cartridge.
Go to Step 5.
5
Remove the Imaging Units and the
Transfer Unit and check for toner
contamination on the high voltage
contacts.
Are the contacts contaminated?
Clean the contacts. Go to Step 6.
6
Are the LED Heads dirty?
Clean the heads with a clean, lint-free
cloth.
Did this correct the problem?
Complete. Go to Step 7.
7
Swap the LED Head of the problem
color with any other LED Head.
Print a Solid Fill Test Pattern.
Has the problem moved with the LED
Head?
Replace the LED
Head.
Go to Step 8.
8
Are the wiring harnesses on the LED
Heads undamaged, properly routed
and seated?
Go to Step 9. Replace or reseat the
wiring harness.
9
Is +5 V supplied to the problem LED
Head?
Replace the
Imaging Unit.
Go to Step 10.
10
Is +5 V supplied to the POWER
connector on the Imaging Unit Sensor
Board?
Replace the
Imaging Unit Sensor
Board (
page 8-142).
Replace in the
following order:
Transfer Unit
LVPS (page 8-121).
Troubleshooting Procedure Table (Continued)
Step Actions and Questions Yes No
 Loading...


