January 2010
4-17
Phaser 7760 Color Laser Printer
REP 6.1
Repairs and Adjustments
Revised
REP 6.1 ROS (Laser Unit)
Parts List on PL 3.1
Removal
1. Remove the Rear Cover (REP 14.2).
2. Remove the Right Cover (REP 14.3).
CAUTION
Image quality defects result if covers on ROS are removed. The ROS is heavy.
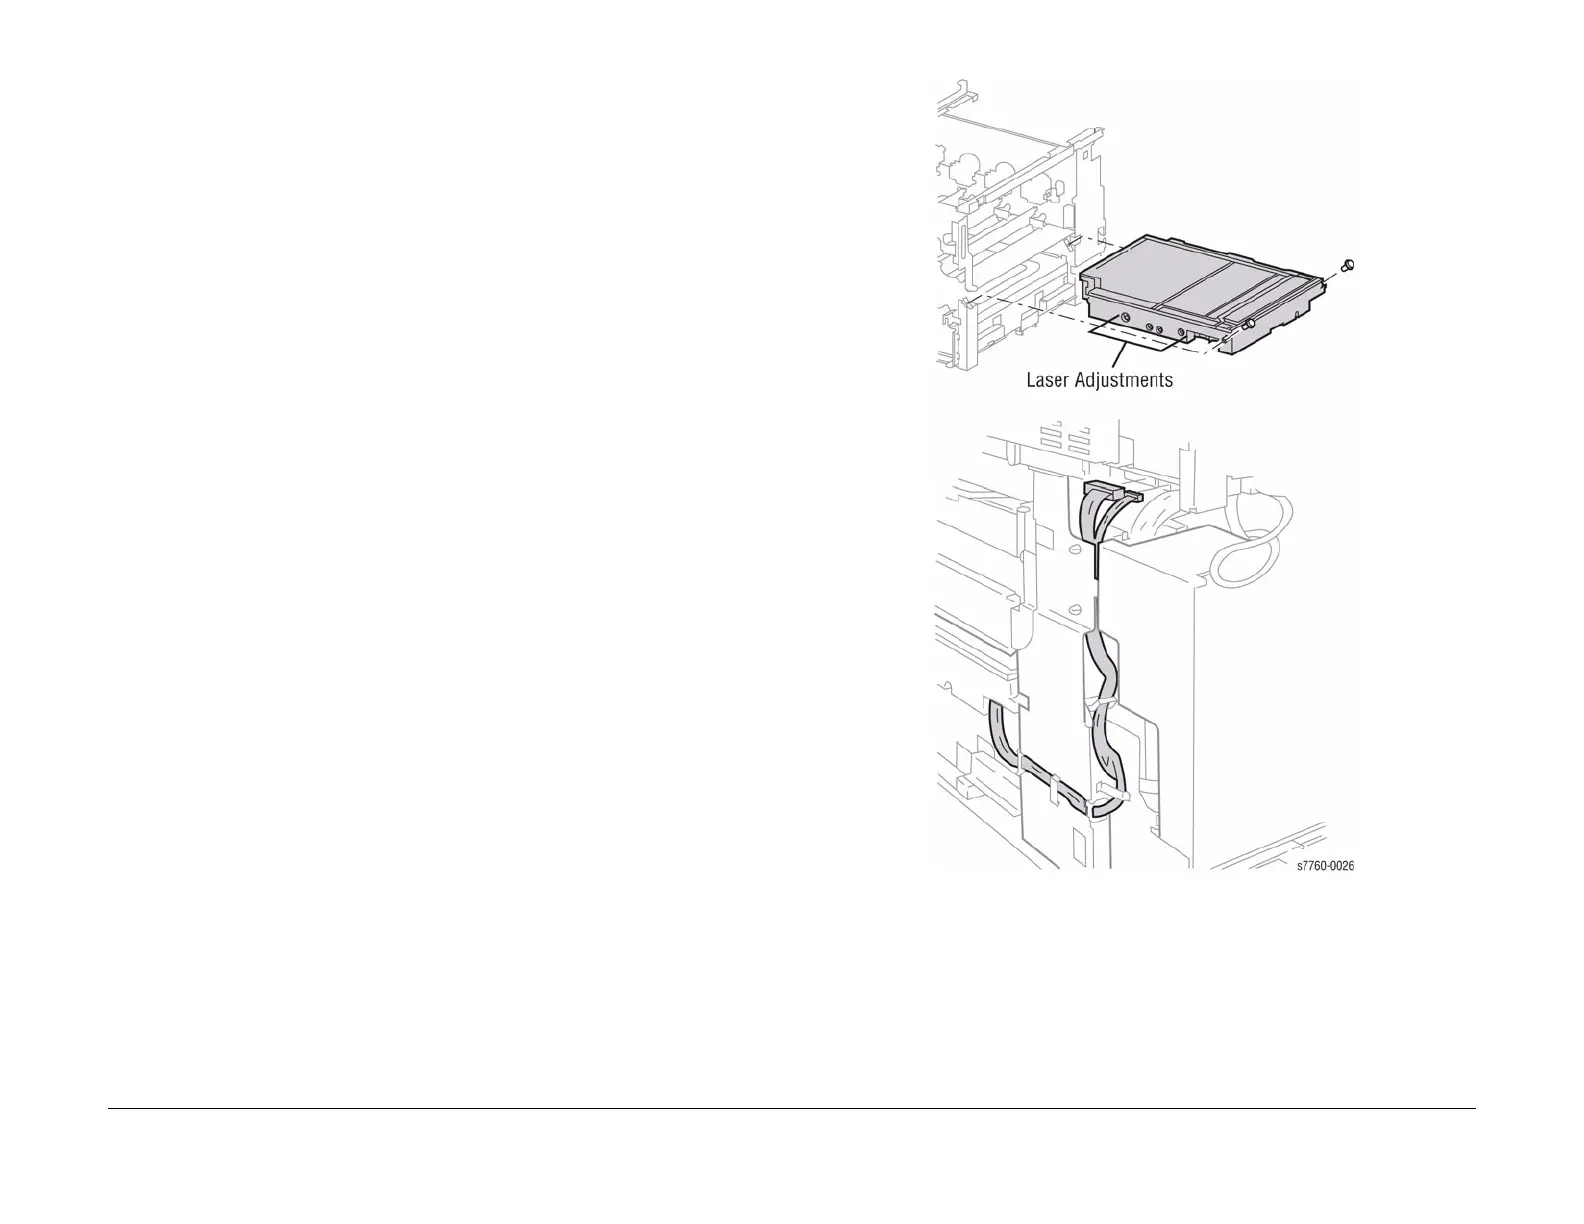
3. Removing the ROS (Figure 1).
a. Disconnect the wiring harness from the Harness Clips.
b. Disconnect the 2 connectors.
c. Remove the 2 screws securing the ROS and pull the ROS out from the Printer.
Figure 1 Removing ROS
Replacement
NOTE: You must perform the RegiCon Adjustment procedures after replacing the Laser Unit
(refer to ADJ 9.10).
NOTE: Store the NVRAM values to the Hard Drive after calibration (refer to Section 6, Store
Engine NVRAM using the Service Diagnostics Menu: Printer Menu > Troubleshooting > Ser-
vice Tools > Printer Status Page >hold the Up and Down buttons simultaneously > Run Ser-
vice Diagnostics > OK.
 Loading...


