January 2010
4-40
Phaser 7760 Color Laser Printer
REP 9.7, REP 9.8
Revised
Repairs and Adjustments
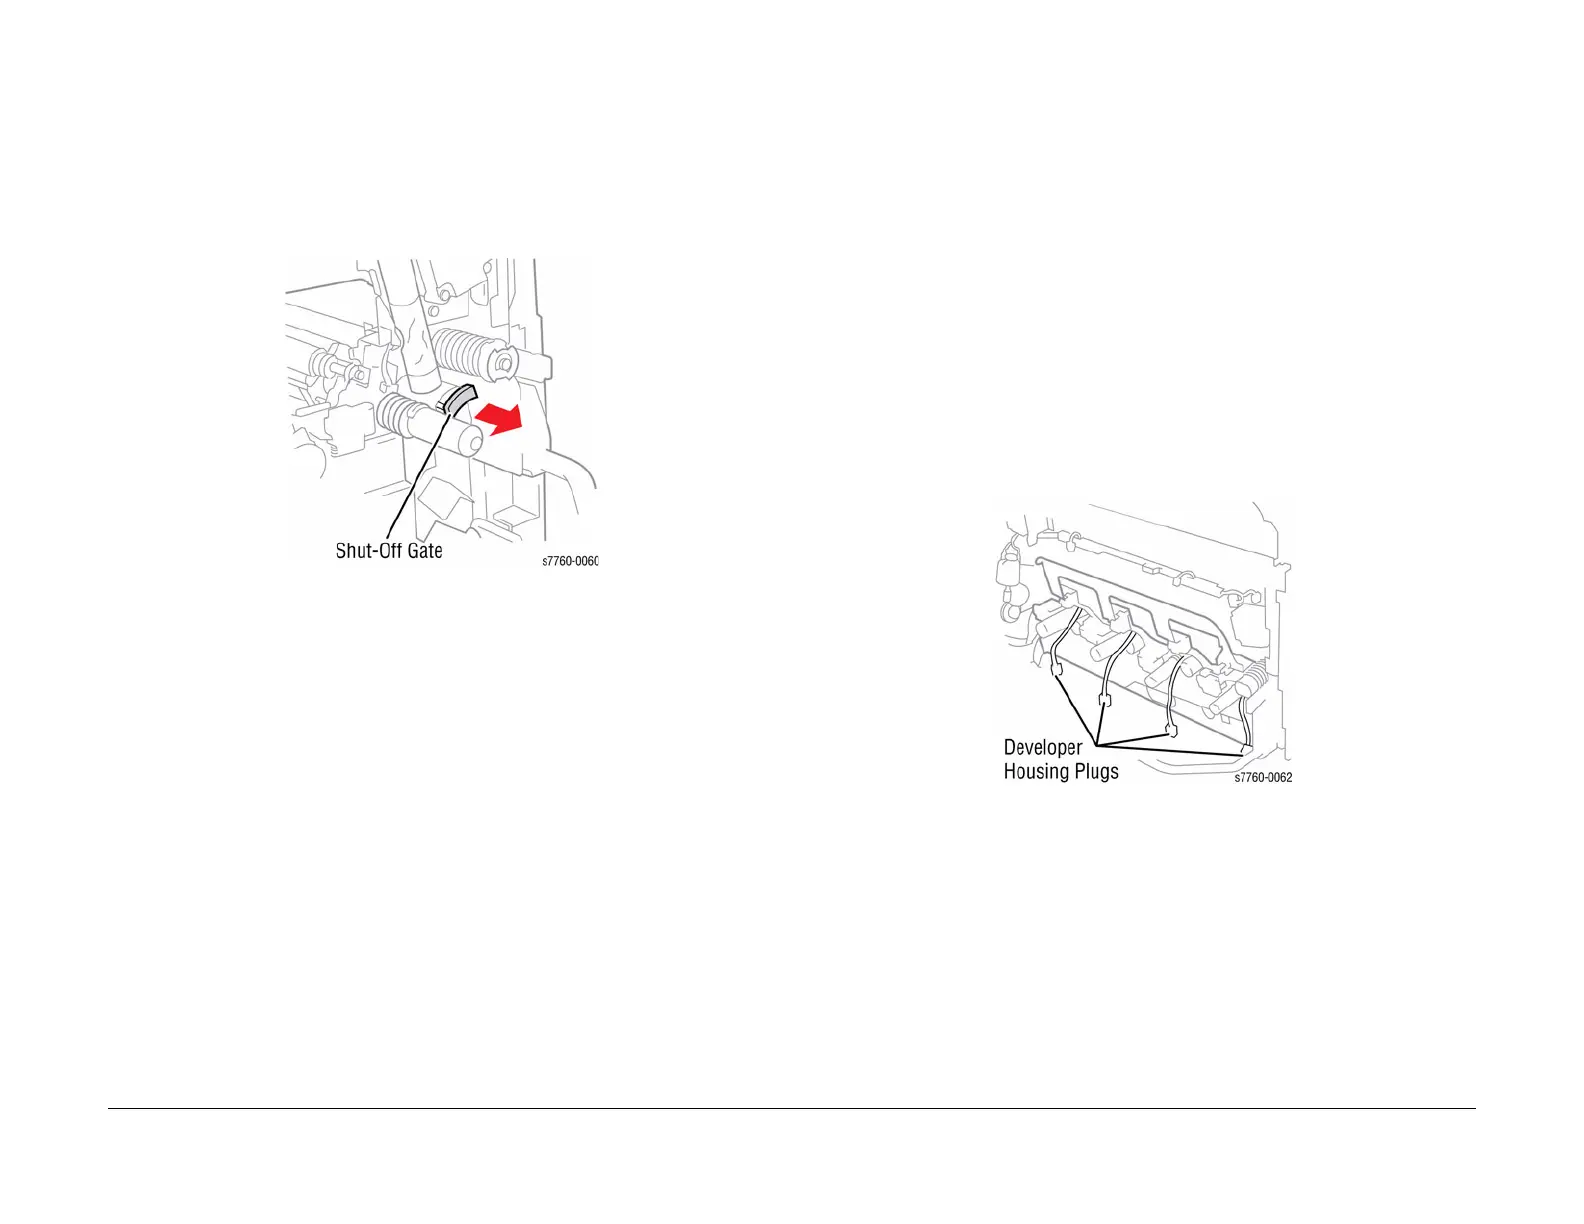
CAUTION
Be careful when moving the Shut-Off Gate; they are easily broken and may come out
completely. The flexible tubing is not secure and can come apart during removal and
replacement causing toner spillage.
c. Pull the Shut-Off Gate of each Toner Cartridge toward you approximately 3/4” (or 20
mm) to shut off the toner supply for each toner tube (Figure 2).
d. Remove the Dispense Assembly by pulling both the top and bottom sections evenly
away from the Printer.
Figure 2 Closing Toner Outlet
REP 9.8 Imaging Unit Plate Assembly
Parts List on PL 4.2
Removal
1. Remove the Front Cover Assembly (REP 14.7).
2. Remove the Imaging Units.
3. Remove the Waste Toner Cartridge.
4. Remove Waste Toner Cartridge Cover (REP 9.3).
5. Remove the Full Toner Sensor (REP 9.5).
6. Remove Fuser Front Cover (REP 14.8).
7. Release and move the IBT Cam Lever half way down.
8. Remove the Dispenser Cover (REP 9.6).
9. Remove all the Toner Dispensers (REP 9.7).
CAUTION
Note the position of the harnesses. Correct harness routing is required for assembly.
10. Disconnect the wiring harnesses to all 4 Developer Housing Assemblies and remove
them from under their Retaining Clips and dress the wires so they stick straight out to the
front of the Printer (Figure 1).
Figure 1 Disconnecting Developer Housing Plugs
 Loading...


