January 2010
4-86
Phaser 7760 Color Laser Printer
REP 12.66, REP 12.67
Revised
Repairs and Adjustments
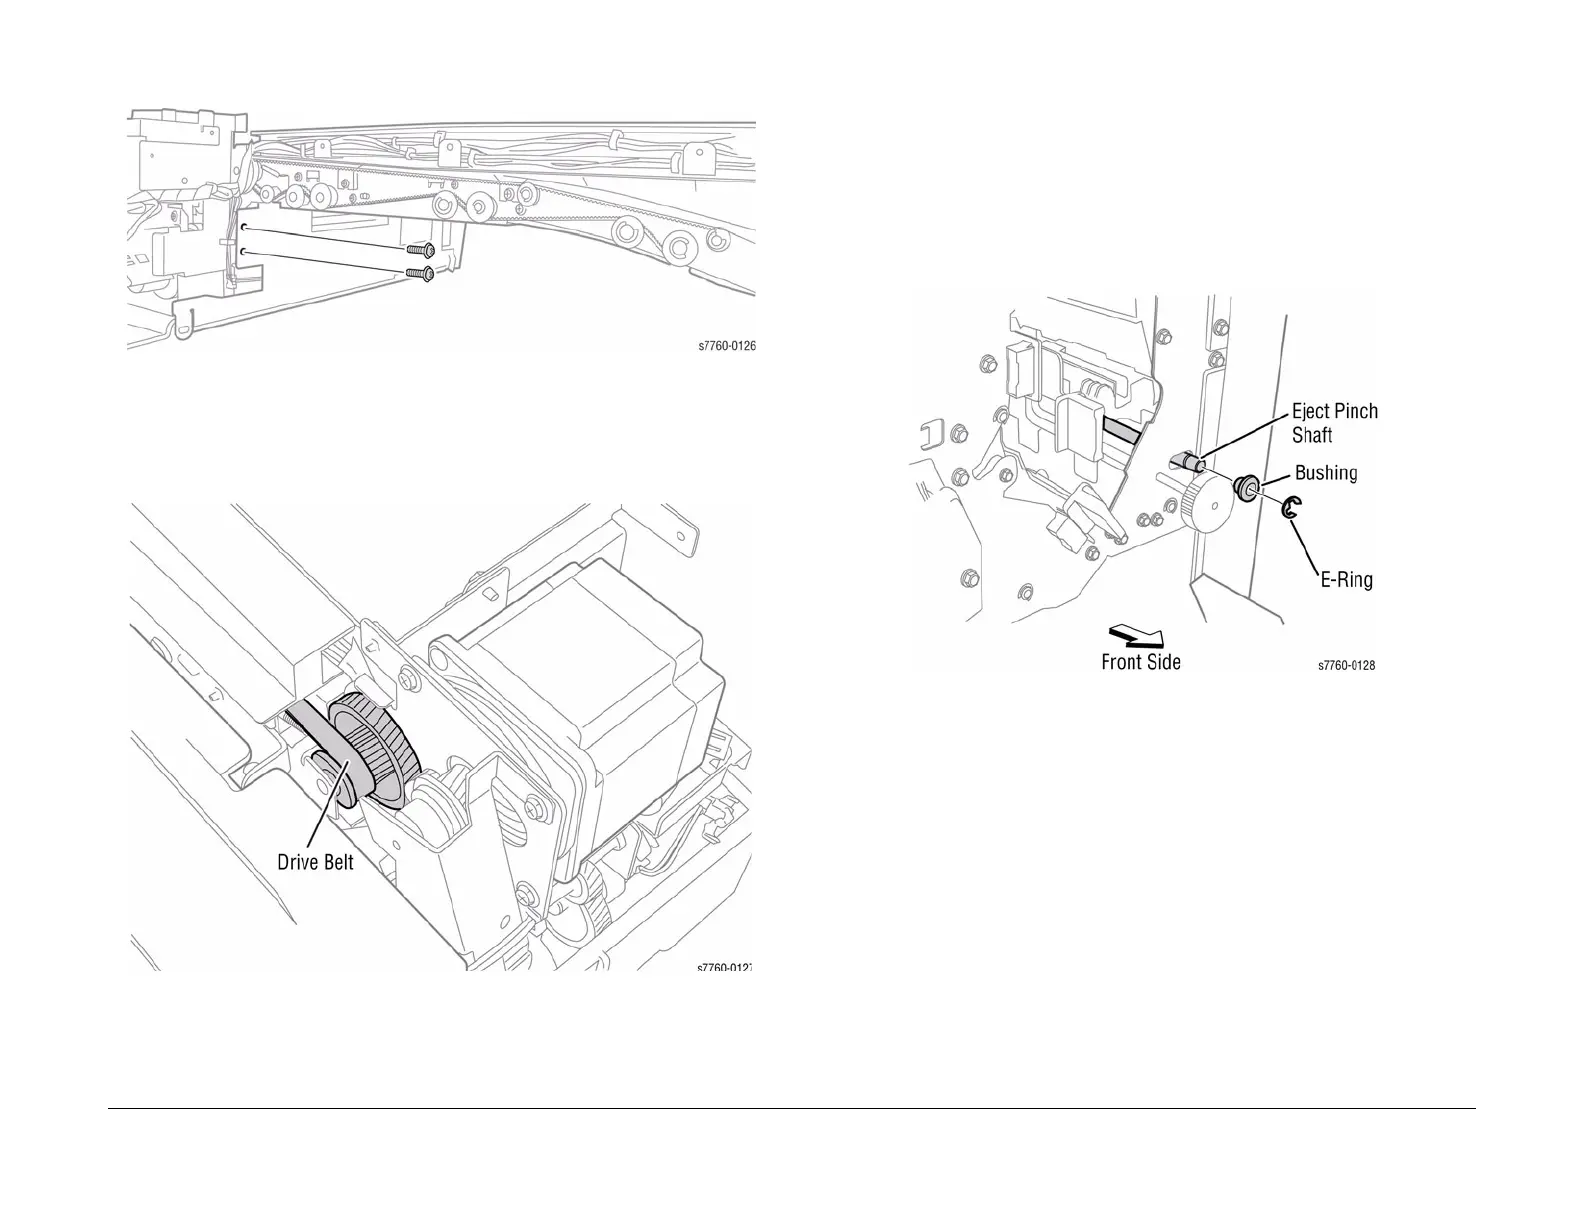
c. Remove the 2 screws securing the Frame (Figure 3).
Figure 3 Removing 2 Screws
d. Release the Belt tension and remove the Drive Belt from the Drives.
e. Separate the Decurler/Drive Assembly from the Horizontal Transport Frame.
Remove the Horizontal Drive Belt (Figure 4).
Figure 4 Removing the H-Transport Drive Belt
REP 12.67 Finisher Eject Chute Assembly
Parts List on PL 21.7
Removal
1. Remove the Front Door (REP 12.40).
2. Remove the Rear Upper Cover (REP 12.41).
3. Remove the Top Tray (REP 12.45).
4. Remove the Eject Cover (REP 12.46).
5. Remove 1 E-clip and 1 Bushing from the Eject Pinch Shaft (Figure 1).
Figure 1 Removing E-clip and Bushing
 Loading...


