January 2010
4-50
Phaser 7760 Color Laser Printer
REP 9.19, REP 9.20
Revised
Repairs and Adjustments
REP 9.19 Left Hinge/Right Hinge
Parts List on PL 5.1
Removal
1. Open the Front Cover.
2. Remove the Fuser Cover (REP 14.8).
3. Remove the Waste Toner Cartridge.
4. Remove Waste Toner Cartridge Cover (REP 9.3).
5. Remove the Inner Cover (REP 14.10).
6. Release and move the IBT Cam Lever down.
7. Remove the Imaging Units.
8. Remove the Right Cover (REP 14.3).
9. Remove the IBT Belt Assembly (REP 9.15).
10. Remove the IBT Cam Lever (REP 9.18).
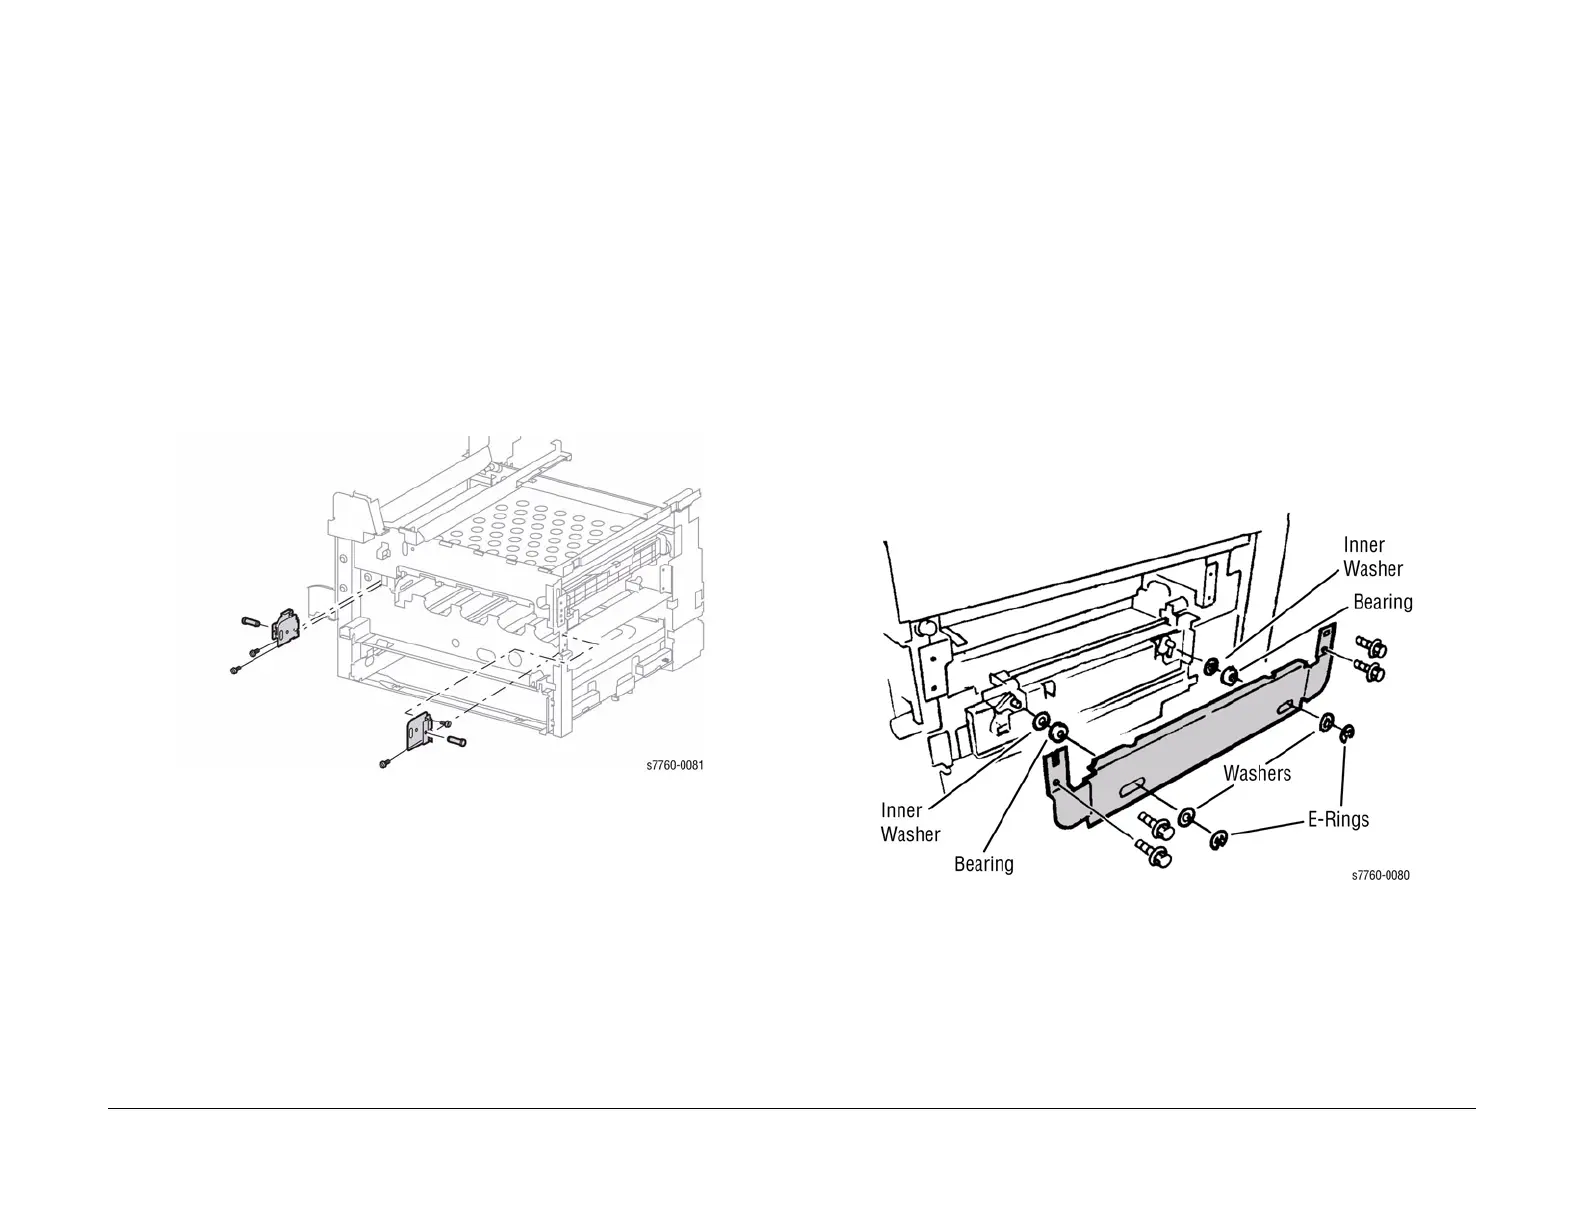
11. Remove the 4 screws and remove the Left and Right Hinges (Figure 1).
Figure 1 Removing Left Hinge/Right Hinge
Replacement
Move the IBT Cam Release Lever to downward position before reinstalling the IBT Belt Assem-
bly.
Ensure alignment marks on the Release Lever Gear teeth align with the marks on the left and
right hinges.
REP 9.20 Right Lift Assembly (Right-Hand Lift Jack Assy.)
Parts List on PL 5.1
Removal
1. Open the Front Cover.
2. Remove the Fuser Cover (REP 14.8).
3. Remove the Waste Toner Cartridge.
4. Remove the Waste Toner Cartridge Cover (REP 9.3).
5. Remove the Inner Cover (REP 14.10).
6. Release and move the IBT Cam Lever down.
7. Remove the Imaging Units. Ensure to protect the Imaging Units from light.
8. Remove the Right Cover (REP 14.3).
9. Remove Belt Module (REP 9.15).
10. Remove the IBT Cam Lever (REP 9.18).
11. Removing the Lift Bracket (Figure 1).
a. Remove the 2 E-Rings and 2 Washers.
b. Remove the 4 screws and remove the Right Lift Assembly.
c. Remove the 2 Bearings and Washers.
Figure 1 Removing Lift Bracket
 Loading...


