January 2010
4-45
Phaser 7760 Color Laser Printer
REP 9.10, REP 9.11
Repairs and Adjustments
Revised
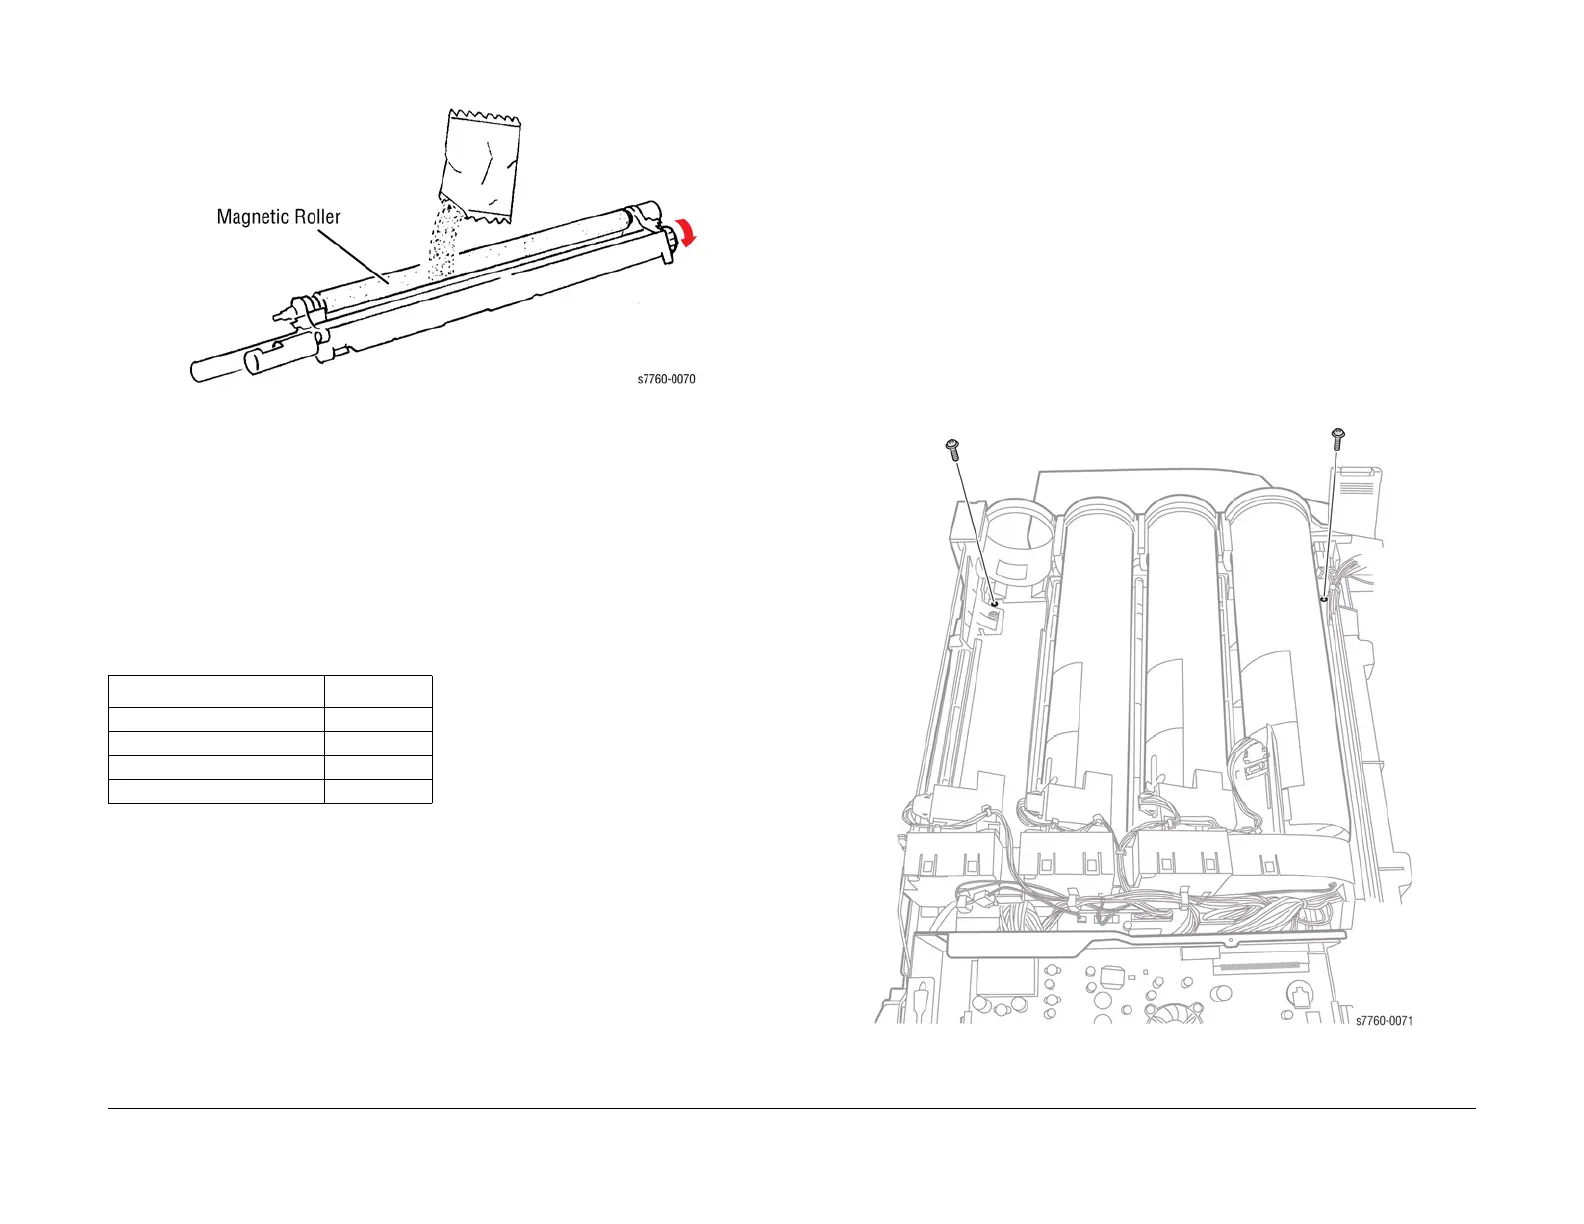
2. Rotate the Drive Gear while installing a new Developer (Figure 4).
Figure 4 Installing Developer
3. Installing the Developer Housing.
a. Ensure the pin at the rear of the Developer Housing engages hole in the rear frame
of the machine.
b. Reassemble the machine.
4. Enter the Service Diagnostics Menu: Printer Menu > Troubleshooting > Service Tools >
Printer Status Page > hold the Up and Down buttons simultaneously > Run Service Diag-
nostics > OK.
5. Reset the Developer Count for each Developer using NVRAM locations and values listed
in Table 1.
CAUTION
It is important to re-enter the ATC value when replacing a Developer. Failing to do so could
result in poor color balance and shortened the Developer life.
NOTE: The ATC sensor tag is difficult to view once the Developer has been installed. Remove
the label prior to installation.
6. Perform the ATC Sensor Setup (ADJ 9.2 - Section 4) using the Service Diagnostics Menu:
Printer Menu > Troubleshooting > Service Tools > Printer Status Page > hold the Up and
Down buttons simultaneously > Run Service Diagnostics > OK.
REP 9.11 Toner Dispenser Base Assembly
Parts List on PL 6.1
Removal
CAUTION
Ensure to route the wires correctly to prevent the wires from trapping under the Base Plate.
The Printer could provide false install Black Toner message. if the wires get under the Base
Plate.
1. Remove all Toner Dispensers (REP 9.7).
2. Remove the Right Cover (REP 14.3).
3. Remove the Top Cover (REP 14.1).
4. Remove the Toner Dispense Module (Figure 1).
a. Remove the 2 screws securing the Toner Dispenser Base Assembly.
b. Disconnect the wiring harness from each Motor.
c. Lift the Toner Dispenser Base Assembly to remove.
Figure 1 Removing Toner Dispense Module
Table 1 Developer Count Reset
Color / NVRAM location Set to Value
Yellow (Y) / 1079 0
Magenta (M) / 1080 0
Cyan (C) / 1081 0
Black (B) / 1082 0
 Loading...


