January 2010
4-44
Phaser 7760 Color Laser Printer
REP 9.10
Revised
Repairs and Adjustments
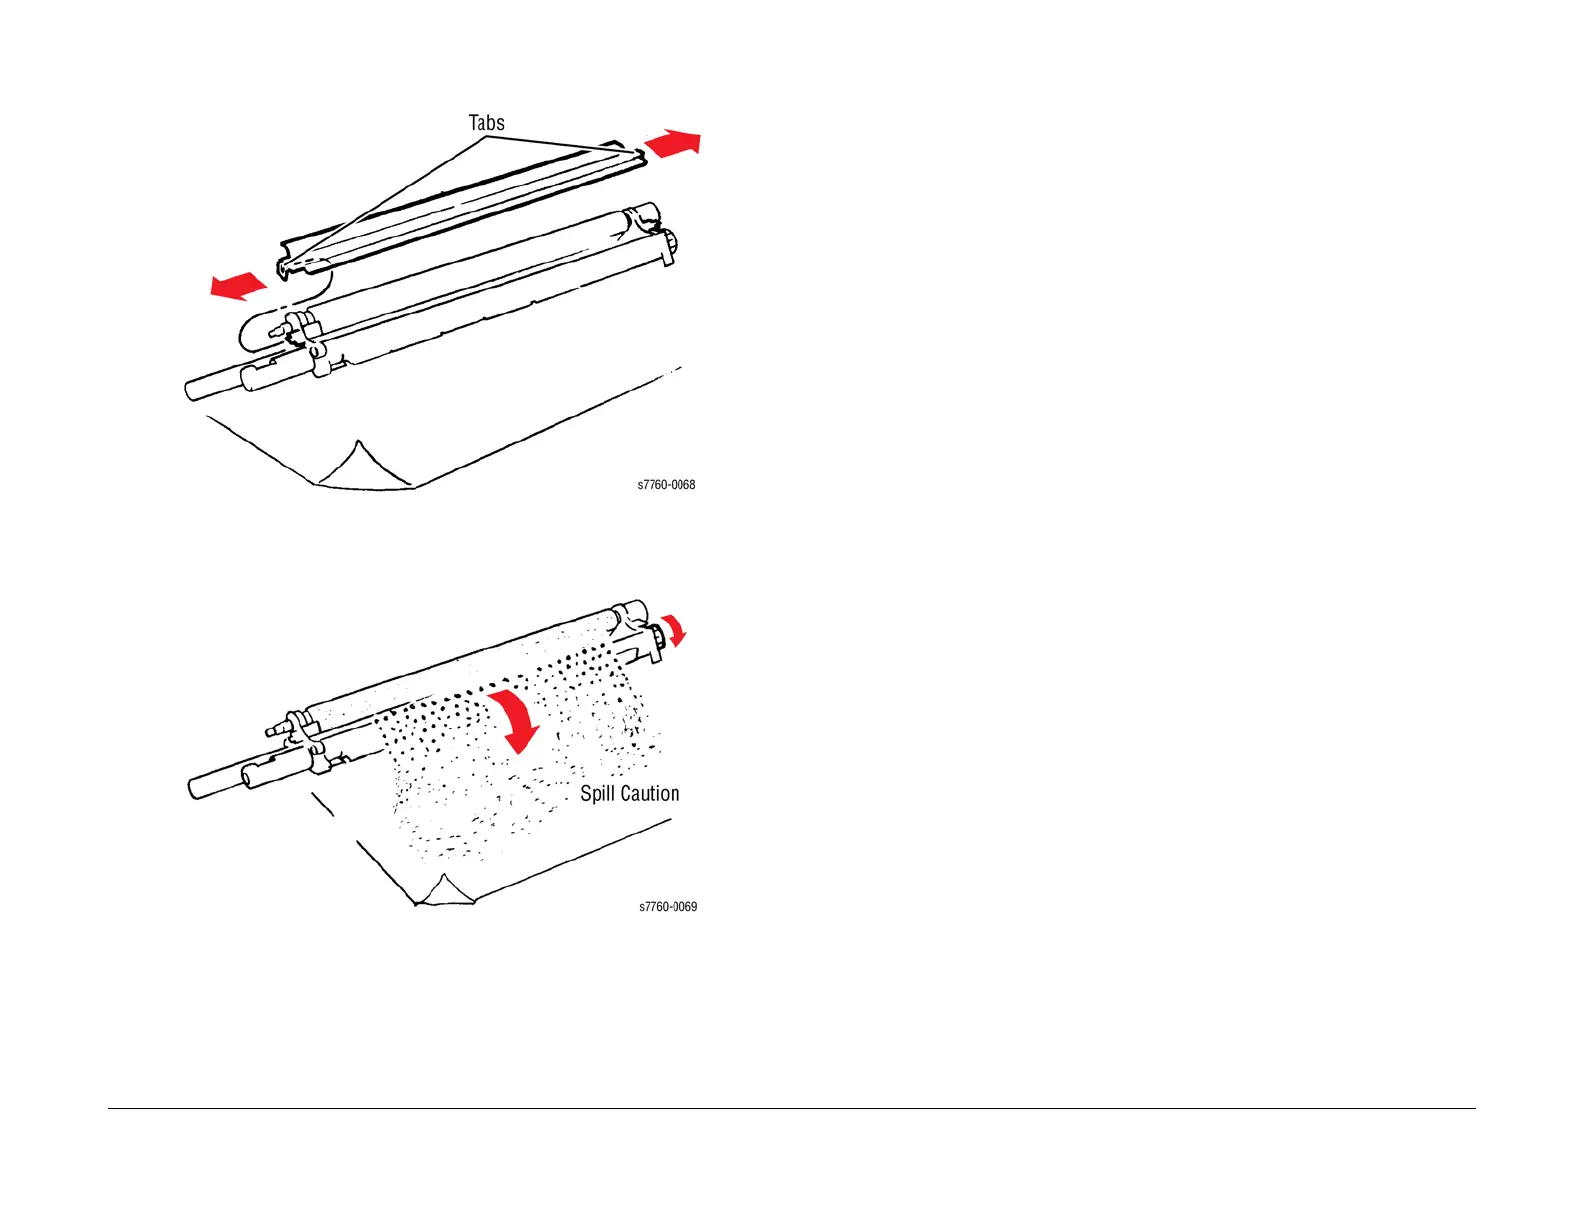
b. Release Tabs and remove the Housing Cover (Figure 2).
Figure 2 Removing Housing Cover
c. Rotate the Drive Gear to remove the Developer (Figure 3).
Figure 3 Removing Developer
Replacement
1. Recharging a Developer Housing Assembly.
NOTE: Be careful when handling the Developer Housing Assembly. It is easy to spill toner
in this procedure.
Check the temperature sensitive label on the Developer Beads. If the label has turned
dark, the Beads have been exposed to a higher than expected temperature and should
not be used.
If the Developer Beads are being replaced for toner clumping, also replace the Toner Car-
tridge of the effected color. The dispense assembly of the effected color should also be
purged of all toner before the new toner cartridge is installed.
a. Place the Developer Housing Assembly (new or used) to be recharged on a drop
cloth.
CAUTION
During this procedure, the Developer Housing Assembly must be kept level at all times. To
prevent toner spillage, it is recommended that the Developer Housing Assembly be fully
supported level by laying it on something like a large piece of cloth, paper towels or styro-
foam hollowed out for the Developer Housing Assembly to lie on. If new, remove the pro-
tective cover over the magnetic roller. Do not touch the magnetic roller.
NOTE: The wires are routed under and behind the right snap tab.
b. Release the snap tabs at each end of the Developer Housing Assembly and remove
the Assembly Cover.
c. Agitate the package of the developer mix and then cut it open. Carefully pour the
entire contents of the developer mix as evenly as possible over the two augers. Do
not let the developer mix accumulate heavily on the roller. Keep the Developer Hous-
ing Assembly level.
d. Reinstall the cover making sure that the rear tabs are all engaged in their respective
slots while positioning the wire harness under the snap tab. Press firmly until you
hear a positive ‘”snap” sound for each tab indicating each tab is securely fastened.
e. Tear off the ATC sensor perforated tag. Do not remove the ATC sensor label from the
Developer Housing. Peel off the protective backing, and adhere the label to the
appropriate or corresponding Imaging Unit Plate. Make sure the ATC sensor tab
label can be located if needed later.
f. Record the number for entering into NVRAM.
 Loading...


