January 2010
4-74
Phaser 7760 Color Laser Printer
REP 12.53
Revised
Repairs and Adjustments
REP 12.53 Finisher Stapler Assembly
Parts List on PL 21.6
Removal
1. Open the Front Door.
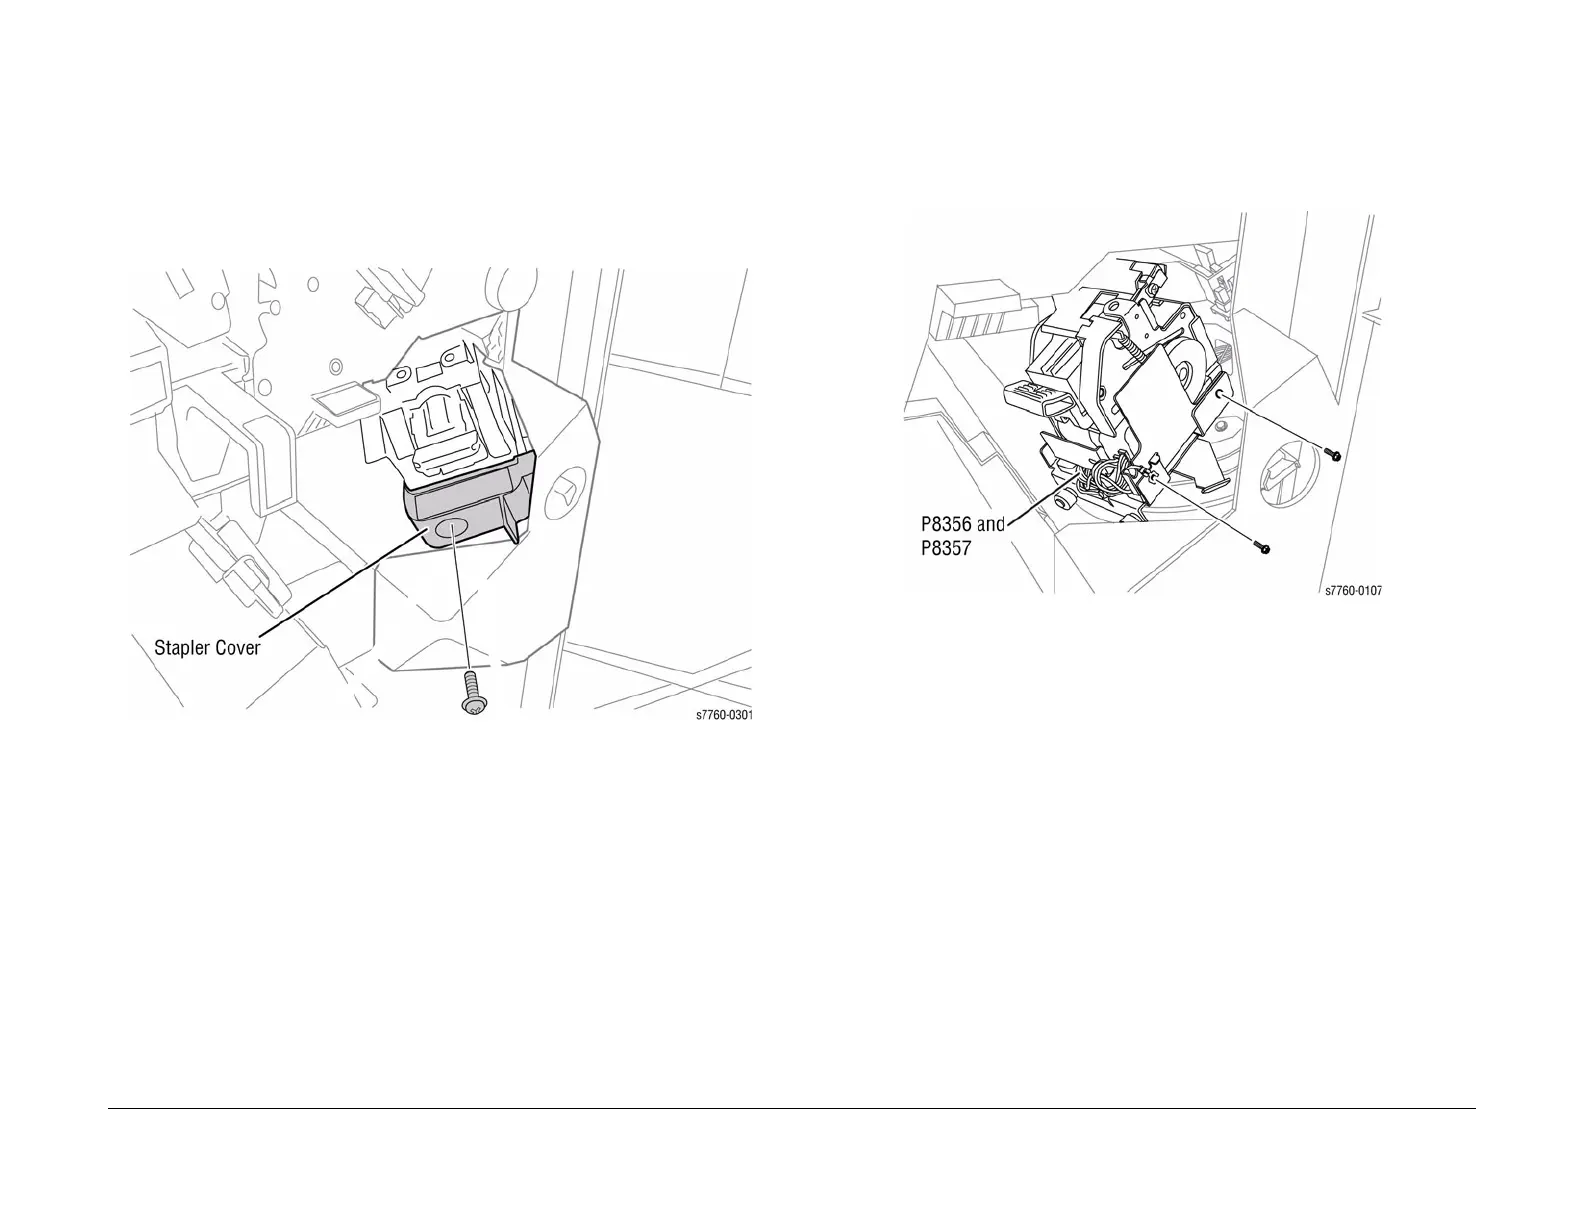
2. Removing the Stapler Cover (Figure 1).
a. Remove 1 long screw.
b. Remove the Stapler Cover.
Figure 1 Removing Stapler Cover
3. Removing the Stapler Assembly (Figure 2).
a. Disconnect the wiring harnesses J8356 and J8357 (refer to Section 7, Finisher Front
View Plug/Jack Locations - Figure 10).
b. Remove the 2 short screws and remove the Stapler Assembly.
NOTE: There is a tab on the back. Ensure to disconnect the Ground Wire.
Figure 2 Removing Stapler Assembly
 Loading...


