Troubleshooting
7
7.9 Diagnosing and Resetting Faults
YASKAWA SIEPC71061753C GA500 Technical Manual 297
7.9 Diagnosing and Resetting Faults
When a fault occurs and the drive stops, do the procedures in this section to remove the cause of the fault, then re-
energize the drive.
◆ Fault and Power Loss Occur at the Same Time
WARNING! Crush Hazard. Wear eye protection when you do work on the drive. If you do not use correct safety equipment, it
can cause serious injury or death.
WARNING! Electrical Shock Hazard. After the drive blows a fuse or trips an RCM/RCD, do not immediately energize the drive
or operate peripheral devices. Wait for the time specified on the warning label at a minimum and make sure that all indicators
are OFF. Then check the wiring and peripheral device ratings to find the cause of the problem. If you do not know the cause of
the problem, contact Yaskawa before you energize the drive or peripheral devices. If you do not fix the problem before you
operate the drive or peripheral devices, it can cause serious injury or death.
1. Supply power to the control circuit from the external 24 V input.
2. Use monitor parameters U2-xx [Fault Trace] to show the fault code and data about the operating status of
the drive immediately before the fault occurred.
3. Use the information in the Troubleshooting tables to remove the fault.
Note:
1. To find the faults that were triggered, check the fault history in U2-02 [Previous Fault]. To find information about drive status (such
as frequency, current, and voltage) when the faults were triggered, check U2-03 to U2-20.
2. If the fault display stays after you re-energize the drive, remove the cause of the fault and reset.
◆ Fault Occurs Without Power Loss
1.
Examine the fault code shown on the keypad.
2. Use the information in the Troubleshooting tables to remove the fault.
3. Do a fault reset.
◆ Fault Reset Procedure
If a fault occurs, you must remove the cause of the fault and re-energize the drive. Table 7.3 lists the different
methods to reset the drive after a fault.
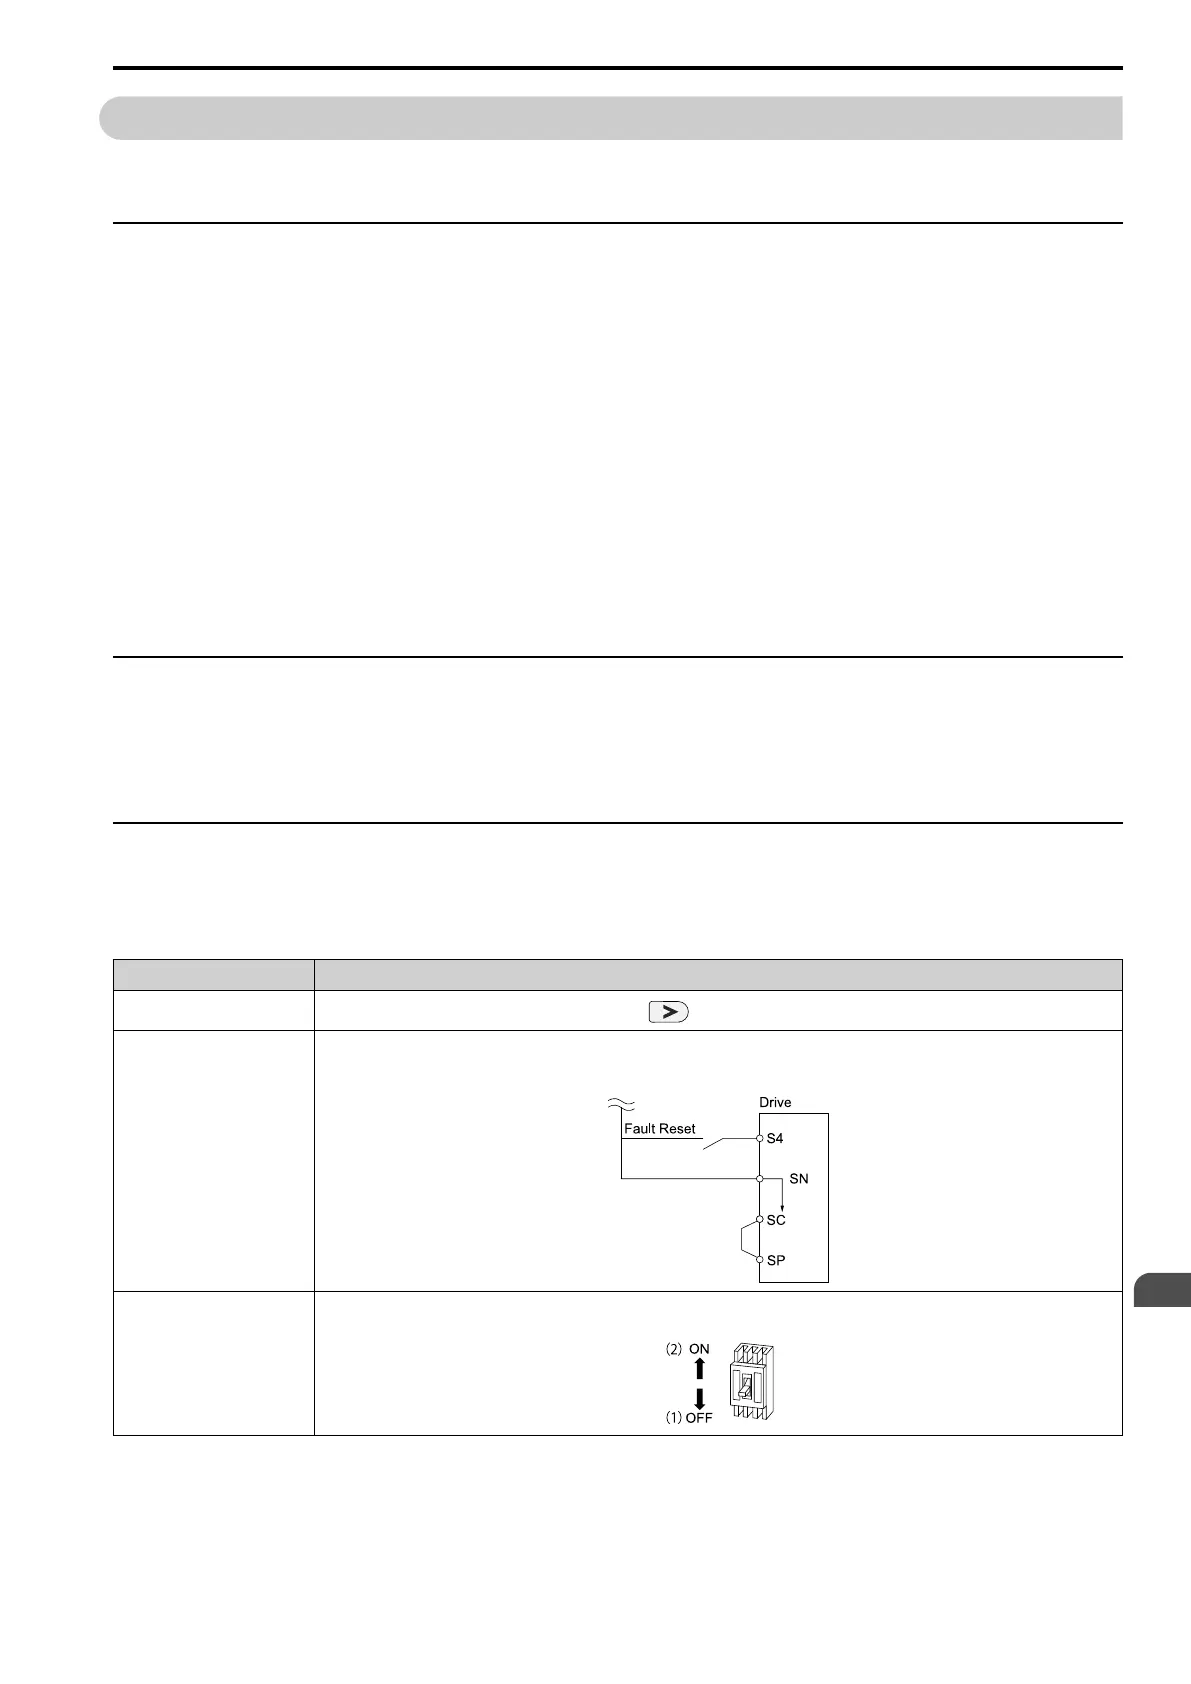
Table 7.3 Fault Reset Methods
Methods Description
Method 1
While the keypad is showing the fault or alarm code, push on the keypad.
Method 2
Switch ON the MFDI terminal set to H1-xx = 14 [MFDI Function Select = Fault Reset].
Note:
The default setting for H1-04 [Terminal S4 Function Selection] is 14 [Fault Reset].
Method 3
1. De-energize the drive main circuit power supply.
2. Energize the drive again after the keypad display goes out.
Note:
If the drive receives a Run command from a communication option or control circuit terminal, the drive will not reset the fault. Turn the
Run command OFF to reset the fault. If you do a fault reset when the drive has a Run command, the keypad will show minor fault CrST
[Remove RUN Command to Reset].
 Loading...