1-19
Confidential
4.2 Troubleshooting According to Image Defect
End users can solve problems related to image defects as long as they follow the User
Check items. If the problem still cannot be solved, implement each procedure according to
the step numbers in the tables below.
4.2.1 Light
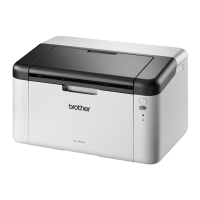
Electrodes location of the toner cartridge and drum unit
Fig. 1-6
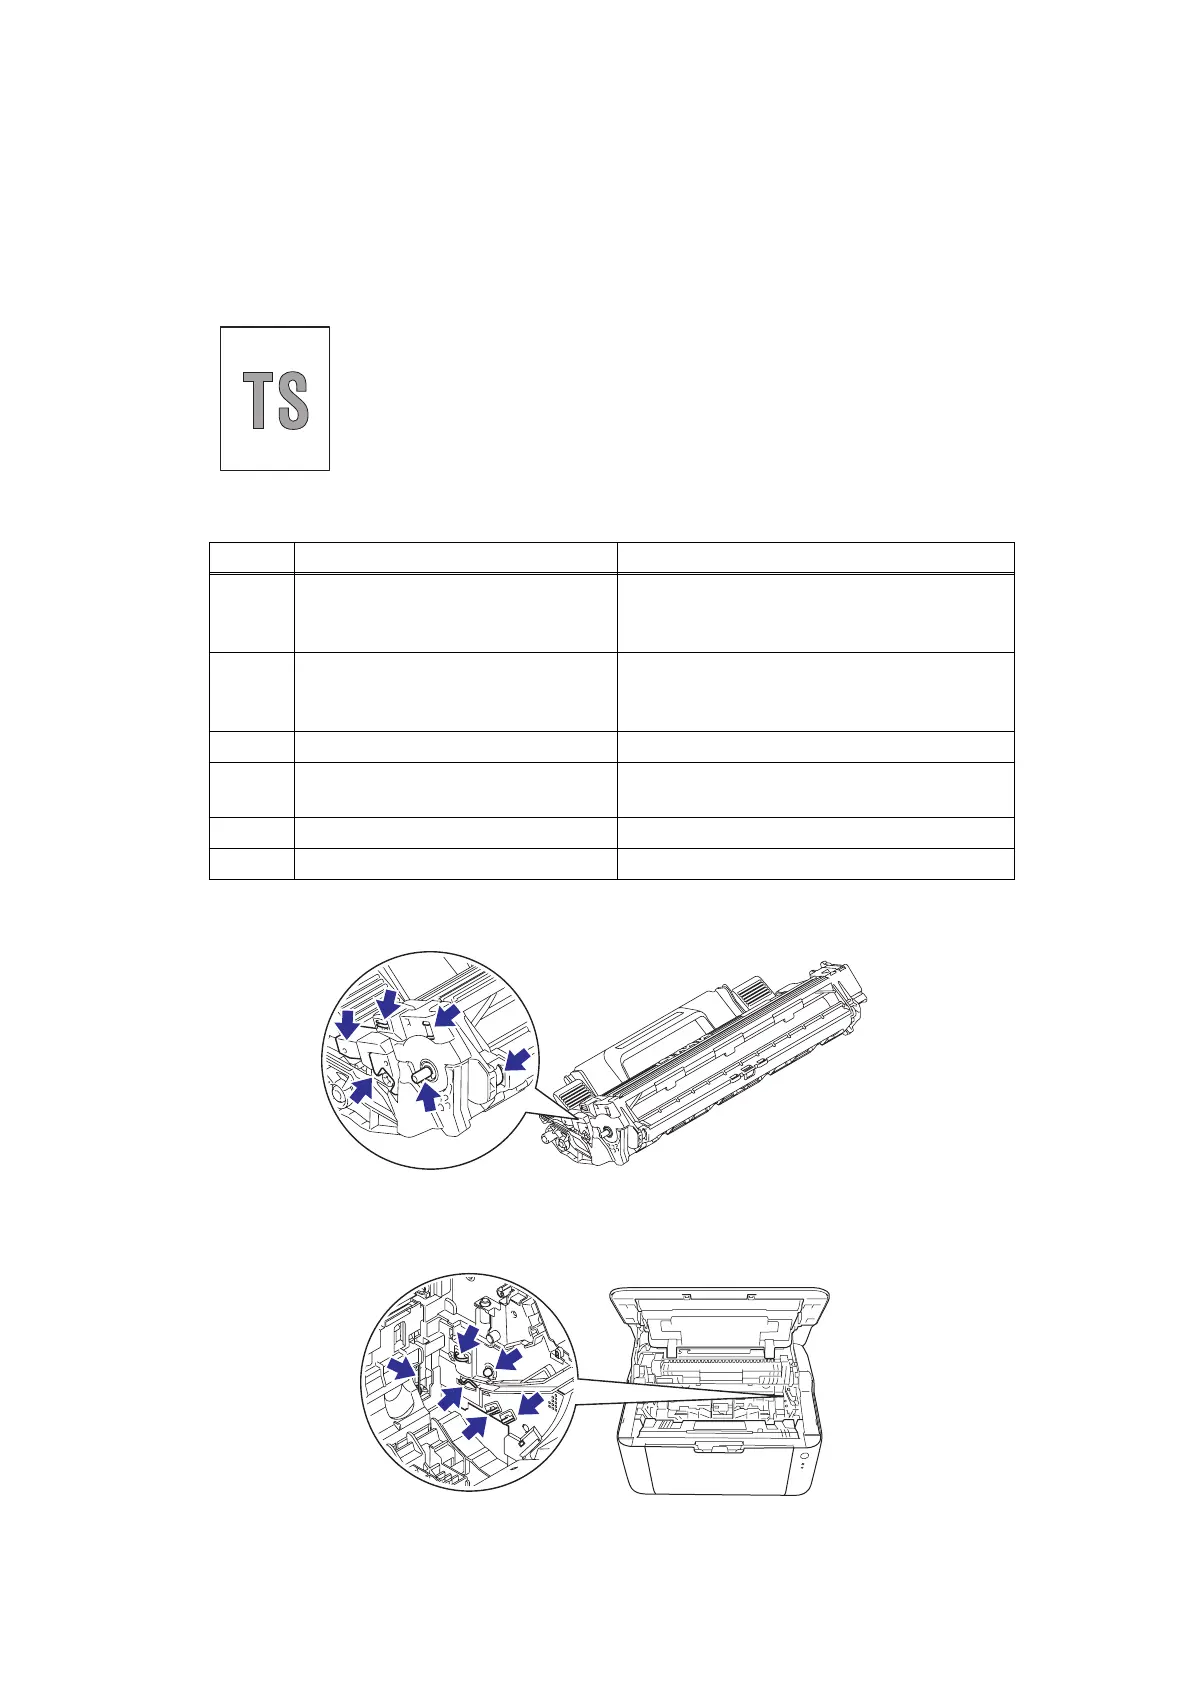
Electrodes location of the machine
Fig. 1-7
<User Check>
- Check the usage environment of the machine. Using the machine in
hot-humid or cold-dry conditions can cause this problem.
- If the whole page is light, toner save mode may be ON. Turn OFF
the toner save mode.
- Adjust the density using the Density Adjustment.
- Replace the drum unit with a new one.
- Replace the toner cartridge with a new one.
Step Cause Remedy
1
Dirt on electrodes of the drum unit
and those of the machine
Clean the electrodes of the drum unit and
those of the machine. (Refer to Fig. 1-6 or
Fig. 1-7.)
2
Toner type determination failure
when a new toner cartridge is
detected
Reset the toner manually. (Refer to “6.
RESETTING TONER MANUALLY” in
Chapter 4.)
3 Fuser unit failure Replace the fuser unit.
4
High voltage power supply PCB
failure
Replace the high voltage power supply PCB
ASSY.
5 Laser unit failure Replace the laser unit.
6 Main PCB failure Replace the main PCB ASSY.
 Loading...