2-18
Confidential
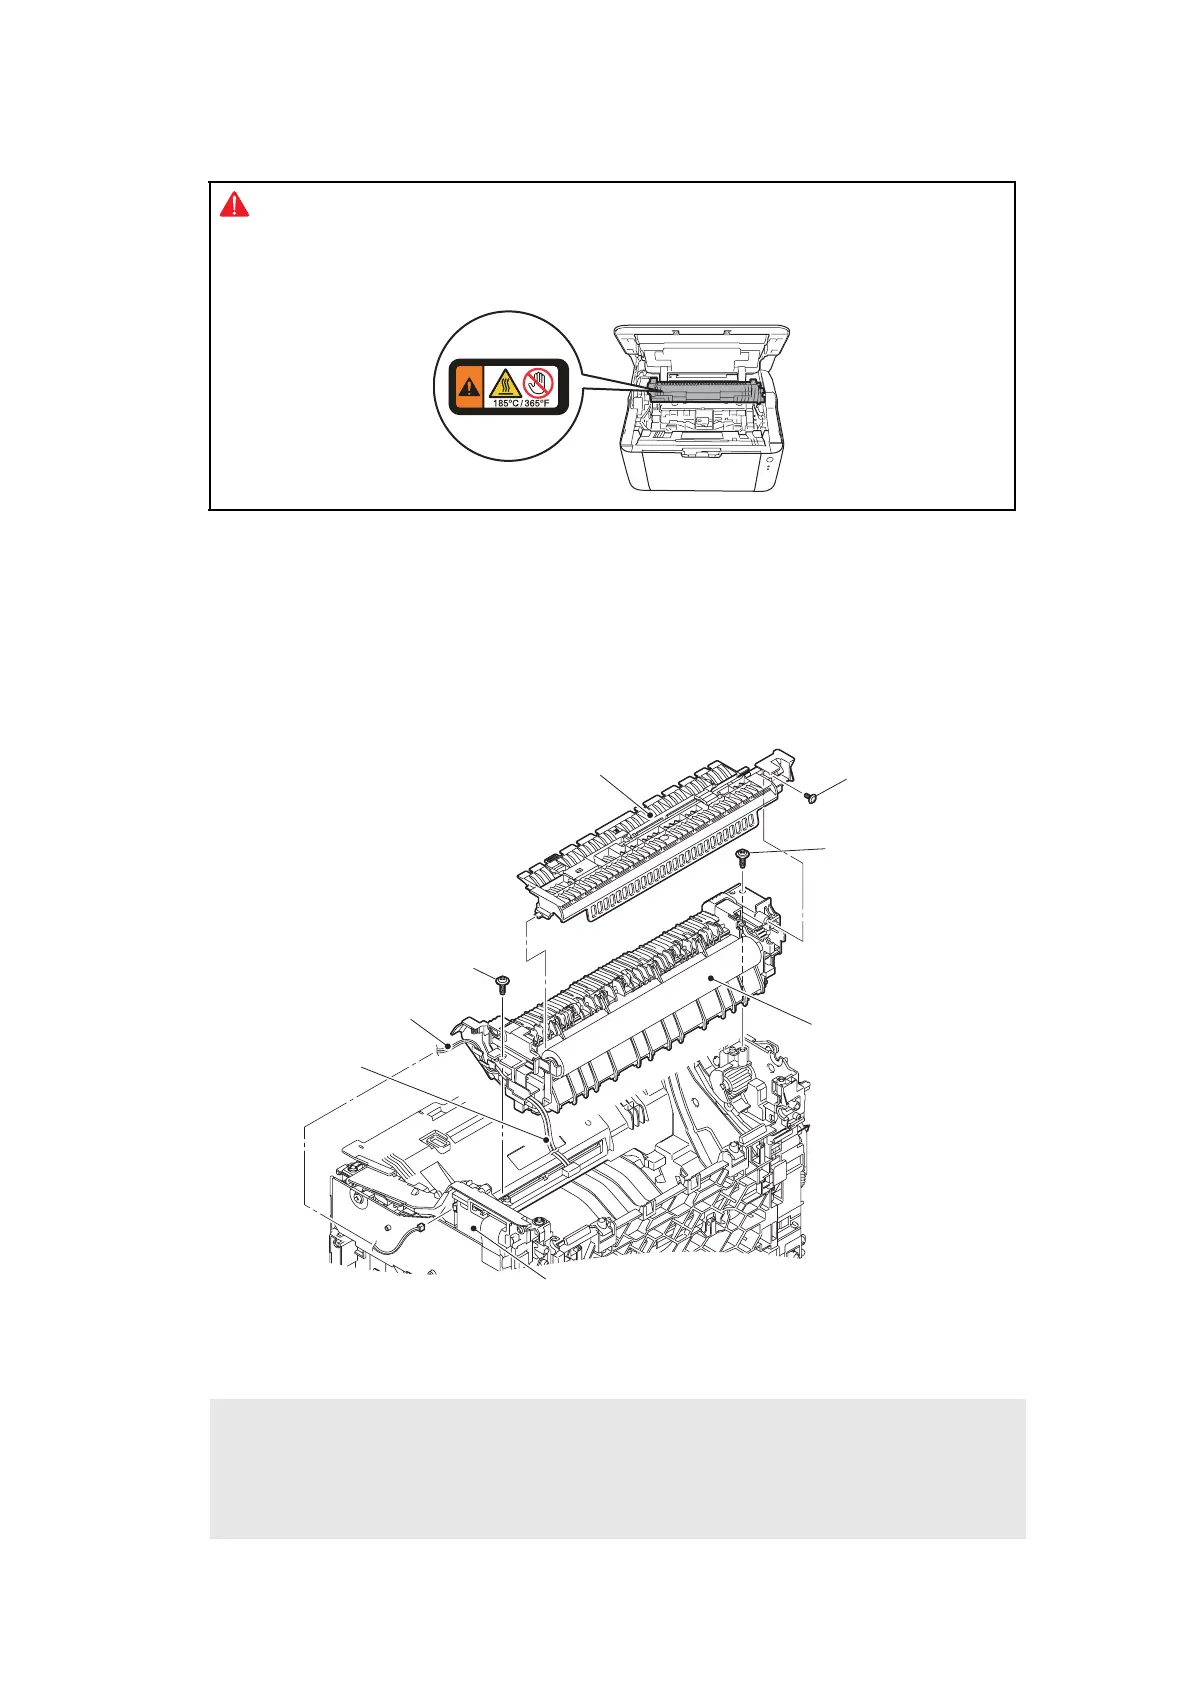
7.8 Fuser unit
(1) Remove the two taptite pan B M4x14 screws.
(2) Disconnect the center thermistor harness from the main PCB ASSY, and release it from
the securing fixtures.
(3) Release the heater harness from the securing fixtures, and remove the fuser unit from
the machine.
(4) Remove the taptite pan B M3x8 screw, and remove the insulation roof from the fuser
unit.
Fig. 2-15
Harness routing: Refer to “1. Main PCB ASSY / low voltage power supply PCB unit / fuser unit”.
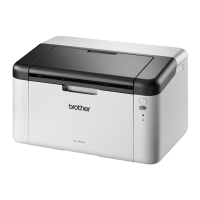
WARNING:
• Some parts inside the machine are extremely hot immediately after the machine is
used. When opening the top cover or back cover to access any parts inside the
machine, never touch the shaded parts shown in the following figures.
Assembling Note:
• Do not use the fuser unit for DCP-1510/1511/1512/1518, MFC-1810/1811/1813/1815/
1818. Heater harnesses of the fuser unit for those models are longer than the one for
this model. It could come into contact with other parts around the securing fixture, result
in safety problems.
Taptite pan B M3x8
Insulation roof
Taptite pan B M4x14
Taptite pan B M4x14
Fuser unit
Center thermistor harness
Main PCB ASSY
Heater harness
 Loading...