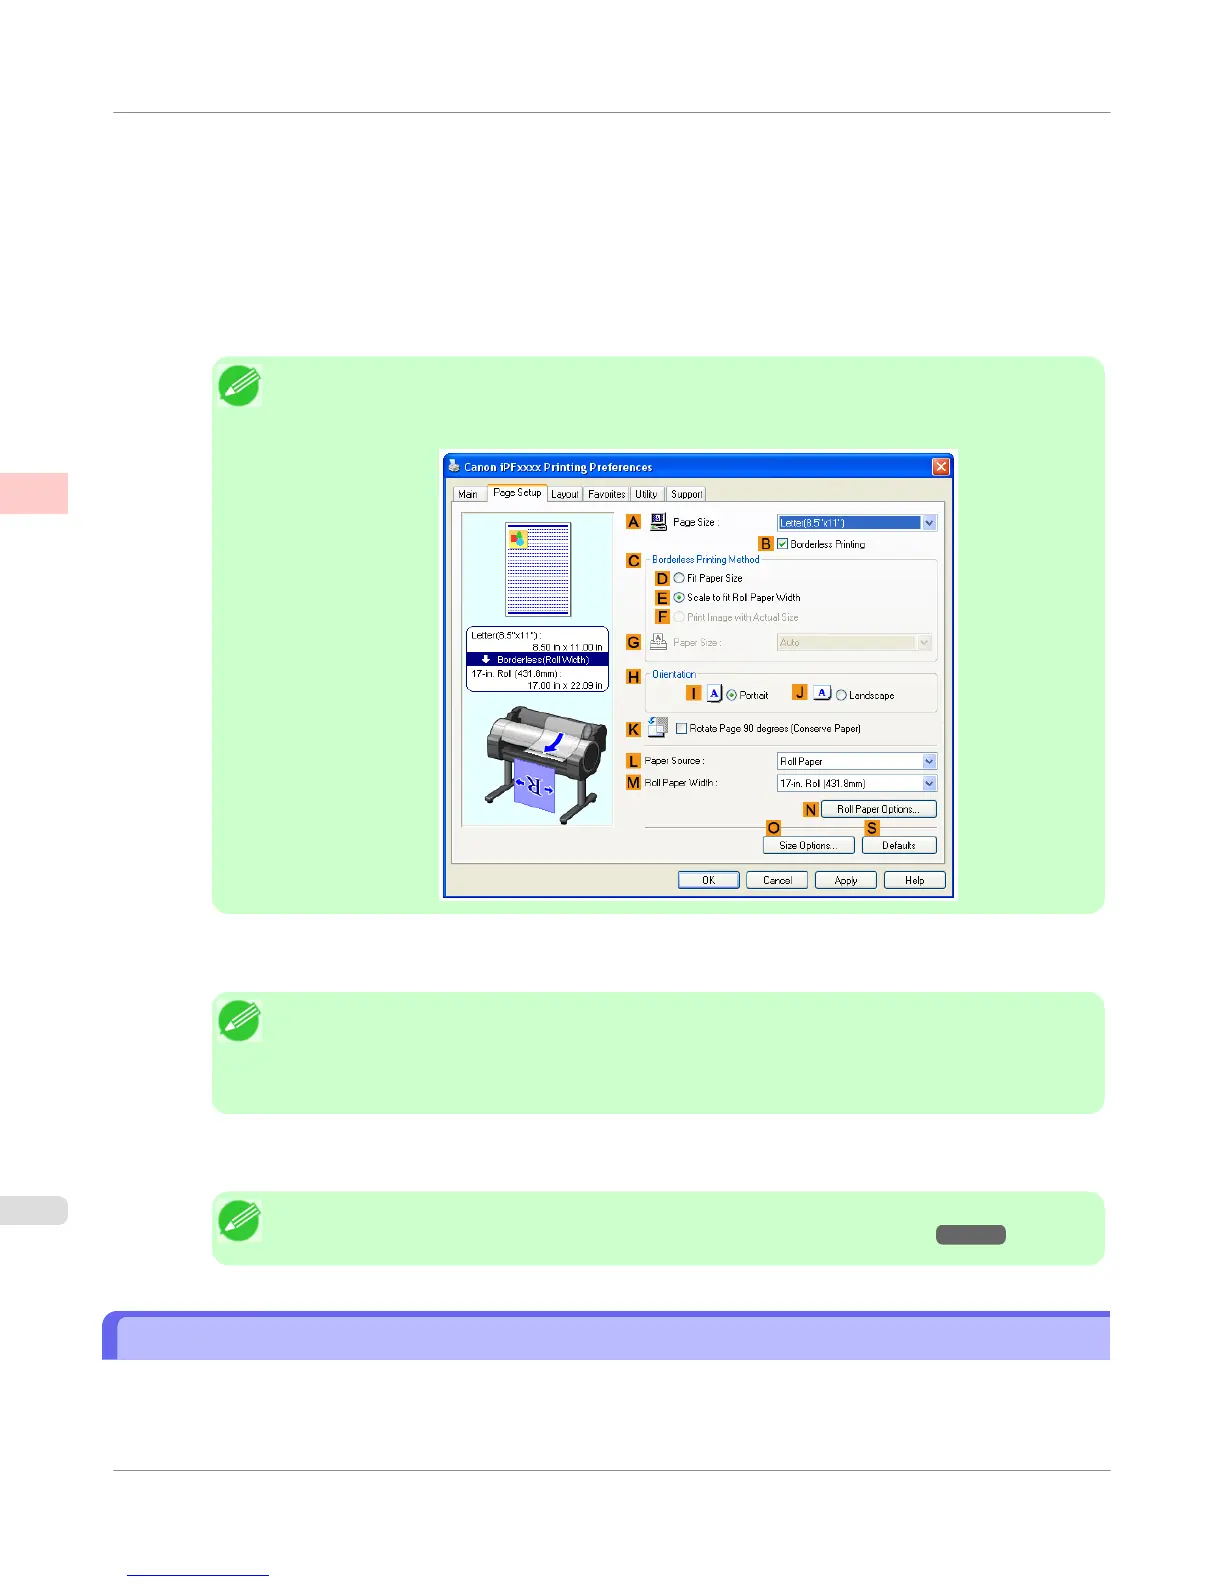
7. Select and click a roll paper in the L Paper Source list.
8. In the A Page Size list, click the size of the original as specified in the application. In this case, click ISO A4 or
Letter (8.5"x11").
9. Select the C Enlarged/Reduced Printing check box.
Note
• If the C Enlarged/Reduced Printing check box is not displayed on the Page Setup sheet, clear the
B Borderless Printing check box.
10. Click E Fit Roll Paper Width.
Note
• After you click E Fit Roll Paper Width, the Information dialog box is displayed. Select the width
of the loaded roll in the Roll Paper Width list and click OK.
• Make sure the roll paper width you specify matches the width of the loaded roll.
11. Confirm the print settings and print as desired.
Note
• For tips on confirming print settings, see "Confirming Print Settings(Windows) →P.212 "
Resizing Originals to Fit the Roll Width (Mac OS X)
This topic describes how to enlarge originals before printing to match the roll width, based on the following example.
• Document: Any Type
Enhanced Printing Options
>
Printing enlargements or reductions
>
Resizing Originals to Fit the Roll Width (Mac OS X)
iPF750
2
78
 Loading...