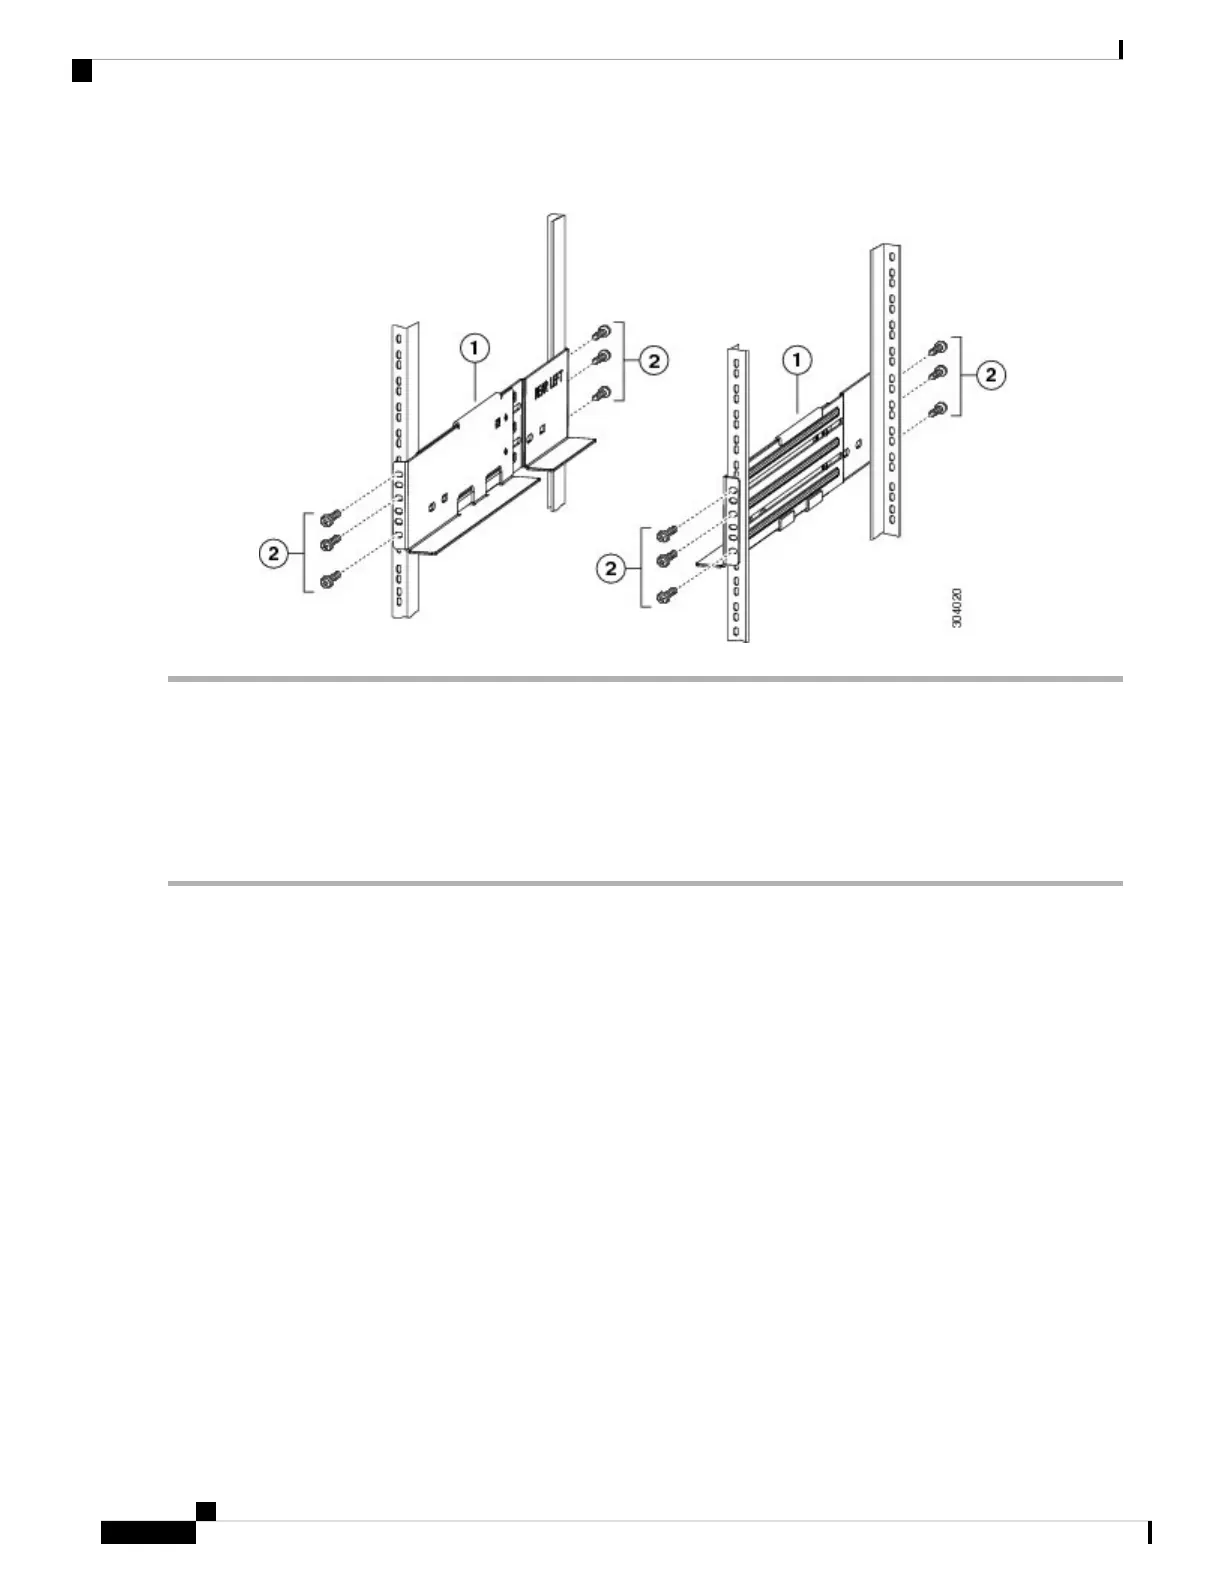
Figure 28: Installing the Shelf Bracket Kit into a Rack
Step 1 Position a shelf bracket inside the rack-mounting rails. Align the screw holes at the front of the shelf bracket with the
holes in the front rack-mounting rail, and then attach the shelf bracket to the front rack-mounting rail using a minimum
of three (M6, 12-32 or 12-24) screws.
Step 2 Align the screw holes at the back of the shelf bracket with the holes in the back rack-mounting rail, and then attach the
shelf bracket to the back rack-mounting rail using a minimum three (M6, 12-32 or 12-24) screws.
Step 3 Verify that the shelf brackets are at the same height (using the level or tape measure as desired).
Installing the Switch on the Brackets
This section provides information on how to install the switch on the rack-mount support brackets and on the
shelf brackets and includes the following subsections:
Installing the Switch on the Rack-Mount Support Brackets
Use this procedure to install the switch on top of the rack-mount support brackets.
Before you begin
This section provides general instructions for installing the switch on top of the rack-mount support brackets.
For detailed installation instructions, see the Rack Mounting Guidelines section, covered earlier in this chapter.
Cisco MDS 9700 Series Switches Hardware Installation Guide
72
Preparing the Site
Installing the Switch on the Brackets
 Loading...