REV.-A
4.3 ADJUSTMENT
This section describes the adjustment procedures necessary when the LX-8 10/850 printer is
reassembled or when parts are reinstalled or replaced. These procedures are necessary to ensure the
correct operation of the printer.
4.3.1
Platen Gap Adjustment
Following the removal of the carriage guide shaft or carriage guide shaft levers, or
if
printing
is abnormal,
the gap between the platen and the print head should be adjusted.
1. Remove the printer mechanism (refer to Section 4.2.4).
2. Install the paper guide and the platen unit onto the printer mechanism.
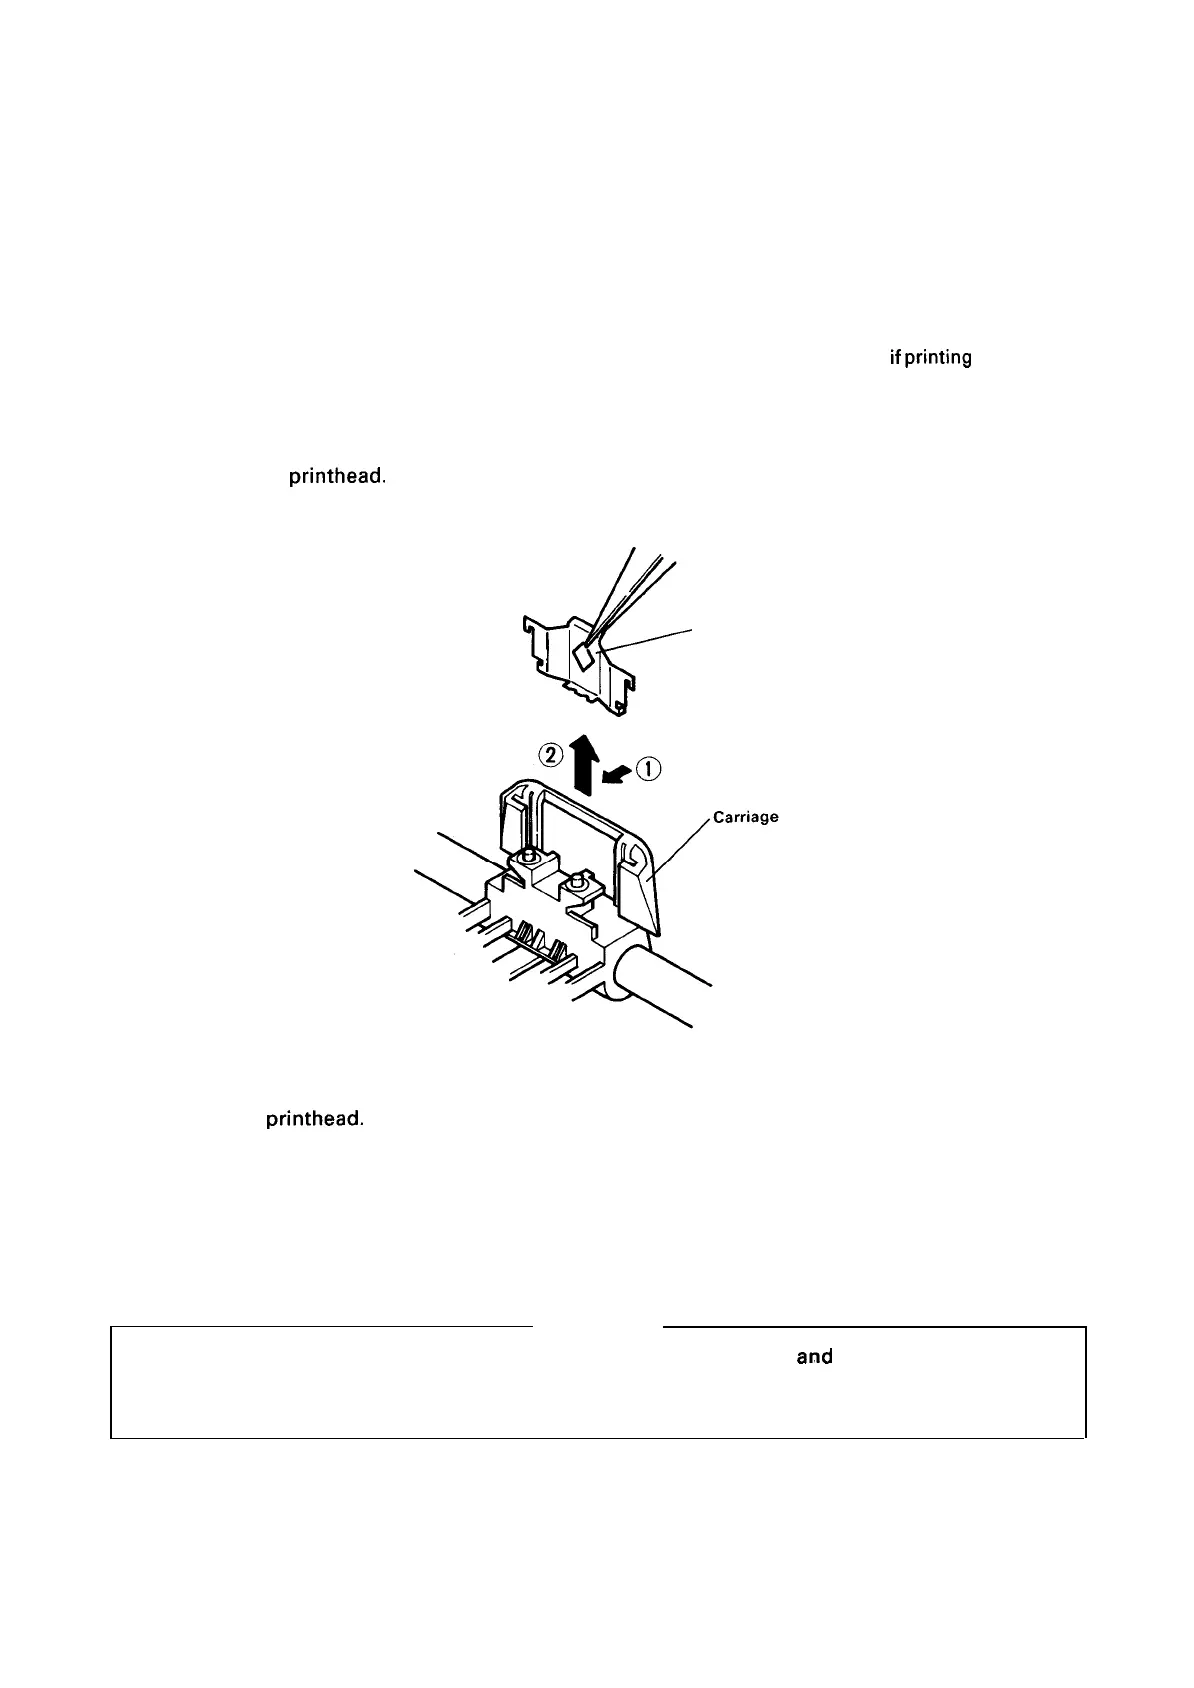
3. Remove the
printhead.
Using tweezers, remove the ribbon mask. Remove the mask by pulling it
slightly forward, then lifting.
+
1
/
Ribbon Mask
4.
5.
6.
7.
8.
Figure 4-39. Removal of Ribbon
Mask
Reinstall the printhead.
Set the head adjust lever to the position nearest the platen.
Set the release lever to the release position.
Manually move the carriage to column 10.
Adjust the platen so that the gap between the head and the platen allows unimpeded insertion of
the 0.44-mm gap gauge, but does not allow insertion of the 0.47-mm gap gauge.
WARNING
When positioning the carriage guide shaft lever, be sure that tabs A and B do not both enter the
notch at the same time. The design is such that neither of the tabs can enter if the other tab is
entered.
4-27
 Loading...