ErgoPro e-, x- and s- Series PC Specialist's Handbook
Page 2 First Edition, Release 4 - June 1998
2-Slot assembly/desassembly
Opening & closing the system unit cover
To open the system unit cover, do as follows:
1. Remove any diskette(s) from the drive(s).
2. Turn off the display unit, system unit, and all other separately powered attached units.
3. Unplug the power cables of the system unit and other attached cables from their outlets.
4. Unlock the security lock, if applicable, by turning the key clockwise.
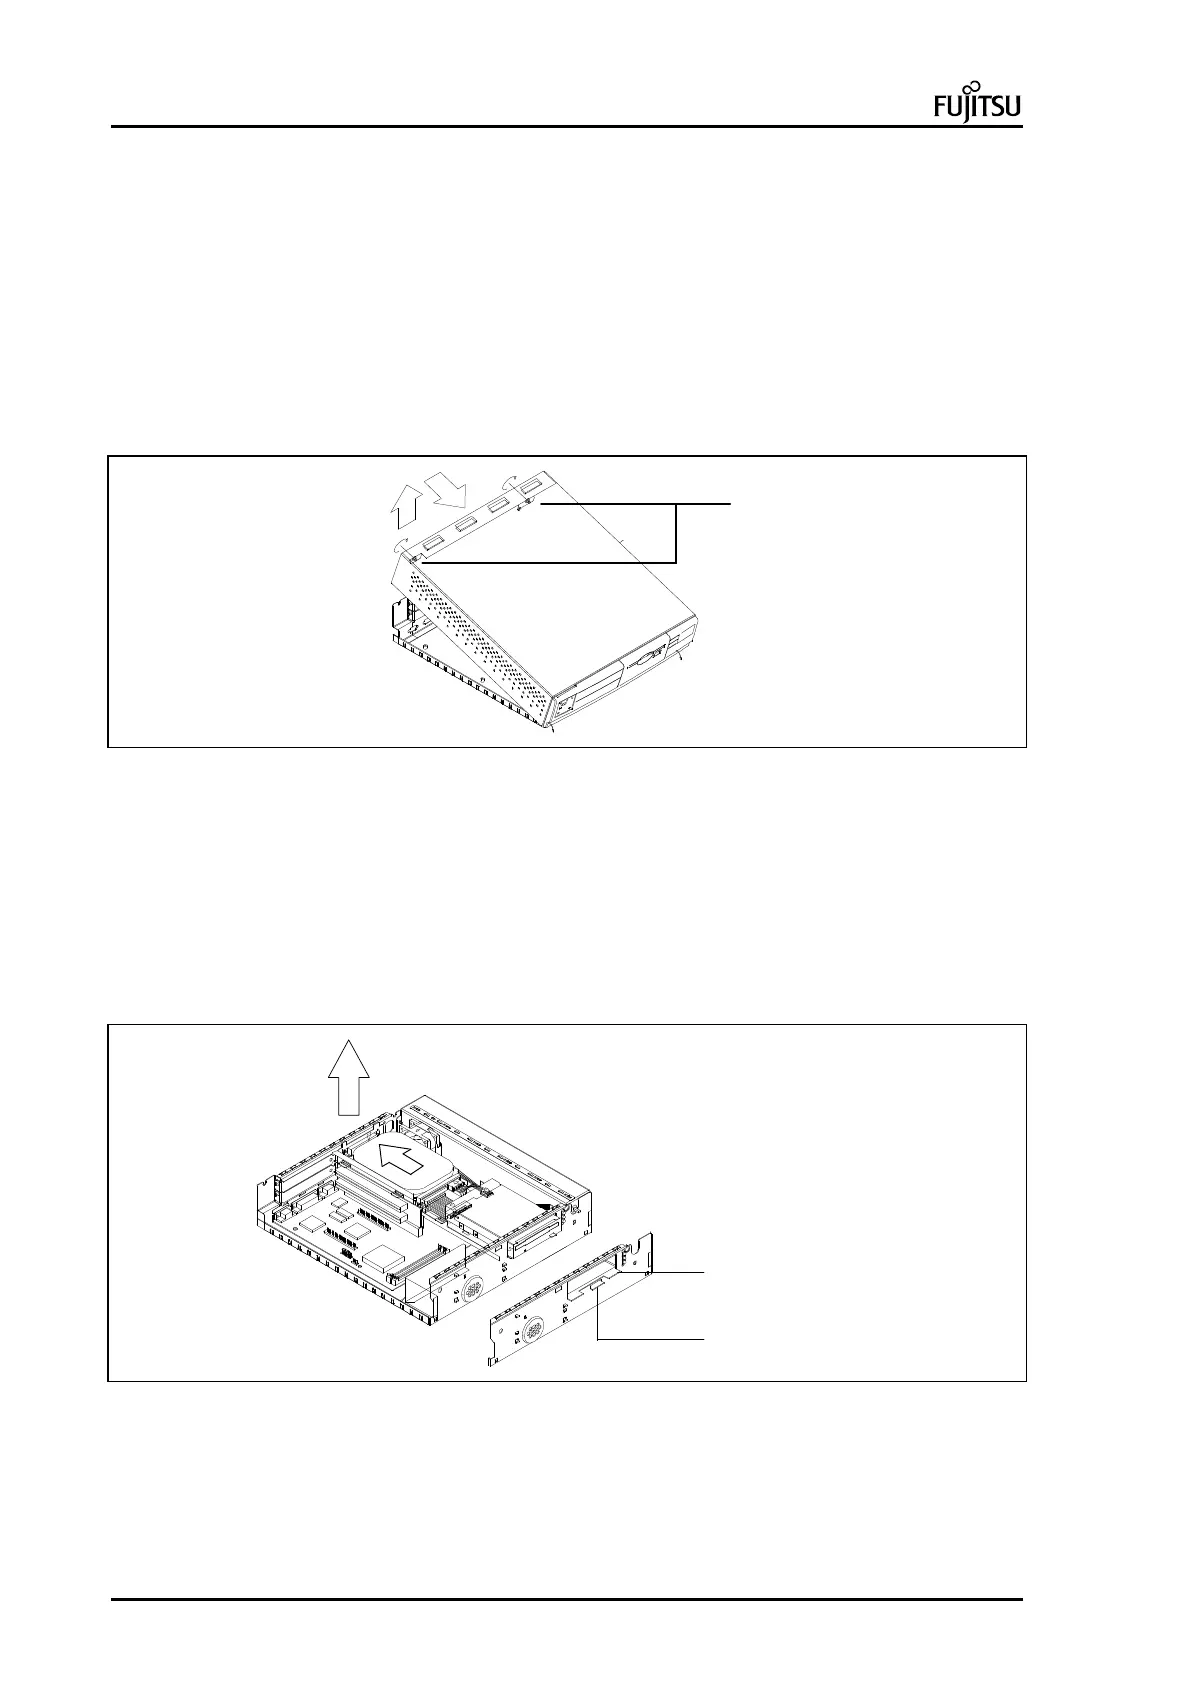
5. Use a medium-sized Posidrive screwdriver to loosen the two screws securing the system unit cover (A)
but do not take them out entirely. Lift up the cover (B), holding it by the rear end, to an angle of about 10-
15 degrees, and then slide it forward and off (C). Note that there is a small tab on each side of the cover;
these tabs go in the small holes in the system unit thus securing the cover in place.
C
B A
Picture 1 : Opening and closing the 2 slot unit cover
Installing and removing disk tray
If you have installed a new hard disk or diskette drive, or replaced an existing drive with another type, check the
Hard disk 0 or Floppy Drive 0 parameters in the SETUP.
1. If the system is provided with the hard disk silencer, lift it straight up, see next page.
2. Disconnect the power and data cables from the fixed disk and diskette drives.
3. Carefully lift the disk tray (about 50mm), with both drives on it, by the rear (A), checking that the power
and data cables do not become caught as they pass through the hole.
4. When the cables are through the hole, pull the plate toward the rear (B) of the machine to disengage the
diskette drive and the mounting lug (See picture) from the front of the chassis.
A
Big lugs through diskette hole
Center lug into small hole
Carriage mounting (Detail)
B
Picture 2 : Installing and removing disk carriage
 Loading...