GE MEDICAL SYSTEMS CT9800 QUICK SYSTEM
Rev. 14 Direction 18000
4-3-57
3-12 Optical Disk SELF-TEST Checks
This section assumes the Optical disk is physically installed (per Direction 18002 - Installation) but has not been
powered up. You will need the following tools to perform the procedures contained in this direction:
• GEMOS GENERAL SUPPORT TAPE - 46-266596G1 (Rev. “AA” or later revision)
• GEMOS SERVICE SCRATCH MEDIA - 46-266557G1
The ODSS (optical disk subsystem) consists of three components:
• ODC Module - Controller Circuit Board (located in the Main CPU chassis connected to the ERCC/BMC)
• ODD Module - The Optical Disk drive itself
• MDD Module - Magnetic Disk (Winchester Disk drive)
The ODSS has a Microprocessor based self-Test that checks over 90% of the controller and interface at power
up time. If a failure is detected during Self-Test, a corresponding LED is lit to report the failure status.
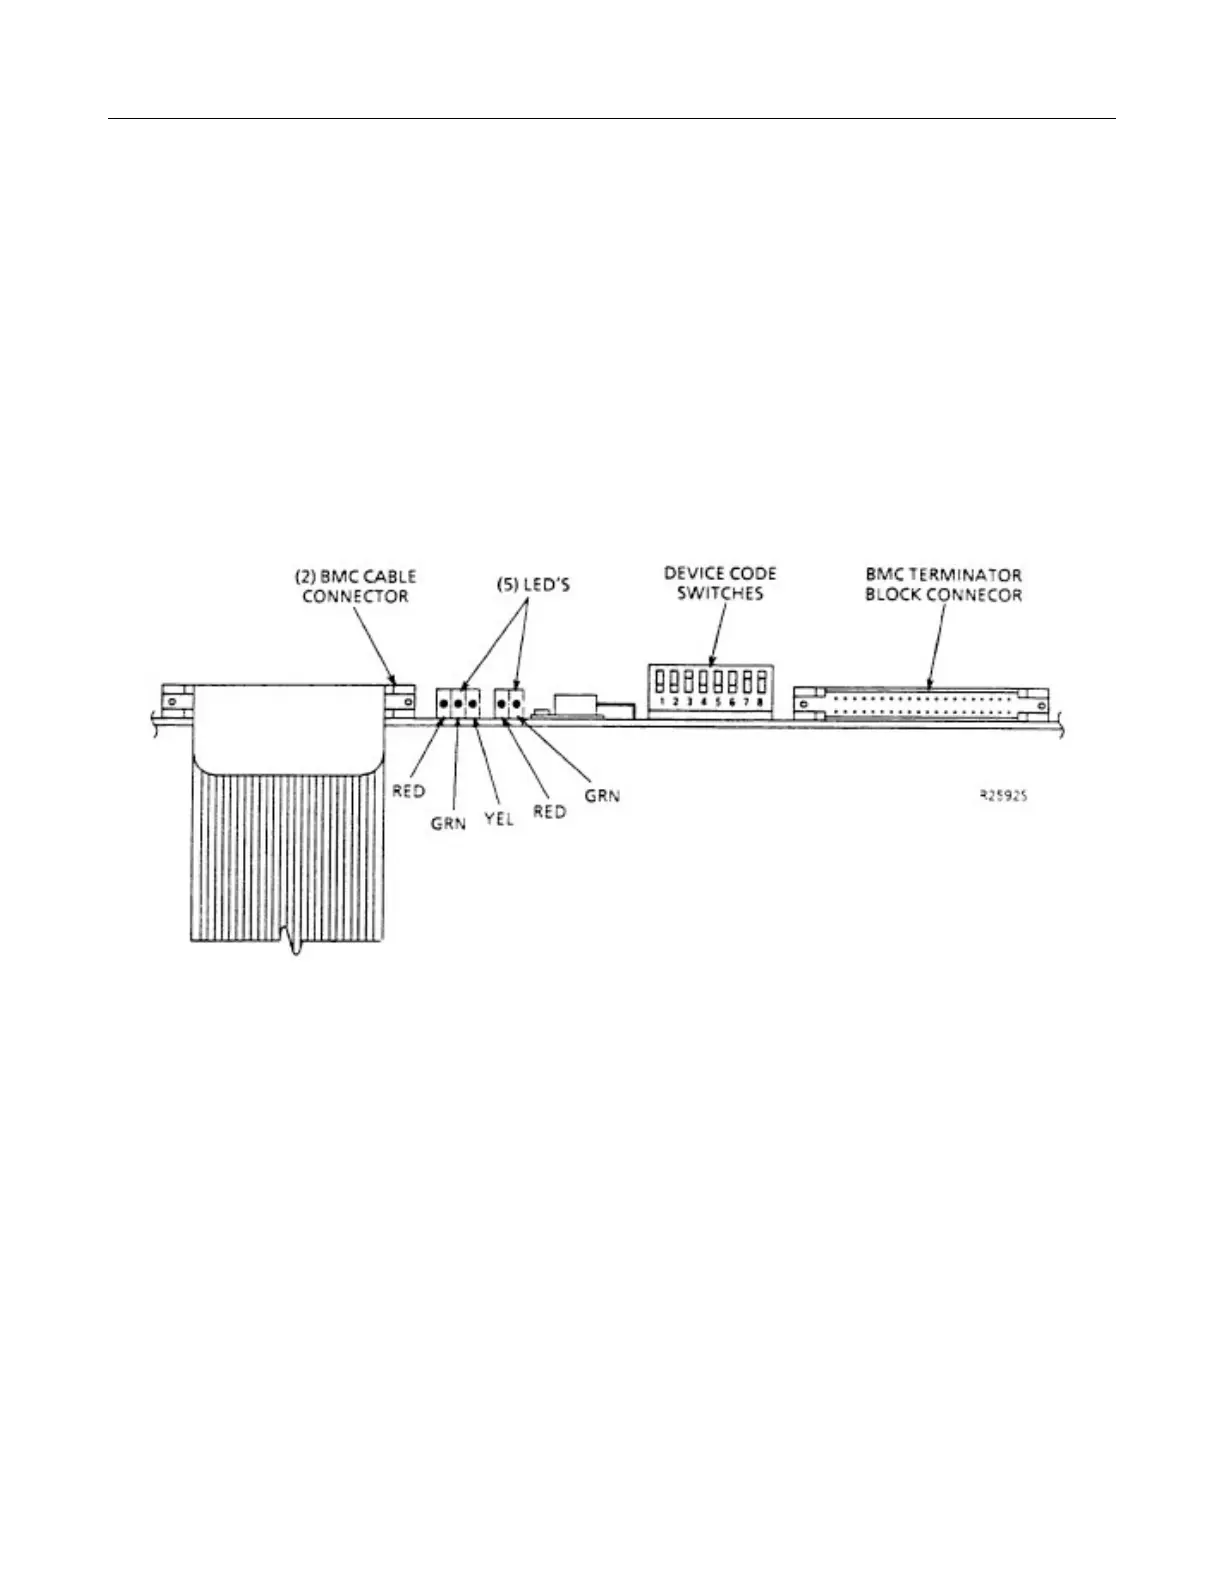
These are two sets of LED’s on the ODC (Controller Board) to indicate which side of the interface the problem
was detected. One interface is the ARZ or Argus interface. This interface is allows the ERCC/BMC (card in
$140 only or the ERCC/BMC circuit on the MV7800 CPU board) to communicate to the ODC as an Argus disk
drive. The second interface is the SCSI interface that allows communication from the ODC the MDD and ODD
modules.
The LED’s are as follows:
• ODC Module - Red LED (on the left)
• ARZ Interface - Red LED (on the right)
• SCSI Interface - Yellow LED (on the left)
The entire self-test takes approx. 1 second to execute. During execution, various LED’s will light and after the 1
second execution, all LED’s should be off. If a failure is detected, one or more LED’s will flash a specific number
of times to indicate what the failure is (see note below).
 Loading...