EasyManua.ls Logo

GE DigitalFlow DF868 User Manual

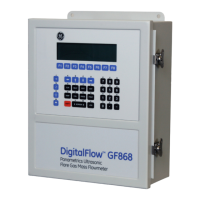
GE DigitalFlow DF868
184 pages
To Next Page IconTo Next Page
To Previous Page IconTo Previous Page
Page #53 background imageLoading...
Page #53 background image
Programming Site Data 1-45
March 2008
Setting Up Global Inputs/
Outputs
While following the programming instructions for this submenu, refer
to the menu map in Figure A-4 on page A-4.
1. To enter the
GLOBAL menu, press [F3]=GLOBL.
2. To enter the I/O submenu, press [F3]= I/O.
Press [F1] to set up error handling, or
Press [F2] to set up any inputs or outputs.
Proceed to the appropriate section for step-by-step instructions on
each of the two options offered above.
Note: Be sure to record all programmed data in Appendix B, Data
Records.
Selecting Error Handling This menu option permits programming of the manner in which the
Model DF868’s measurements respond during an error condition. See
Chapter 2, Error Codes and Screen Messages, of the Service Manual
for a discussion of the built-in error codes.
1. At the
I/O screen, press [F1] to select the Error option.
2. Press
[F1] if you want the DF868 to Hold the last “good” reading
and continues to totalize, based on that reading, or press
[F2],
No Up, if you want the meter to stop totalizing.
3. Press
[F1] to disable 2-path Error Handling, or press [F2] to enable
2-path error handling.
The
2-path error handling option is intended for applications where
two sets of transducers are installed in the same location in the same
pipe to improve accuracy and the meter is operated in
AVE mode. With
this function enabled, the Model DF868 performs error handling only
if both
channels are in error. If this function is disabled, error
handling occurs when either
channel goes into error.
Specific responses of the totalizer to the 2-path error handling option
are listed in Table 1-19 below.
Table 1-19: 2-Path Error Response Options
Option Totalizer Response
NO Outputs the average of CH1 and CH2 totals, regard-
less of the error state of either channel.
YES 1. If one channel is in error, totalizing continues.
2. If both channels are in error and “No Up” is
selected, totalizing stops.

Table of Contents

Other manuals for GE DigitalFlow DF868

Question and Answer IconNeed help?

Do you have a question about the GE DigitalFlow DF868 and is the answer not in the manual?

GE DigitalFlow DF868 Specifications

General IconGeneral
BrandGE
ModelDigitalFlow DF868
CategoryMeasuring Instruments
LanguageEnglish

Summary

Chapter 1: Programming Site Data

Entering Programming Mode

Steps to access and navigate the device's programming mode.

Entering Channel-Specific Data

Procedures for configuring parameters unique to each measurement channel.

Entering Global System Data

Configuration of system-wide parameters applicable to all channels.

Saving Site Data Configuration

Guidance on storing the current configuration settings as a site file.

Recalling Saved Site Data

Instructions on how to retrieve and activate previously saved site configuration data.

Chapter 2: Displaying Data

Displaying Transducer Signal Data

Guidance on graphically displaying various transducer signals against time.

Chapter 3: Logging Data

Creating a Standard Log File

Steps to create and configure standard data logging files with parameters.

Stopping an Active Log Process

Instructions on how to terminate an active data logging process.

Creating an Error Log

Guidance on creating log files specifically for recording error conditions.

Chapter 4: Printing Data

Setting Up the Printer Connection

Steps for connecting and configuring a printer for use with the device.

Chapter 5: Clearing Data

Clearing Totalized Measurement Values

Procedure to reset totalized measurement values and the stopwatch.

Deleting Site Parameter Files

Instructions for removing saved site parameter files from memory.

Chapter 6: Serial Communications

Wiring the RS232 Interface

Details on wiring the RS232 serial interface for PC connectivity.

Setting Up Ethernet Connection

Instructions for establishing an Ethernet connection for network communication.

Appendix B: Data Records

Initial Setup Data Recording

Template for recording initial device setup parameters during installation.

Appendix C: Programming with PanaView

Editing DF868 Meter Properties via PanaView

Guidance on editing device properties like clock and signals using PanaView.

Changing Meter Settings Remotely with PanaView

Instructions for changing device settings remotely using the PanaView software.

Appendix D: Foundation Fieldbus Communications

Selecting Desired Measurements for AI Blocks

Procedure for selecting specific measurements for Analog Input (AI) blocks.

Related product manuals