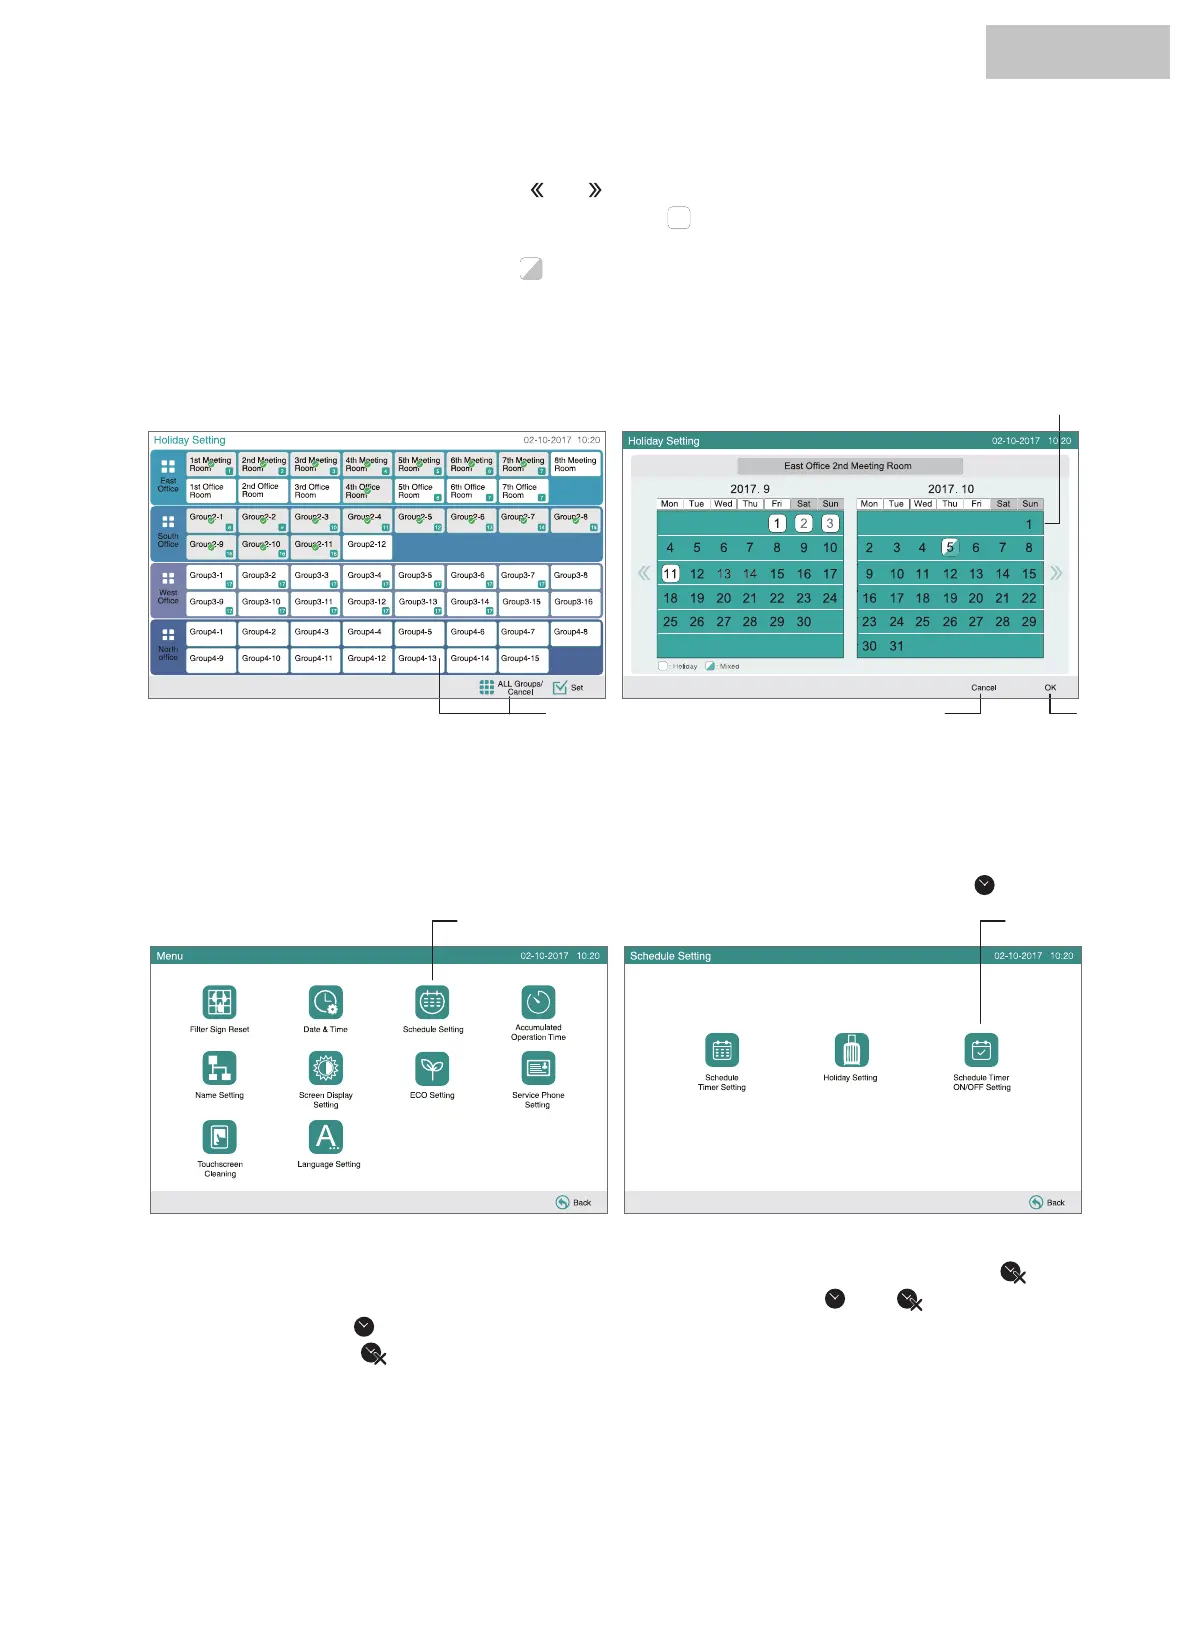
4 Set the date to suspend the scheduled operation.
The calendar will be forward/backward by touching “ ” or “ ”.
By touching the date on the calendar, the “Holiday” is set with mark of “ ”. “Holiday Setting” is canceled by touching the same
date again. Holiday setting is not available for the days before the present day.
With “All Groups” or “Block” selected, the mark of “ ” will be indicated for the day when the groups with setup holiday and the
groups without setup holiday are mixed.
5 Touch “Cancel” to cancel the setting and set the schedule for other groups. The screen will return to “Holiday Setting”.
6 Touch “OK” to confirm the setting and set the schedule for other groups. The screen will return to “Holiday Setting”.
1 Select “Schedule Setting” from the screen of “Menu”.
2 Select “Schedule Timer ON/OFF Setting” from the “Schedule Setting”.
The screen will be changed to the “Schedule Timer ON/OFF Setting”. At first, the setting is “ON” with the mark of “ ”.
3 Select the target (all groups, blocks or groups).
By touching the button of all groups, blocks or groups, the indication is changed to the “OFF” setting with the mark of “ ”.
By touching the all groups, blocks or groups, the indication is changed alternately in order of “ ” and “ ”.
• Schedule is turned ON:
• Schedule is turned OFF:
4 Touch “OK” to return.
7.3.3 Schedule timer ON/OFF setting
(1) (2)
(3) (6)(5)
(4)
HYJM-S01H
 Loading...