EXCEL CARE CONTROL ICONS ALPHABETIC REFERENCE
207 74-5577–33 (US)
EN2B-0184 GE51 R0518 (Europe)
3. Define Xa by clicking the left and right arrows in the scroll bar just below the X
axis. As you click, the value of Xa changes. You can also click the gray area in
the scroll bar or click the white box (thumb) in the scroll bar and move it to the
desired position.
Determine Xb by clicking the lower scroll bar. You can use the same techniques
as for the other scroll bar.
The a and b values establish the curves left and right pivot points. Xb must be
less than Xa.
RESULT: The values in the boxes to the left and right of the horizontal scroll
bars change. A line appears in the graph to represent the curve
you created.
Tip ⇒ If desired, you can change the Xmin and Xmax/2 values that
appear at the top of the dialog box. These values establish which
area Xa and Xb can span. Click the value in the box and type a
new value to change it. Click Scale to save the entries.
4. Define Ya by clicking the vertical scroll bar on the left-hand side of the dialog
box. You can use the same techniques to change Ya values as for the other
scroll bars.
Define Yb by clicking the vertical scroll bar to the right of the Ya scroll bar.
Yb must be less than Ya.
Tip ⇒ If desired, you can change the Ymin and Ymax values that appear
at the top of the dialog box. These values establish which area Ya
and Yb can span. Click the value in the box and type a new value
to change it.
5. Click Toggle to start work on the other curve. Each time you click Toggle, you
move the focus from one curve to the other.
6. Define the X and Y values for the right-hand curve in the same manner as for
the left-hand curve.
7. Click OK to save the curves.
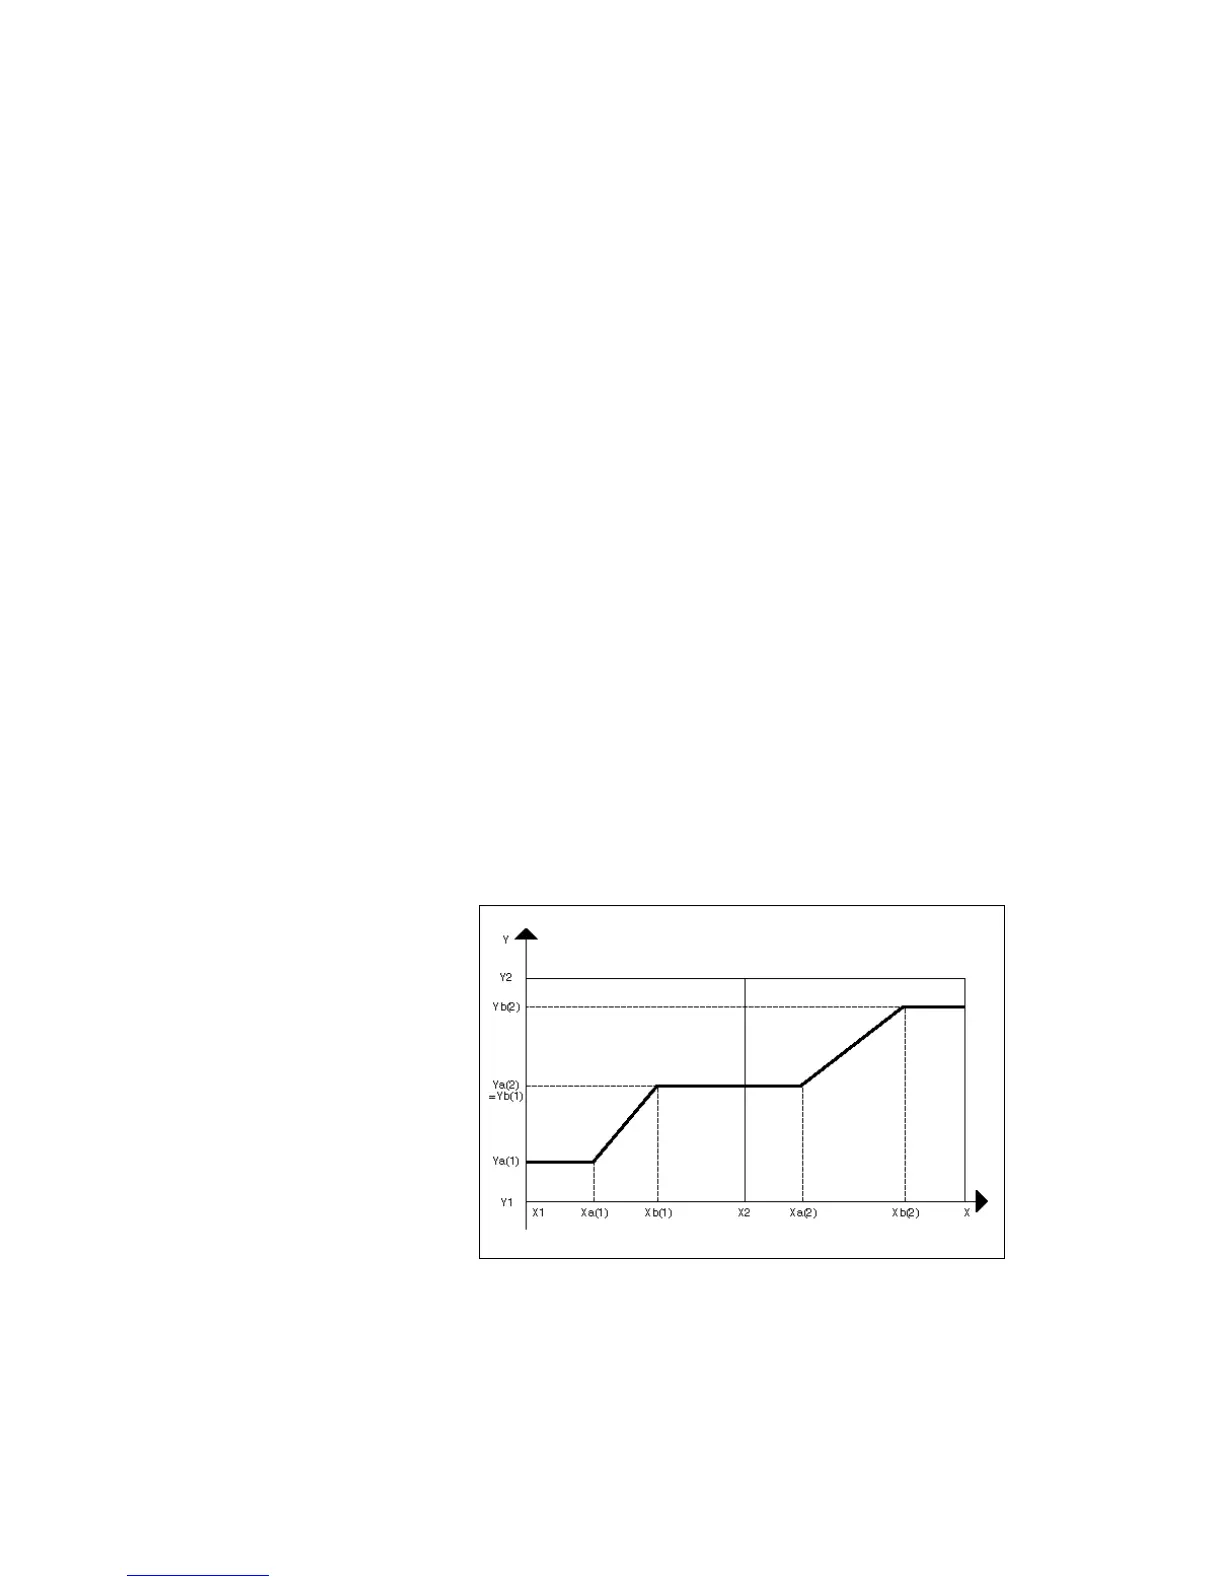
The following diagram shows how the software interprets the graph.
Creating a Ramp (Excel Web / Excel Web II)1. Enter the values for ramp (Ymin, Ymax, Xmin, Xmax, Xa, Xb, Xc, Xd, Ya,
Ybc, Yd).
2. Click OK to confirm your entries.