10
www.honeywell.com
Page 10
Mini-AT User Guide
Quick Start Guide
The following steps will guide you to getting the Mini-AT instrument installed and operational.
1. Carefully unpack the instrument and verify that there is no shipping damage, also verify that nothing is
missing from the shipment.
2. Open the case door and make sure there are no loose connections or loose hardware.
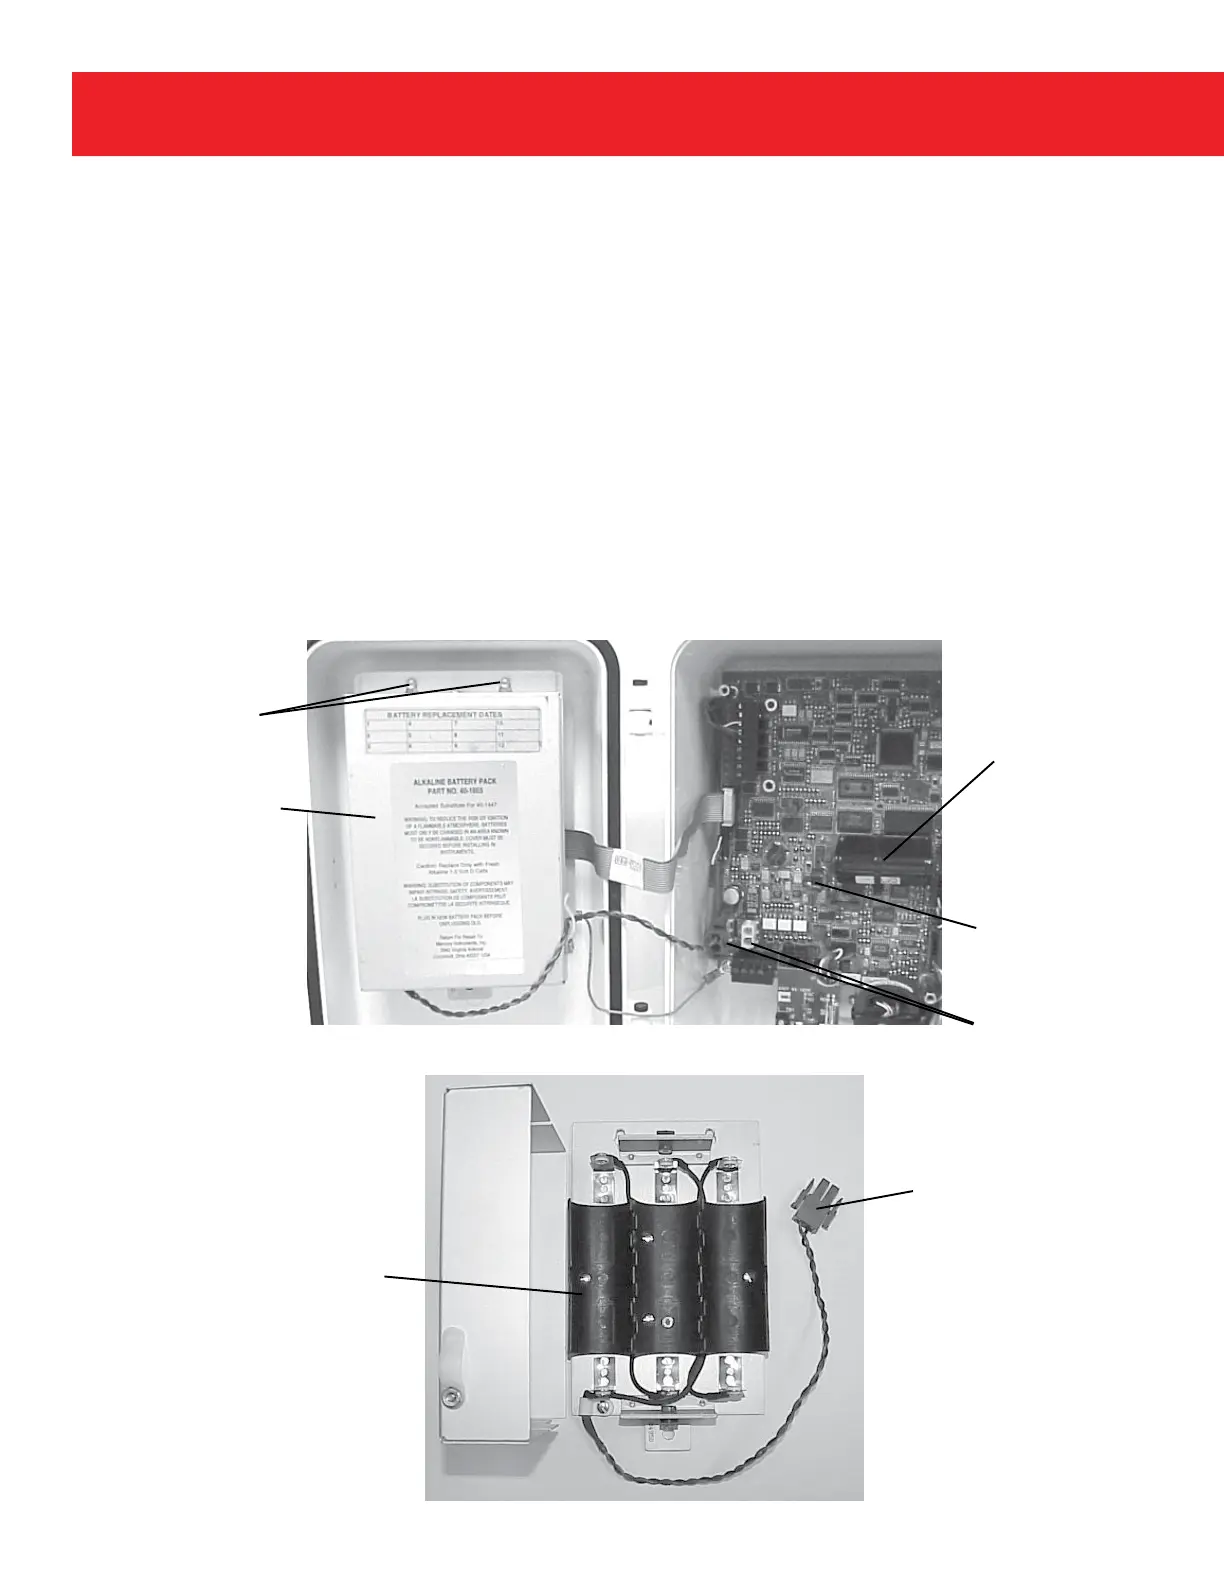
3. Install six new D-cell alkaline batteries if using the Alkaline Receptacle Pack. Plug the main battery
connector into either J7 or J8. Hang the battery pack on the screws of the battery hanger plate located
inside the door. Install the battery cover if using a disposable pack.
4. Plug the memory battery into J26. You may initially see the letter “P” across the LCD.
Alkaline
Receptacle
Pack
Alkaline
Receptacle
Pack
Memory
Battery
J26 Memory
Battery Connector
J7, J8
Main Battery
Connectors
Battery
Connector
Mounting
Screws
 Loading...