66
www.honeywell.com
Page 66
Mini-AT User Guide
Single-Point Pressure Calibration (Items Required)
- Mini-AT
- Mercor Mini Field Calibrator, p/n 20-8360
- Pressure Source with fittings
- Calibrated pressure gauge, or equivalent
- Mag Wand, p/n 20-7286
Single-Point Pressure Calibration (Procedure)
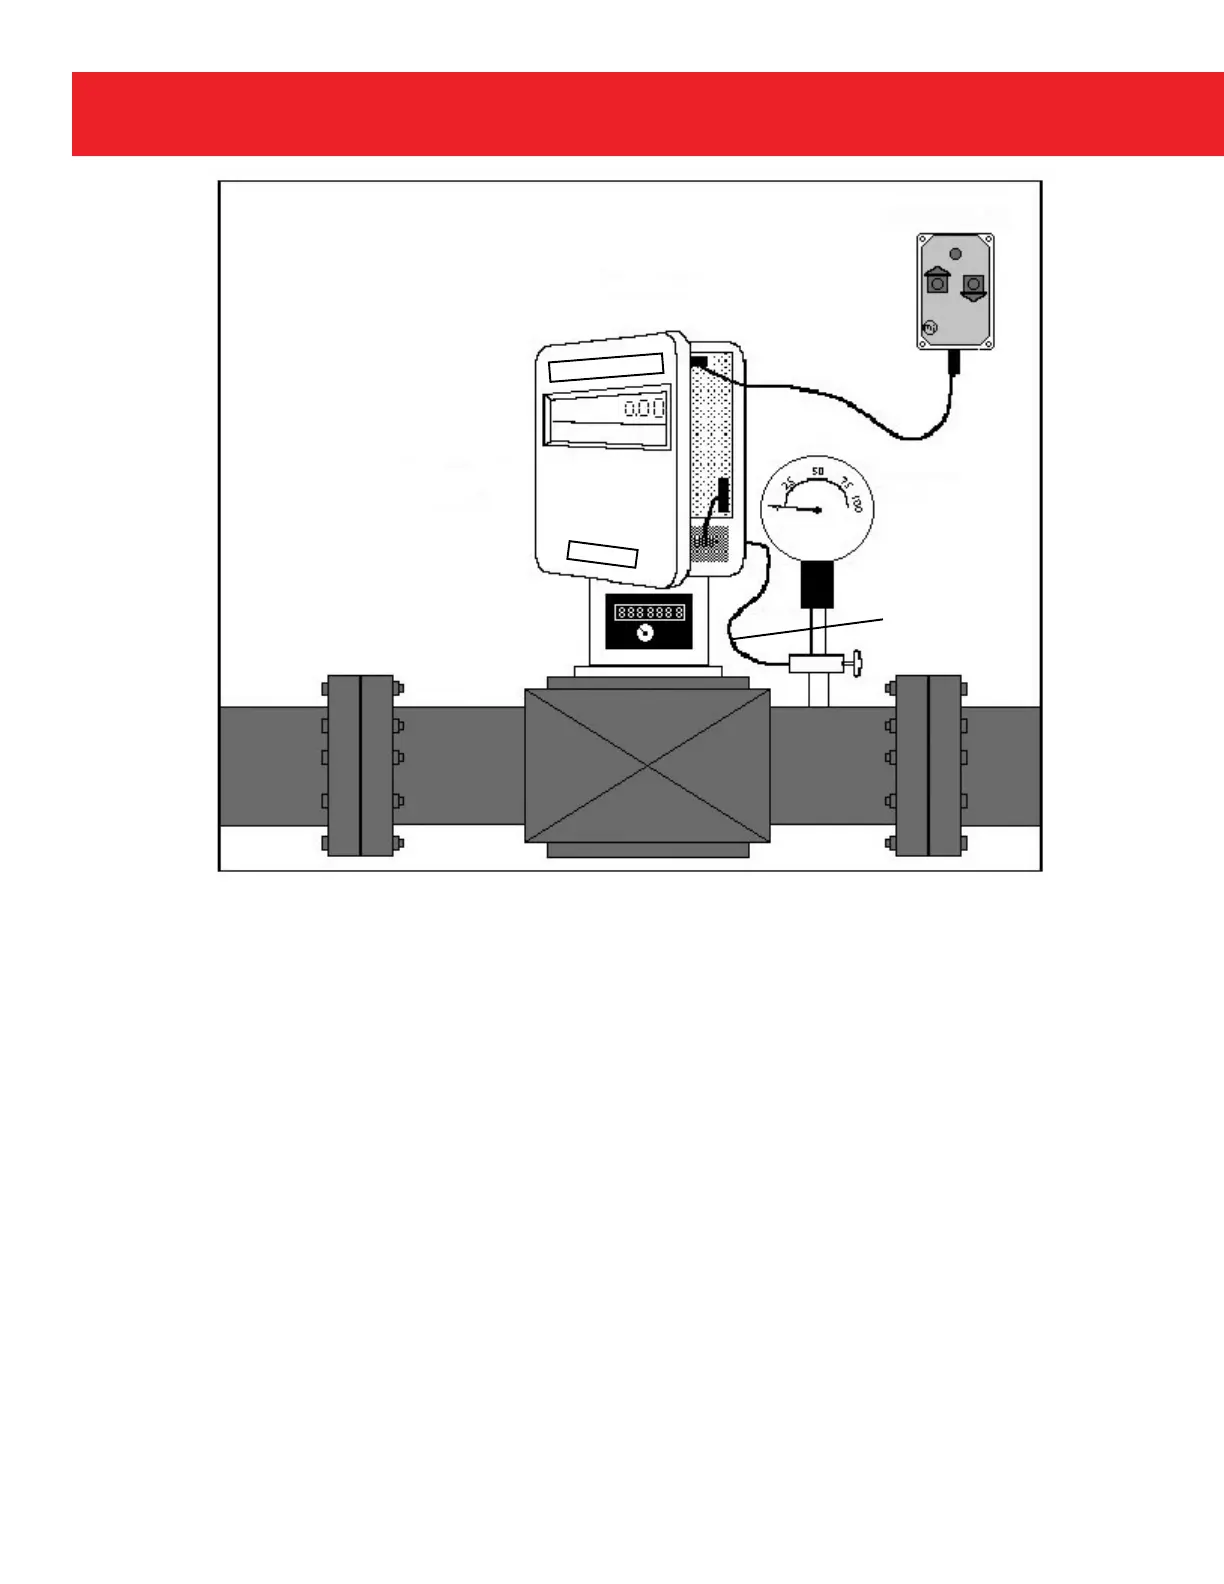
Refer to figure 20 during the single-point calibration procedure. Before starting the procedure, unlock and open
the Mini-AT's door. Locate connector J2 near the top center of the main circuit board. Connect a calibrated
pressure gauge to the same pressure source that supplies pressure to the Mini-AT's pressure transducer. Note:
If the Mini-AT is a dual pressure model, make sure to verify if using the PCor (P1) or PLog (P2) Transducer.
1)
Plug the Mercor Mini Field Calibrator cable onto the main circuit board connector J2. Make certain
all six pins are fully inserted into the black plastic cable connector. The cable connector is angled
to prevent the connector from being plugged in upside-down.
M E R C U R Y
ENTER
MERCOR MINI
Field Calibrator
Field Calibrator
Mini-AT
Front View with
Door Ajar
Calibrated
Pressure
Gauge
Pressure
Line
Fig. 20
Single Point Pressure Calibration
MINI-AT
 Loading...