TUNING THE CHASSIS 36
8.17Adjusting the handlebar position x
Warning
Danger of accidents Handlebar breakage.
– If the handlebar is bent or straightened it will cause material fatigue, and the handlebar can break. Always replace handle-
bar.
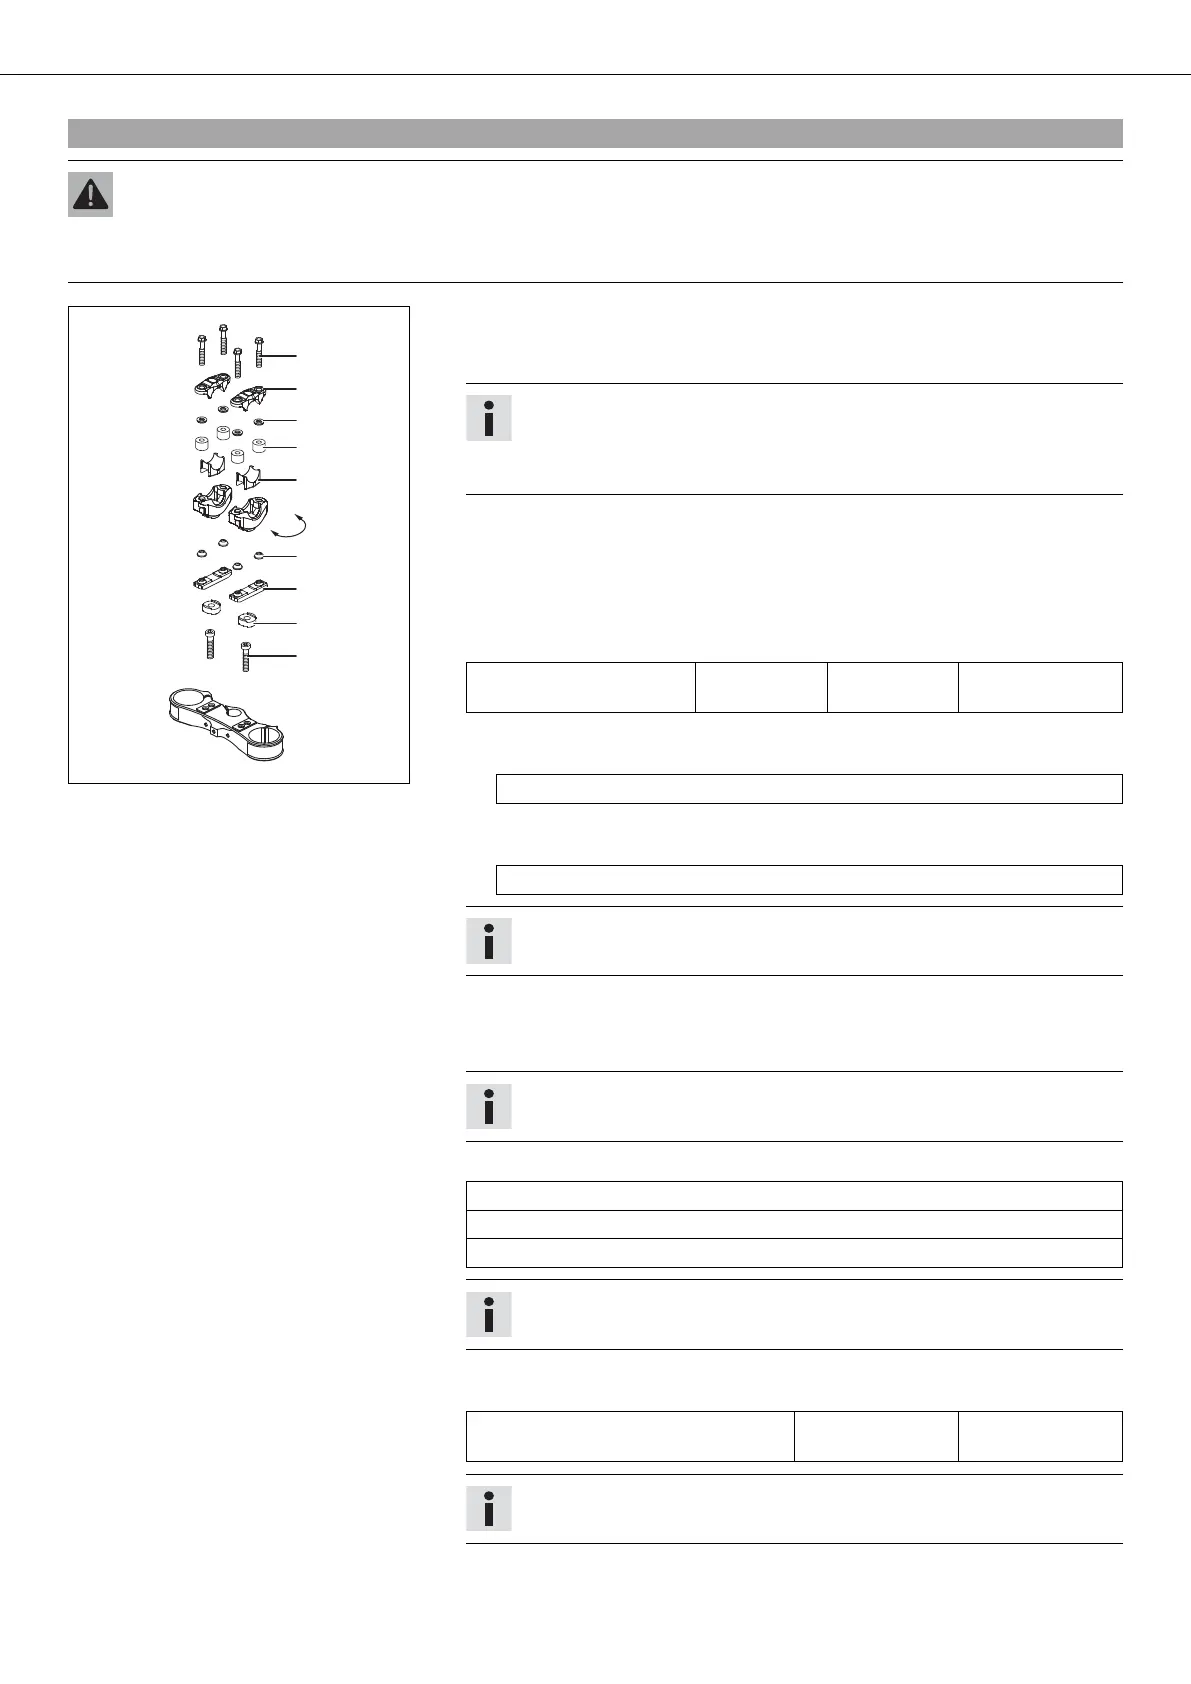
400343-10
– Remove the four screws . Remove handlebar clamps with rubber washers
and elastomers .
– Remove the handlebar and lay it to one side.
Info
Protect the motorcycle and its attachments against damage by covering
them.
Do not bend the cables and lines.
– Remove the lower shells .
– Take out clamp bar with the rubber cones .
– Remove the two screws . Remove the handlebar support.
– Place the handlebar support in the required position. Mount and tighten the two
screws .
Guideline
Screw, handlebar support M10 40 Nm
(29.5 lbf ft)
Loctite
®
243™
Condition
Spacer mounted:
Use a M10x35 screw
Condition
Without a spacer :
Use a M10x25 screw
Info
Position the left and right handlebar supports evenly.
– Insert rubber cones and clamp bar .
– Insert lower shells .
– Position the handlebar.
Info
Make sure cables and wiring are positioned correctly.
– Position handlebar clamps with rubber washers and elastomers .
Elastomer kit green - soft quality (SXS05125203)
Elastomer kit yellow - medium quality (standard) (SXS05125204)
Elastomer kit red - hard quality (SXS05125205)
Info
The elastomers are available in different versions.
– Mount and evenly tighten the four screws .
Guideline
Screw, handlebar clamp M8 16 Nm
(11.8 lbf ft)
Info
Make sure the gap width is even.
 Loading...