Chapter 8 Clutch and driveline
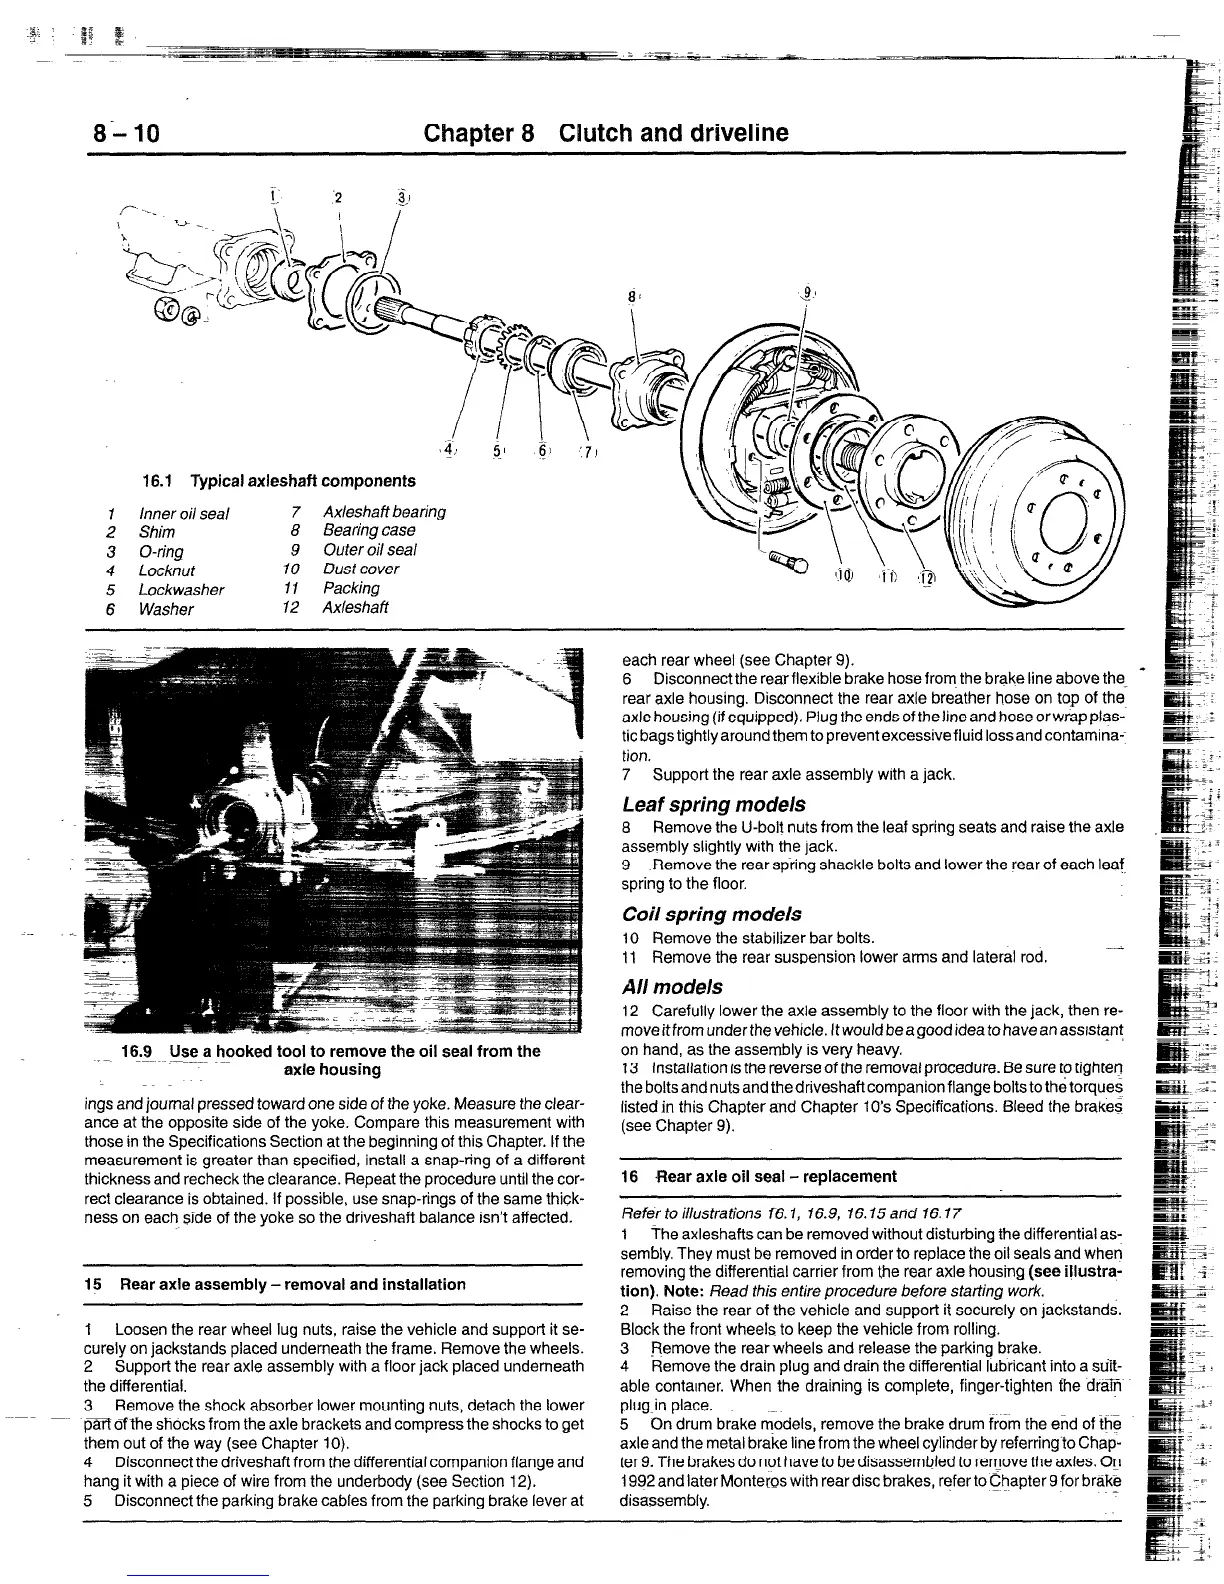
16.1 Typical axleshaft components
Inner oil seal
7 Axleshaft bearir
Shim
8 Bearing case
O-ring
9 Outer oil sea/
Locknut
10 Dusf cover
Lockwasher
11 Packing
Washer
12 Axleshaft
16.9 Use a hooked tool to remove the oil seal from the
. ~-~ ~-__~ ~~
axle housing
ings and journal pressed toward one side of the yoke. Measure the clear-
ance at the opposite side of the yoke. Compare this measurement with
those in the Specifications Section at the beginning of this Chapter. If the
measurement is greater than specified, install a snap-ring of a different
thickness and recheck the clearance. Repeat the procedure until the cor-
rect clearance is obtained. If possible, use snap-rings of the same thick-
ness on each side of the yoke so the driveshaft balance isn’t
affected.
15 Rear axle assembly - removal and installation
1 Loosen the rear wheel lug nuts, raise the vehicle and support it se-
curely on jackstands placed underneath the frame. Remove the wheels.
2 Support the rear axle assembly with a floor jack placed underneath
the differential.
3 Remove the shock absorber lower mounting nuts, detach the lower
~ parfofthe
shocks
from the axle brackets and compress the shocks to get
them out of the way (see Chapter 10).
4 Disconnect the driveshaft from the differential companion flange and
hang it with a piece of wire from the underbody (see Section 12).
5 Disconnect the parking brake cables from the parking brake lever at
each rear wheel (see Chapter 9).
6 Disconnectthe rearflexible brake hose from the brake line above the
rear axle housing. Disconnect the rear axle breather hose on top of the
axle housing (if equipped). Plug the ends of the line and hose orwrap plas-
tic bags tightly around them to prevent excessive fluid loss and contamina;
tion.
7 Support the rear axle assembly wrth a jack.
Leaf spring models
8 Remove the U-bolt nuts from the leaf spring seats and raise the axle
assembly slightly with the
jack.
9 Remove the rear spring shackle bolts and lower the rear of each leaf,
spring to the floor.
Coil spring models
10 Remove the stabilizer bar bolts.
11 Remove the rear suspension lower arms and lateral rod. --
A// mode/s
12 Carefully lower the axle assembly to the floor with the jack, then re-
move it from under the vehicle. It would be a good idea to have an assistant
on hand, as the assembly is very heavy.
13 Installation is the reverseof the removal procedure. Be sure to tighten
the bolts and nuts and the driveshaft companion flange bolts to the torques
listed in this Chapter and Chapter 10’s Specifications. Bleed the brake5
(see Chapter 9).
16 ,Rear axle oil seal - replacement
Refer to illustrafions 16.1, 76.9, 16.15 and 16.77
1 The axleshafts can be removed without disturbing the differential as-
sembly. They must be removed in order to replace the oil seals and when
removing the differential carrier from the rear axle housing (see illustra-
tion). Note: Read this entire procedure before starting work.
2 Raise the rear of the vehicle and support it securely on jackstands.
Block the front wheels to keep the vehicle from rolling.
3 -Remove the rearwheels and release the parking brake.
4 Remove the drain plug and drain the differential lubricant into a suit-
able contamer. When the draining is complete, finger-tighten the dram
plug~in place.
5 On drum brake models, remove the brake drum from the end of the
axle and the metal brake line from the wheel cylinder by referring to Chap-
ter 9. The brakes do not have to be disassembled to remove the axles. OIJ
1992 and
later Monteros with rear disc brakes, refer to Chapter 9 for brake
disassembly.
 Loading...


