Chapter 1 Tune-up and routine maintenance
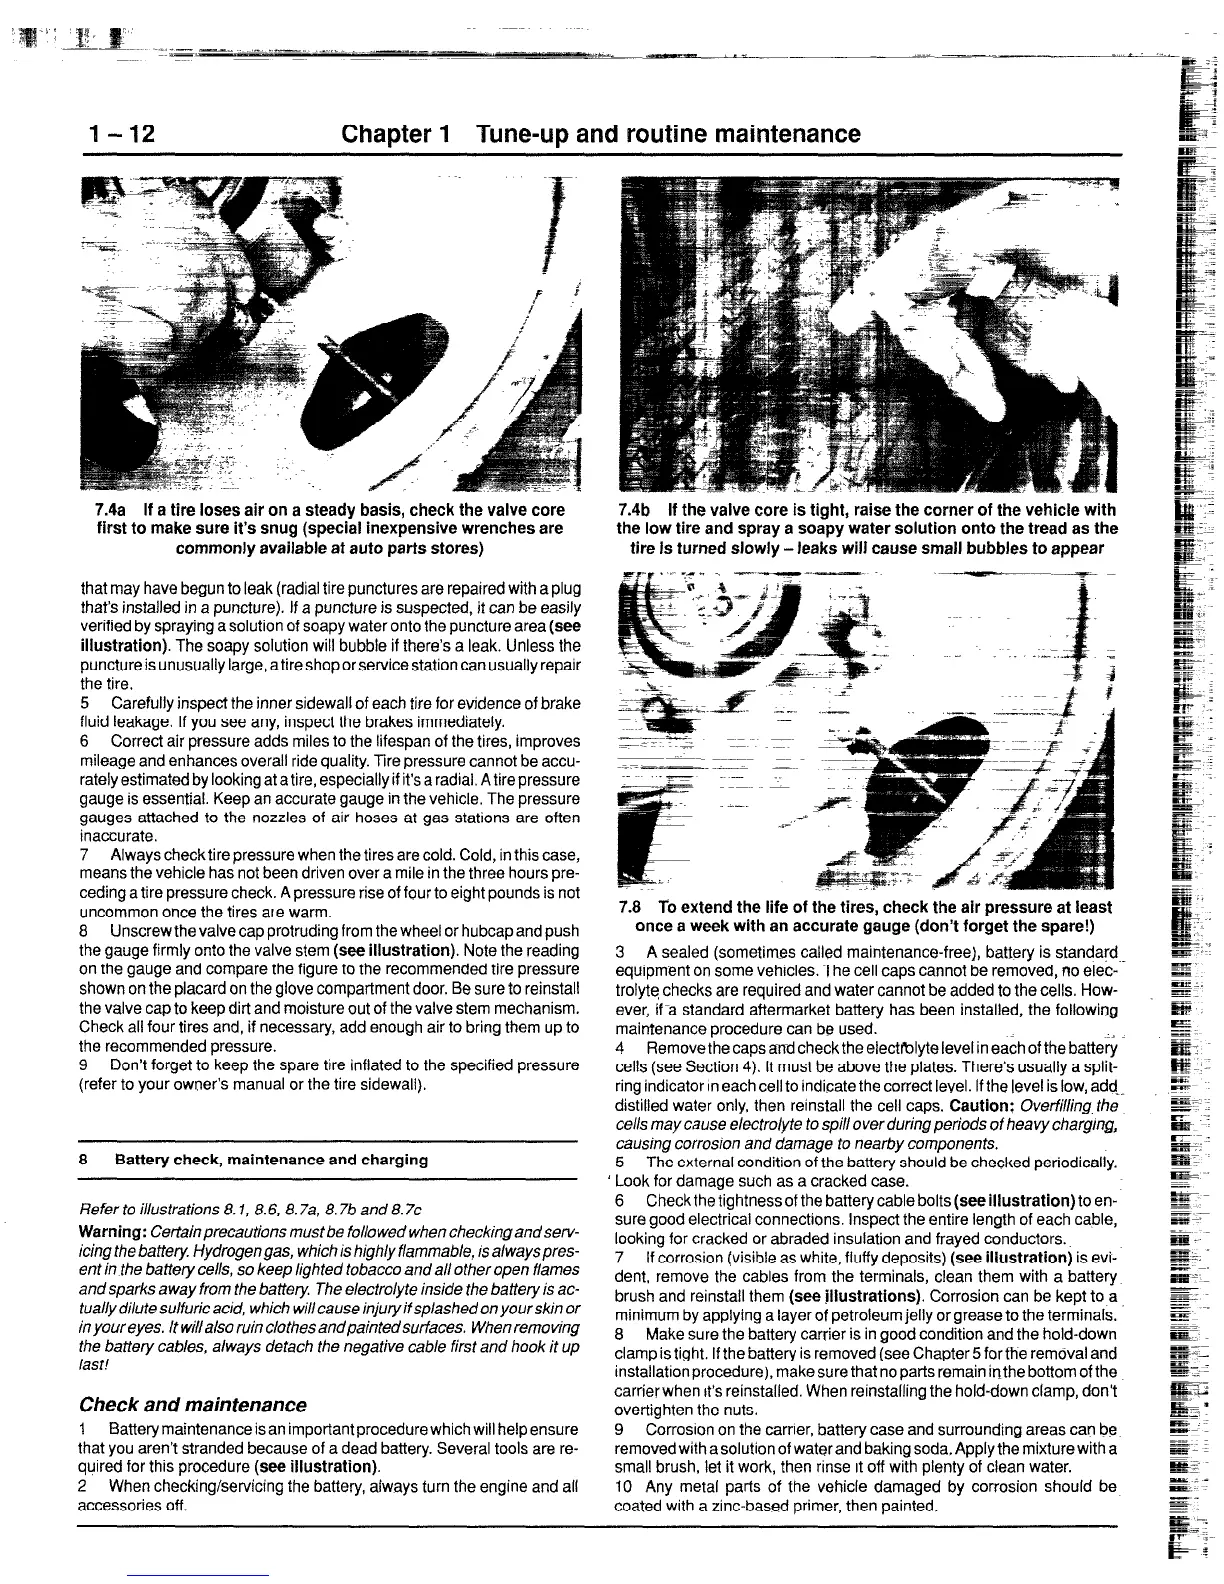
7.4a If a tire loses air on a steady basis, check the valve core
first to make sure it’s snug (special inexpensive wrenches are
commonly available at auto parts stores)
that may have begun to leak (radial tire punctures are repaired with a plug
thar’s installed in a puncture). If a puncture is suspected, it can be easily
verified by spraying a solution of soapy water onto the puncture area (see
illustration). The soapy solution will bubble if there’s a leak. Unless the
puncture is unusually large, a tire shop or service station can usually repair
the tire.
5 Carefully inspect the inner sidewall of each tire for evidence of brake
fluid leakage. If you see any, inspect the brakes immediately.
6 Correct air pressure adds miles to the lifespan of the tires, improves
mileage and enhances overall ride quality. Tire pressure cannot be accu-
rately estimated by looking at a tire, especially if it’s a radial. A tire pressure
gauge is essential. Keep an accurate gauge in the vehicle. The pressure
gauges attached to the nozzles of air hoses at gas stations are often
inaccurate.
7 Always check tire pressure when the tires are cold. Cold, in this case,
means the vehicle has not been driven over a mile in the three hours pre-
ceding a tire pressure check. A pressure rise of four to eight pounds is not
uncommon once the tires are warm.
8 Unscrew the valve cap protruding from the wheel or hubcap and push
the gauge firmly onto the valve stem (see illustration). Note the reading
on the gauge and compare the figure to the recommended tire pressure
shown on the placard on the glove compartment door. Be sure to reinstall
the valve cap to keep dirt and moisture out of the valve stem mechanism.
Check all four tires and, if necessary, add enough air to bring them up to
the recommended pressure.
9 Don’t forget to keep the spare tire inflated to the specified pressure
(refer to your owner’s manual or the tire sidewall).
8
Battery check, maintenance and charging
Refer to illustrations 8.1, 8.6, 8.7a, 8.76 and 8.7~
Warning: Certain precautions must be followed when checking andserv-
icing the battery. Hydrogengas, which is high/y flammable, IS alwayspres-
ent in the battery cells, so keep lighted tobacco andall other open flames
and sparks away from the battery. The electrolyte inside the battery is ac-
tually dilute sulfuric acid, which will cause injury if splashed on your skin or
in your eyes. It wiflalso ruin clothes andpaintedsurfaces. When removing
the battery cables, always detach the negative cable first and hook it up
last!
Check and maintenance
1 Battery maintenance is an important procedure which will help ensure
that you aren’t stranded because of a dead battery. Several tools are re-
quired for this procedure (see illustration).
2 When checking/servicing the battery, always turn the engine and all
accessories off.
7.4b If the valve core is tight, raise the corner of the vehicle with
the low tire and spray a soapy water solution onto the tread as the
tire Is turned slowly -leaks will cause small bubbles to appear
7.8 To extend the life of the tires, check the air pressure at least
once a week with an accurate gauge (don’t forget the spare!)
3 A sealed (sometimes called maintenance-free), battery is standard...
equipment on some vehicles. The cell caps cannot be removed, no elec-
trolyte checks are required and water cannot be added to the cells. How-
ever, ifa standard aftermarket battery has been installed, the following
maintenance procedure can be used.
4 Remove the caps and check the electmlyte level in each of the battery
cells (see Section 4). It must be above the plates. There’s usually a split-
ring indicator In each cell to indicate the correct level. If the level is low, add
distilled water only, then reinstall the cell caps. Caution: Overfilling. the
cells may cause electrolyte to spill over during periods of heavy charging,
causing corrosion and damage to nearby components.
5 The external condition of the battery should be checked periodically.
Look for damage such as a cracked case.
6 Check the tightness of the battery cable bolts (see illustration) to en-
sure good electrical connections. Inspect the entire length of each cable,
looking for cracked or abraded insulation and frayed conductors.
7 If corrosion (visible as white, fluffy deposits) (see illustration) is evi-
dent, remove the cables from the terminals, clean them with a battery
brush and reinstall them (see illustrations). Corrosion can be kept to a.
minimum by applying a layer of petroleum jelly or grease to the terminals.
8 Make sure the battery carrier is in good condition and the hold-down
clamp is tight. If the battery is removed (see Chapter 5 for the removal and
installatronprocedure), make sure that no parts remain inthe bottom of the
carrierwhen It’s reinstalled. When reinstalling the hold-down clamp, don’t
overtighten the nuts.
9 Corrosron on the carrier, battery case and surrounding areas can be
removedwith a solution of water and baking soda, Apply the mixture with a
small brush, let it work, then rinse It off with plenty of clean water.
IO Any metal parts of the vehicle damaged by corrosion should be
coated with a zinc-based primer, then painted.
 Loading...


