Chapter 1 Tune-up and routine maintenance 7-77
13.18 Lubricate the oil filter gasket with clean engine oil before
installing the filter on the engine
15.1 The rocker arms on engines that do not require valve
adjustment look like these (arrows) -they don’t have adjustment
screws (if the rocker arms do have adjustment screws for the
intake and exhaust or smaller jet valves, follow the procedure
in the text)
16 Compare the old filter with the new one to make sure they’re the same
type.
17 Use a clean rag to remove all oil, dirt and sludge from the area where
the oil filter mounts to the engine. Check the old filter to make sure the rub-
ber gasket isn’t stuck to the engine. if the gasket is stuck to the engine,
remove it.
18 Apply a light coat of clean oil to the rubber gasket on the new oil filter
(see illustration).
19 Attach the new filter to the engine, following the tightening directions
printed on the filter canister or packing box. Most filter manufacturers rec-
ommend against using a filter wrench due to the possibility of overtighten-
ing and damage to the seal.
20 Remove ail tools, rags, etc. from under the vehicle, being careful not
to spill the oil in the drain pan, then lower the vehicle.
21 Move to the engine compartment and locate the oil filler cap.
22 Pour the fresh oil into the filler opening. A funnel may be used.
23 Pour three or four quarts of fresh oil into the engine. Wait a few min-
utes to allow the oil to drain into the pan, then check the level on the oil
dipstick (see Section 4 if necessary). if the oil level is above the L mark,
start the engine and allow the new oil to circulate.
24 Runtheengineforonlyaboutaminuteandthenshutitoff. Immediate-
ly look under the vehicle and check for leaks at the oil pan drain plug and
around the oil filter. if either one is leaking, tighten it a little more.
25 With the new oil circulated and the filter now completely full, recheck
the level on the dipstick and add more oil as necessary.
26 During the first few trips after an oil change, make it a point to check
frequently for leaks and correct oil level.
27 The old oil drained from the engine cannot be reused in its present
state and should be disposed of. Oil reclamation centers, auto repair
shops and gas stations will normally accept the oil, which can be refined
t
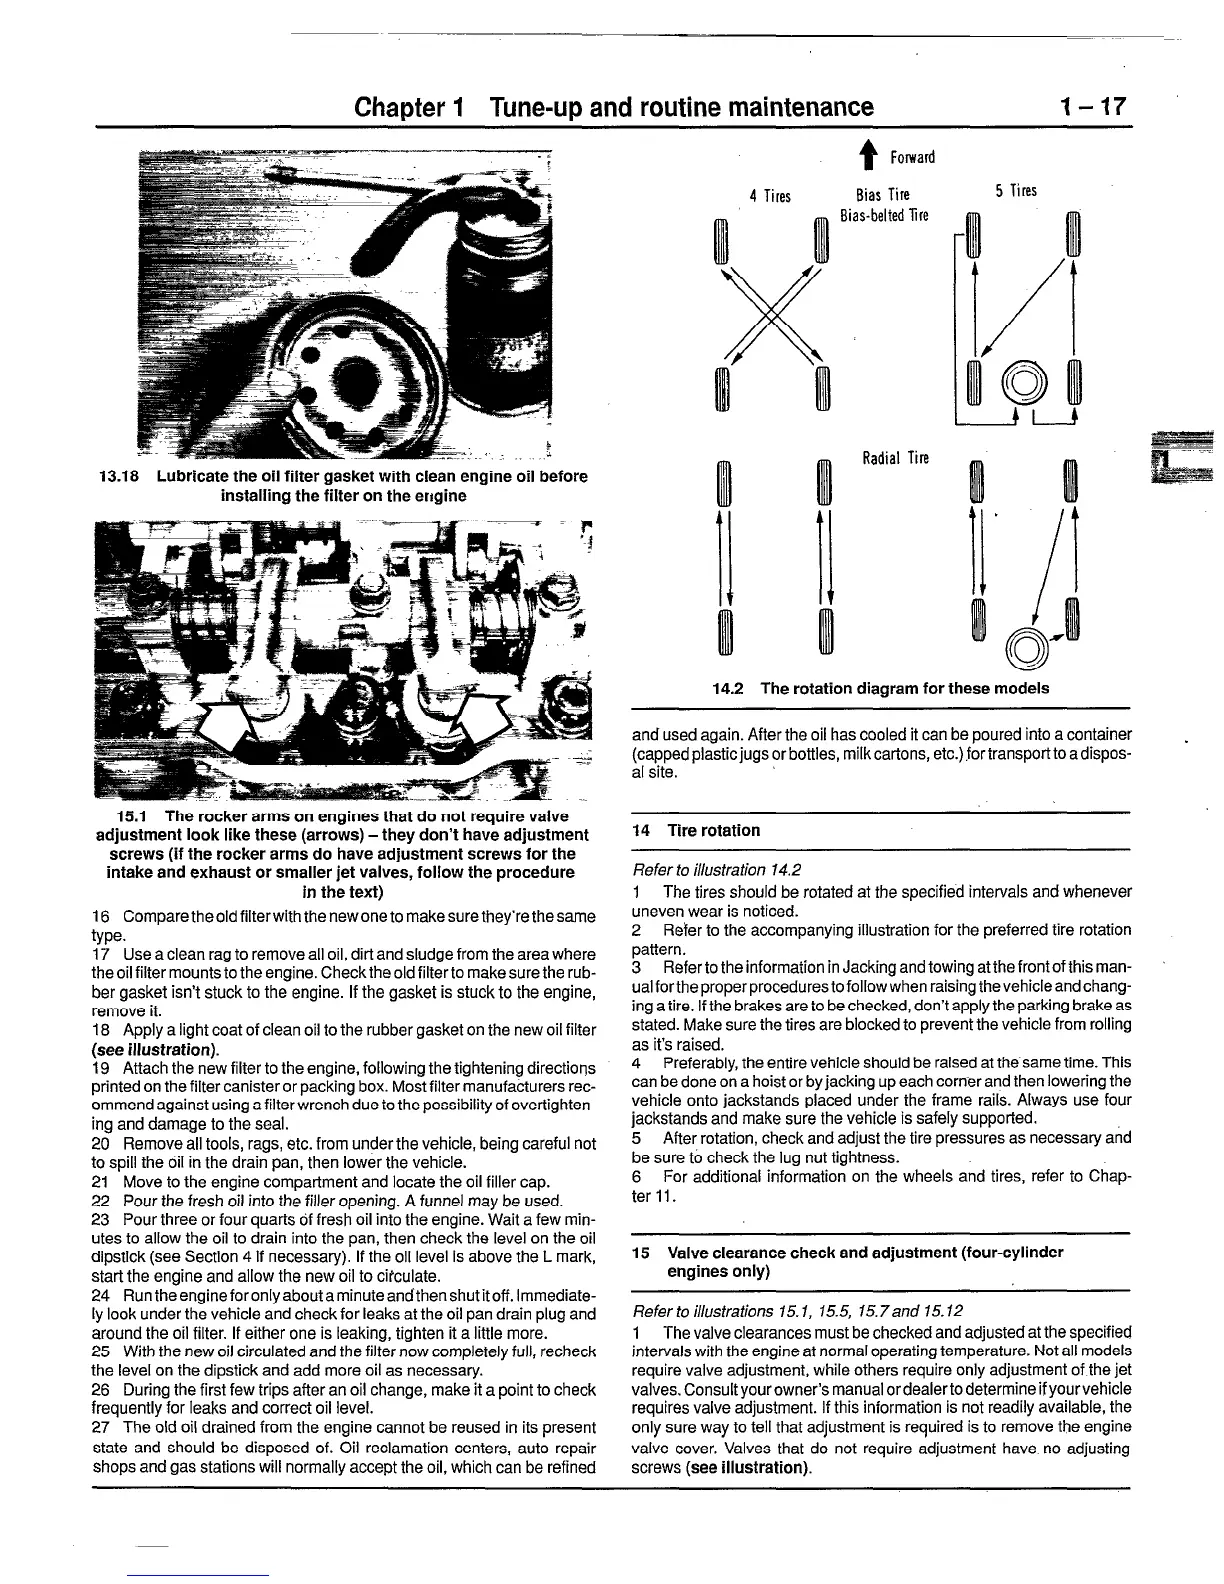
Forward
4 Tires
Bias Tire
5 Tires
,, ,, Bias-belted Tire rl QD
Radial Tire
14.2 The rotation diagram for these models
and
used again. After the oil has cooled it can be poured into a container
$;yrd plastic jugs or bottles, milk cartons, etc.) for transport to adispos-
.
14 Tire rotation
Refer to illustration 14.2
1
The tires should be rotated at the specified intervals and whenever
uneven wear is noticed.
2 Refer to the accompanying illustration for the preferred tire rotation
pattern.
3
Refer to the information in Jacking and towing at the front of this man-
ualfortheproperprocedurestofollow when raising thevehicleandchang-
ing a tire. if the brakes are to be checked, don’t apply the parking brake as
stated. Make sure the tires are blocked to prevent the vehicle from rolling
as it’s raised.
4
Preferably, the entire vehicle should be raised at the same time. This
can be done on a hoist or by jacking up each corner and then lowering the
vehicle onto jackstands placed under the frame rails. Always use four
jackstands and make sure the vehicle is safely supported.
5
After rotation, check and adjust the tire pressures as necessary and
be sure to check the lug nut tightness.
6
For additional information on the wheels and tires, refer to Chap-
ter 11.
15 Valve clearance check and adjustment (four-cylinder
engines only)
Refer to illustrations 15. I, 15.5, 15.7and 15.12
1 The valve clearances must be checked and adjusted at the specified
intervals with the engine at normal operating temperature. Not all models
require valve adjustment, while others require only adjustment of the jet
valves. Consult your owner’s manual or dealer to determine if your vehicle
requires valve adjustment. If this information is not readily available, the
only sure way to tell that adjustment is required is to remove the engine
valve cover. Valves that do not require adjustment have no adjusting
screws (see illustration).
 Loading...


