Chapter 4 Fuel and exhaust systems
4-15
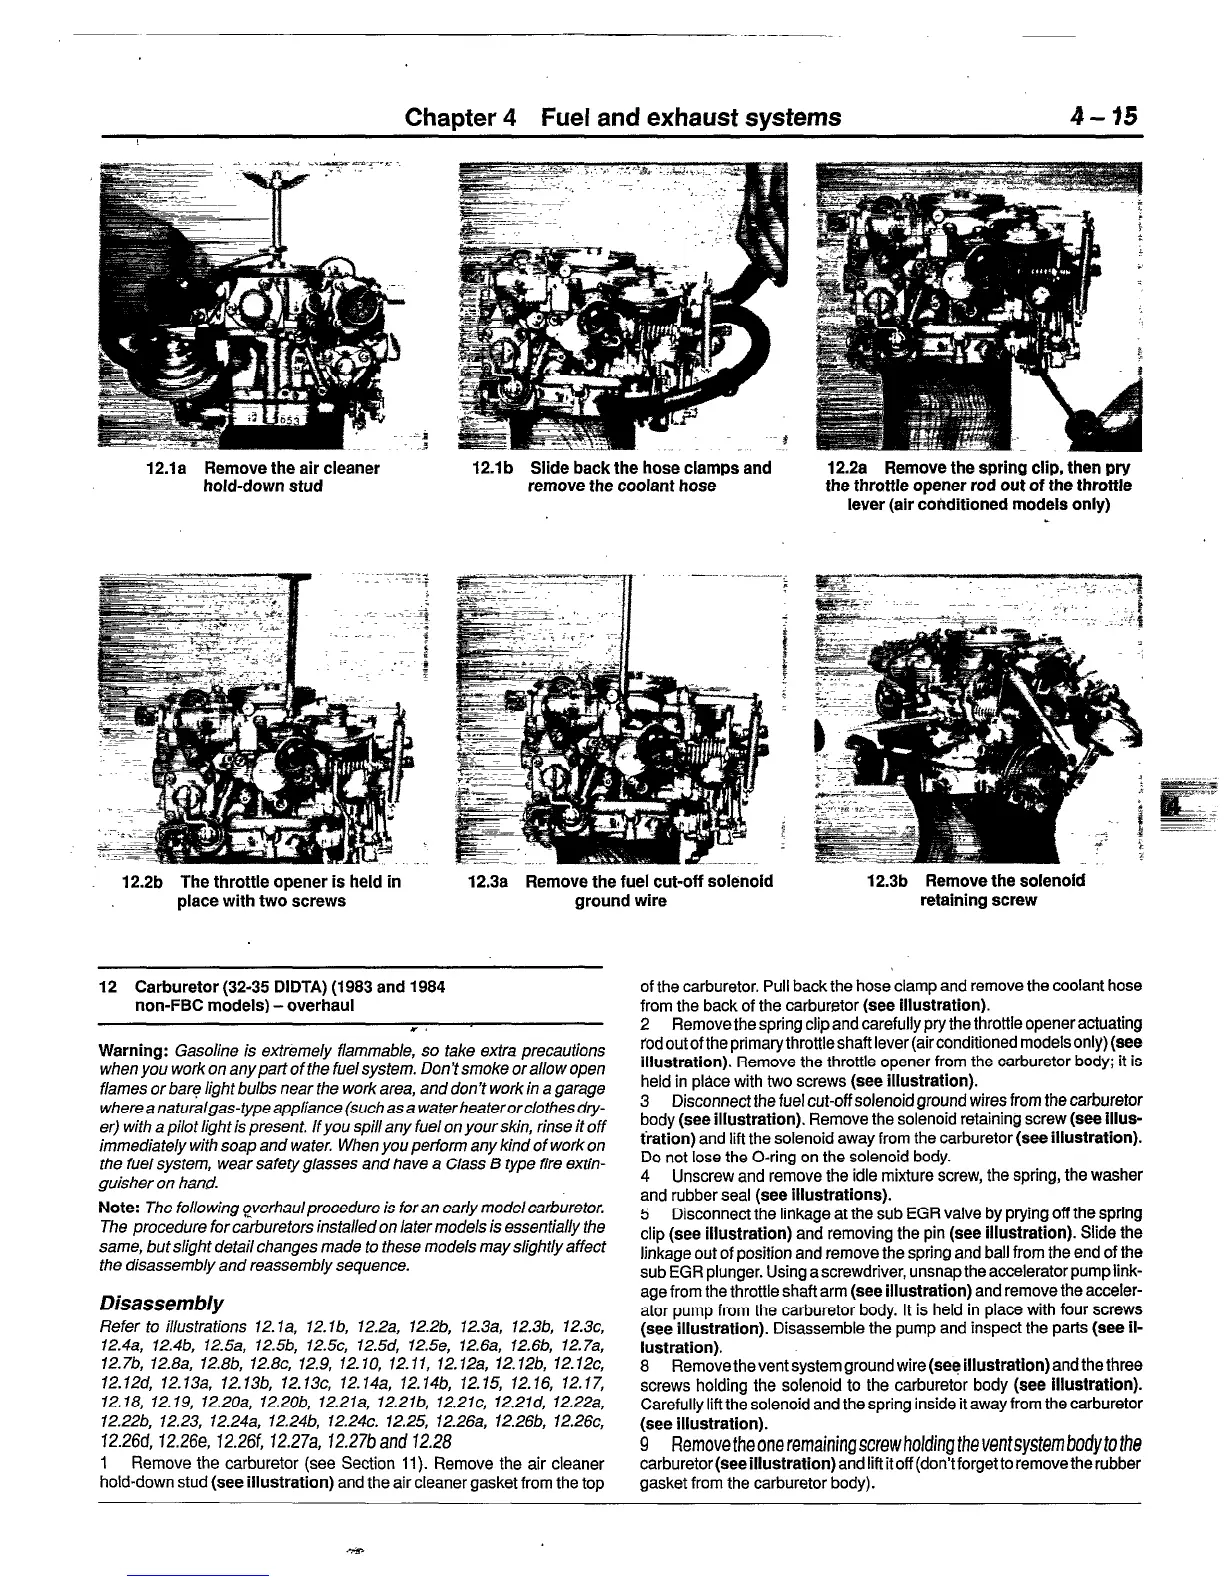
12.1 b Slide back the hose clamps and
remove the coolant hose
12.la Remove the air cleaner
hold-down stud
12.2b The throttle opener is held in
place with two screws
12.3a Remove the fuel cut-off solenoid
ground wire
12.2a Remove the spring clip, then pry
the throttle opener rod out of the throttle
lever (air conditioned models only)
.
12.3b Remove the solenoid
retaining screw
12 Carburetor (32-35 DIDTA) (1983 and 1984
non-FBC models) -overhaul
Warning:
Gasoline is extremely flammable, so take extra precautions
when you work on any part of the fuel system. Don’t smoke or allow open
flames or bare light bulbs near the work area, and don’t
work
in a garage
whereanaturalgas-typeappliance (sochasa waterheaterorclothesdry-
er) with a pilot light is present. If you spill any fuel on your skin, rinse it off
immediately with
soap and
water. When you perform any kind of work on
the fuel system, wear safety glasses and have a C/ass 6 type fire extin-
guisher on hand.
Note:
The following gverhaul procedure is for an early model carburetor.
The procedure for carburetors installed on later models is essentially the
same, but slight detail changes made to these models may slightly affect
the disassembly and
reassembly sequence.
Disassembly
Refer to illustrations iZ.la, 12.14 12.2a, 12.2b, 12.3a, 12.36, 12.3c,
12.4a, 12.4b, 12.5a, 12.5b, 12.5c, 12.5d, 12.5e, 12.6a, 12.6b, 12.7a,
12.7b, 12.8a. 12.8b, 12.8~. 12.9, 12.10, 12.11, 12.12a, 12.12b, 12.12c,
iZ.i2d, 12.13a, 12.13b, 12.13c, 12.14a, 12.14b, 12.15, 12.16, 12.17,
12.18, 12.19, 12.2Oa, 12.206, 12.2ia, 12.2ib, 12.2ic, 12.2id, 12.22a,
12.22b. 12.23, 12.24a, 12.24b, 12.24~. 12.25, 12.26a, 12.26b, 12.26c,
1226d, 1226e, 1226f, 12.27a, 12.27band 12.28
1 Remove the carburetor (see Section 11). Remove the air cleaner
hold-down stud (see illustration) and the air cleaner gasket from the top
of the carburetor. Pull back the hose clamp and remove the coolant hose
from the back of the carburetor (see illustration).
2 Remove the spring clip and carefully pry the throttle opener actuating
rodoutoftheprimarythrottleshaftlever(airconditioned modelsonly)(see
illustration). Remove the throttle opener from the carburetor body; it is
held in place with two
screws
(see illustration).
3 Disconnect the fuel cut-off solenoid ground wires from the carburetor
body (see illustration). Remove the solenoid retaining screw (see lllus-
nation) and lift the solenoid away from the carburetor (see illustration).
Do not lose the O-ring on the solenoid body.
4 Unscrew and remove the idle mixture screw, the spring, the washer
and rubber seal (see illustrations).
5 Disconnect the linkage at the sub EGR valve by prying off the spring
clip (see illustration) and removing the pin (see illustration). Slide the
linkage out of position and remove the spring and ball from the end of the
sub EGR plunger. Using a screwdriver, unsnap the accelerator pump link-
age from the throttle shaft arm (see illustration) and remove the acceler-
ator pump from the carburetor body. It is held in place with four screws
(see illustration). Disassemble the pump and inspect the parts (see ll-
lustration).
8 Remove the vent system ground wire (see illustration) and the three
screws holding the solenoid to the carburetor body (see illustration).
Carefully lift the solenoid and the spring
inside it away from the carburetor
(see illustration).
9 Remove the one remaining screw holding the ventsystem body to the
carburetor (see illustration) and lift it off (don’t forget to remove the rubber
gasket from the carburetor body).
 Loading...


