Chapter 3 Operation
3.3 Controls on the Microscope Body
57
3.3 Controls on the Microscope Body
Ti-E and Ti-E/B microscope bodies have operation panels on the front, left, and right for operation of various
motorized parts.
3.3.1 Front Operation Panel
L80
EYE
DISPLAY
MEMORY
PFS
ON RECALL
Z
-
RESETBRIGHTNESS
R100L100
FOCUS
1X
1.5X
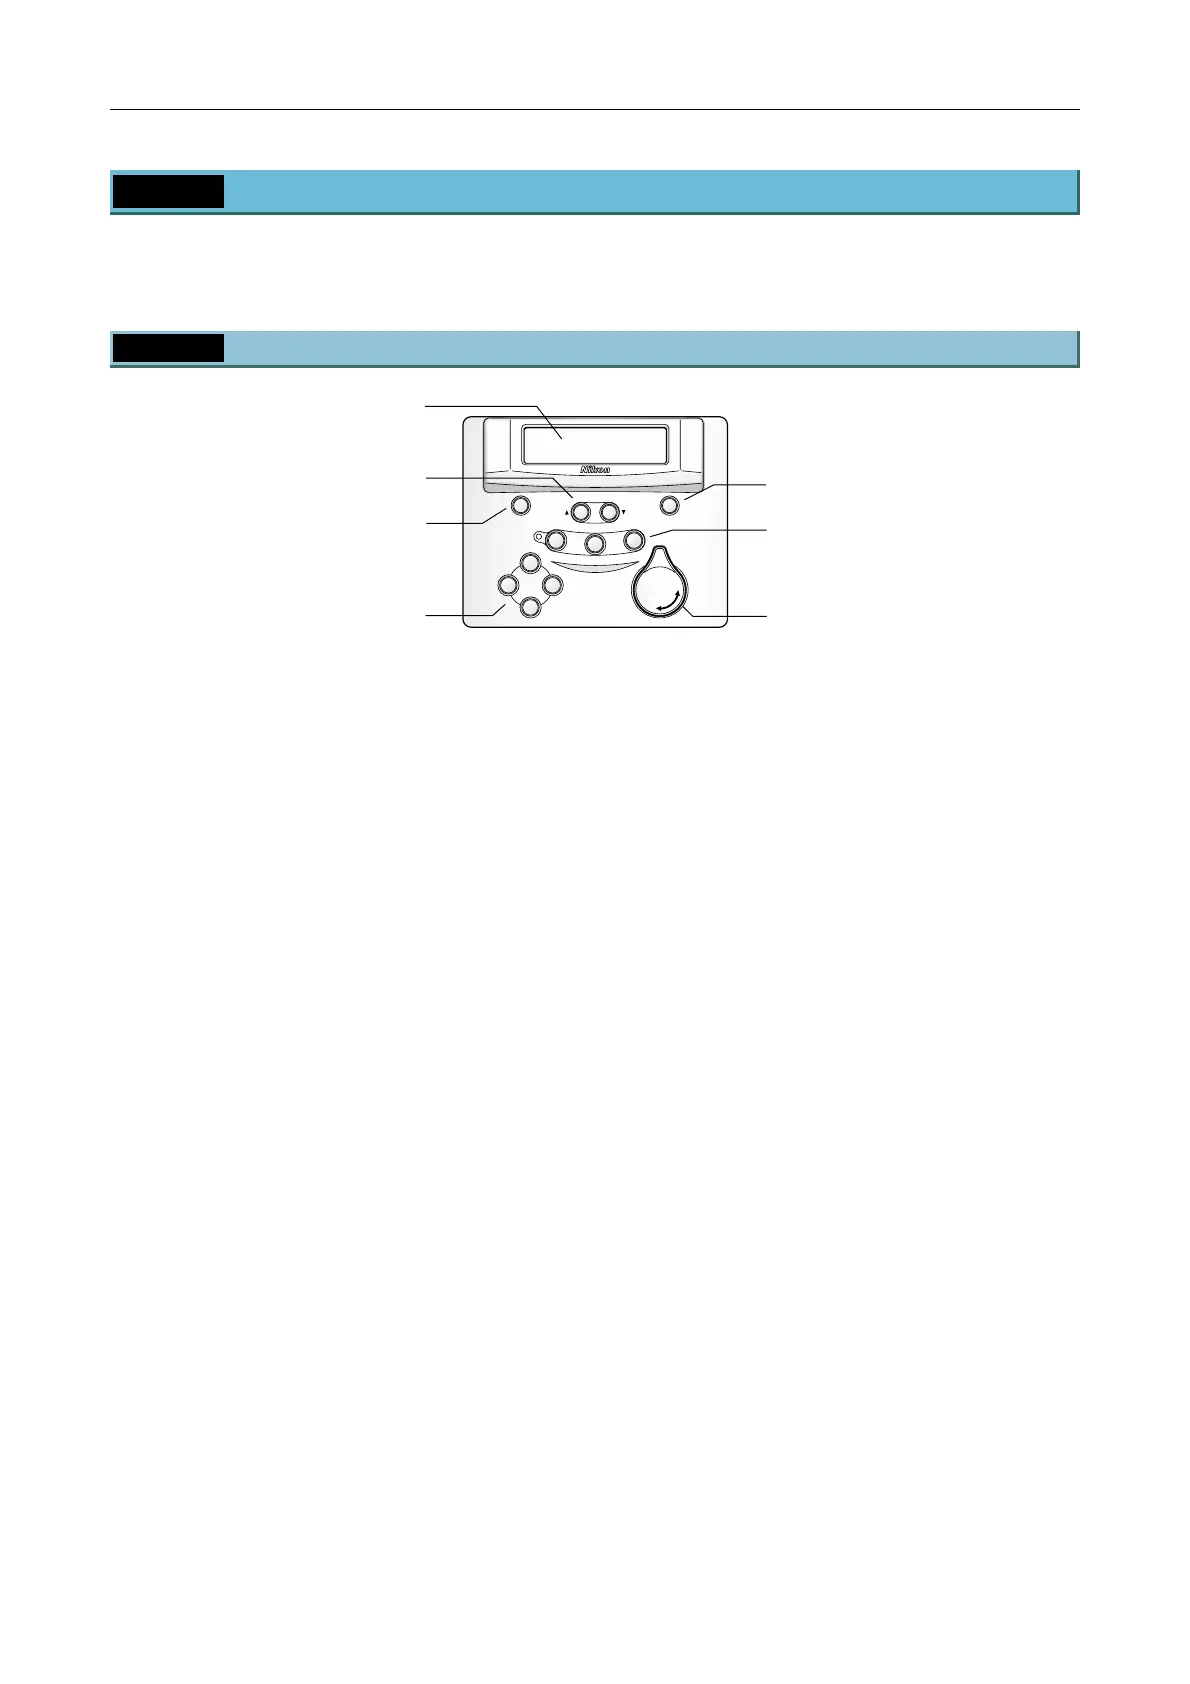
Figure 3-6 Front operation panel
(1) Status display panel
The microscope status appears here. Multiple
display patterns are provided. Select the pattern
that best suits your need. When the microscope
is turned on, the initial pattern will be displayed.
(See page 58.)
(2) DISPLAY switches (display item selection)
The up/down arrow switches change the display
content of the status display panel. Multiple
display patterns are provided. (See page 58.)
(3) BRIGHTNESS switch (display brightness
selection)
This switch changes the illumination of the status
display panel and LEDs on the body between
bright, dim, and off. Use this switch to darken the
room for epi-fl microscopy or so on.
When the switch is pressed, the status will cycle
in the following order: [Panel ON, LED ON] →
[Panel dim, LED OFF] → [Panel OFF, LED OFF].
(4) Z-RESET switch (Z-axis position reset)
Press this switch to reset the Z-axis position on
the status display panel to zero. The Z-axis
position display will be increased when the
nosepiece is elevated, and decreased when the
nosepiece is lowered. By resetting the Z-axis
position display after setting the focus, you will
be to use the set position as a reference point.
For details, refer to Section 3.10, “Focusing
Mechanism Operation.”
(5) PFS control switches and indicator
These controls are used for in-focus observation
with the PFS (Perfect Focus System). For
details, refer to Section 3.14, “PFS Operation.”
FOCUS indicator: The indicator shows the
in-focus status. When the objective is placed in
the focus range, the indicator blinks. When the
PFS focuses on the reference position, the
indicator turns on.
ON switch: This switch turns on/off the in-focus
(PFS) function. The switch body is lit when the
PFS function is ON.
MEMORY switch: Press this switch to register
the distance (offset) from the reference position
to a given focal position. When an offset is
registered, the switch body is lit.
RECALL switch: Press this switch to restore the
offset.
(6) Optical path selector switch/indicator
This switch changes the output port for the
image. The switch for the selected port will be lit.
For details, refer to Section 3.4, “Optical Path
Selection.”
(7) Intermediate magnification selector knob
(1.5x ↔ 1x)
Rotate the knob to change the magnification of
the microscope body between 1x (1x objective
magnification) and 1.5x (1.5x objective
magnification). The setting of this knob is applied
for all output ports.
(1) Status display panel
(5) PFS control switches/indicators
(6) Optical path selecto
switch/indicato
(4) Z-RESET switch
(Z-axis position reset)
(3) BRIGHTNESS switch
(display brightness selection)
(2) DISPLAY switches
(display item selection)
(7) Intermediate magnification
selector knob (1.5x ↔ 1x)

 Loading...


