87Service Manual – SC6000 30 - Solution System
Troubleshooting
Level Sensors
Use the Service Mode display (shown below) to observe the states of the 4 level sensors.
Symptom: All of the sensors show full even though the tank is empty.
• Because all 4 sensors are showing failure, the most likely cause is a broken ground wire.
Symptom: All of the sensors show empty even though the tank is full.
• Because all 4 sensors are showing failure, the most likely cause is the wire connector is disconnected.
Symptom: One sensor always shows empty, regardless whether the tank is empty or full.
• Check for a short to ground in that sensor wire.
• Check to make sure the sensor oat is not stuck or fouled.
Symptom: One sensor always shows full, regardless whether the tank is empty or full.
• Check for an open circuit in that sensor wire.
• Check to make sure the sensor oat is not stuck or fouled.
• Slowly drain the tank and watch for a sensor transition as the water level approaches that sensor oat.
If you see a full-empty-full sensor transition, then the lower C-clip has slipped and the sensor oat is
too low.
Symptom: One sensor shows empty when the tank is full, AND full when the tank is empty.
• Both C-clips for that oat are too low.
• If this is the result of removing and replacing that oat, you may have turned the oat upsidedown,
making the C-clips out of position. (The magnetic ring is toward the top of the oat.)
Resetting a Float Position
Each of the oats are limited in their position by a pair of
C-clips. If these clips slip out of position, the sensor won’t
function properly. The position of the lower C-clip is the
more critical of the two, and the upper C-clip just needs to
permit ample travel.
1. With the sensor removed but still connected to the
machine, use service mode to view the 4 level sensors.
2. As necessary, slide one or both C-clips away from the
sensor position so you can move the oat back and forth past the
sensor position.
3. Starting from below, slide the oat up until the sensor registers
1 on the display. Mark the main rod below the oat at this
position.
4. Starting from above, slide the oat down until the sensor
registers a 1 on the display. Mark the main rod below the oat
at this position.
5. Position the lower C-clip between your two marks.
6. Position the upper C-clip about 1½" (40mm) above the lower clip.
E2 Main Controller
J2-10 LEVEL 1
Back
Scroll
J2-13 LEVEL 2
J2-14 LEVEL 3
J2-15 LEVEL 4
0
0
1
1

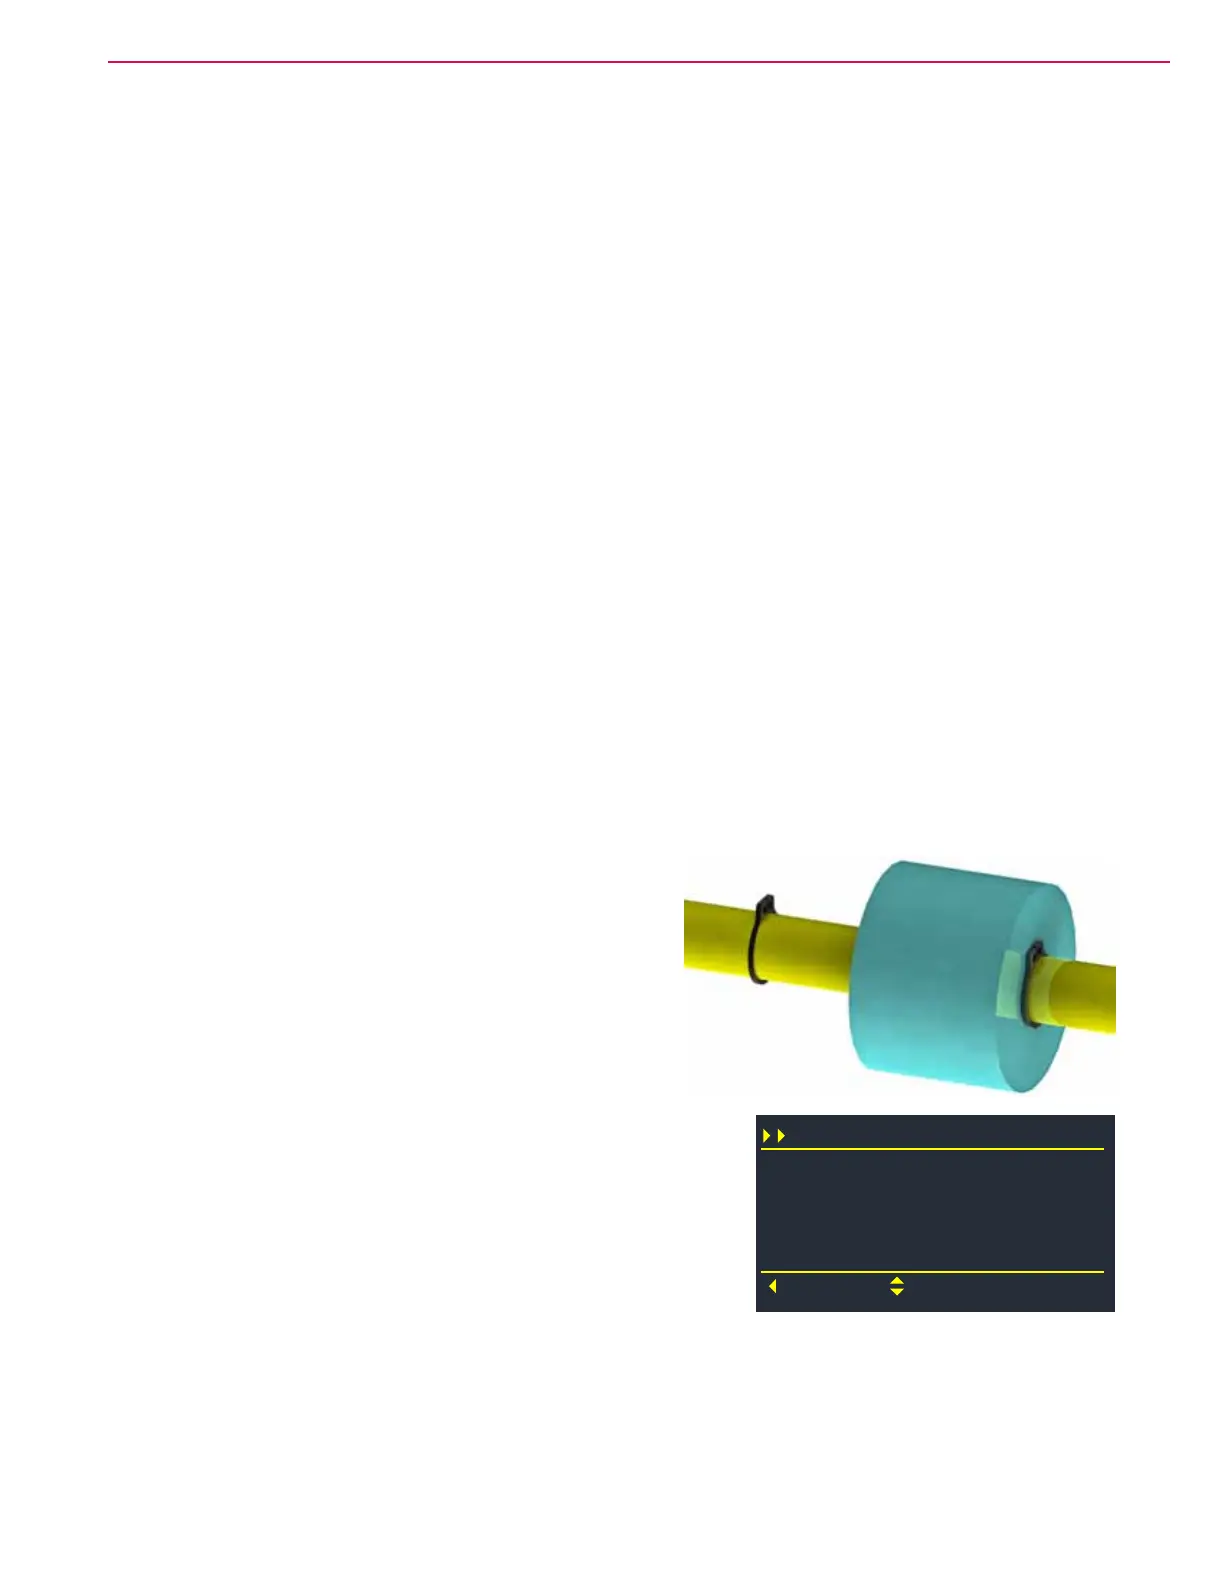 Loading...