Partitioning the Library Using SLC
7-4 StorageTek SL8500 Library Guide
■ Smallest slot increment is a quarter rail (for example: the inner wall of rail 1 on the
right side of the library)
■ Smallest drive increment is one drive.
■ Partition boundaries can span across pass-thru ports (PTPs).
Committing Partitioning Changes
No changes are made to the partitioning configuration until you complete these
procedures.
1. To prevent configuration conflicts, you should make the library unavailable to
other users and stop all host operations before committing partitioning changes.
2. Select the Commit (Step 4) tab.
3. Click Apply.
4. Update any affected host applications to recognize the changes (see the host
software documentation).
Meaning of the SLC Partitioning Icons
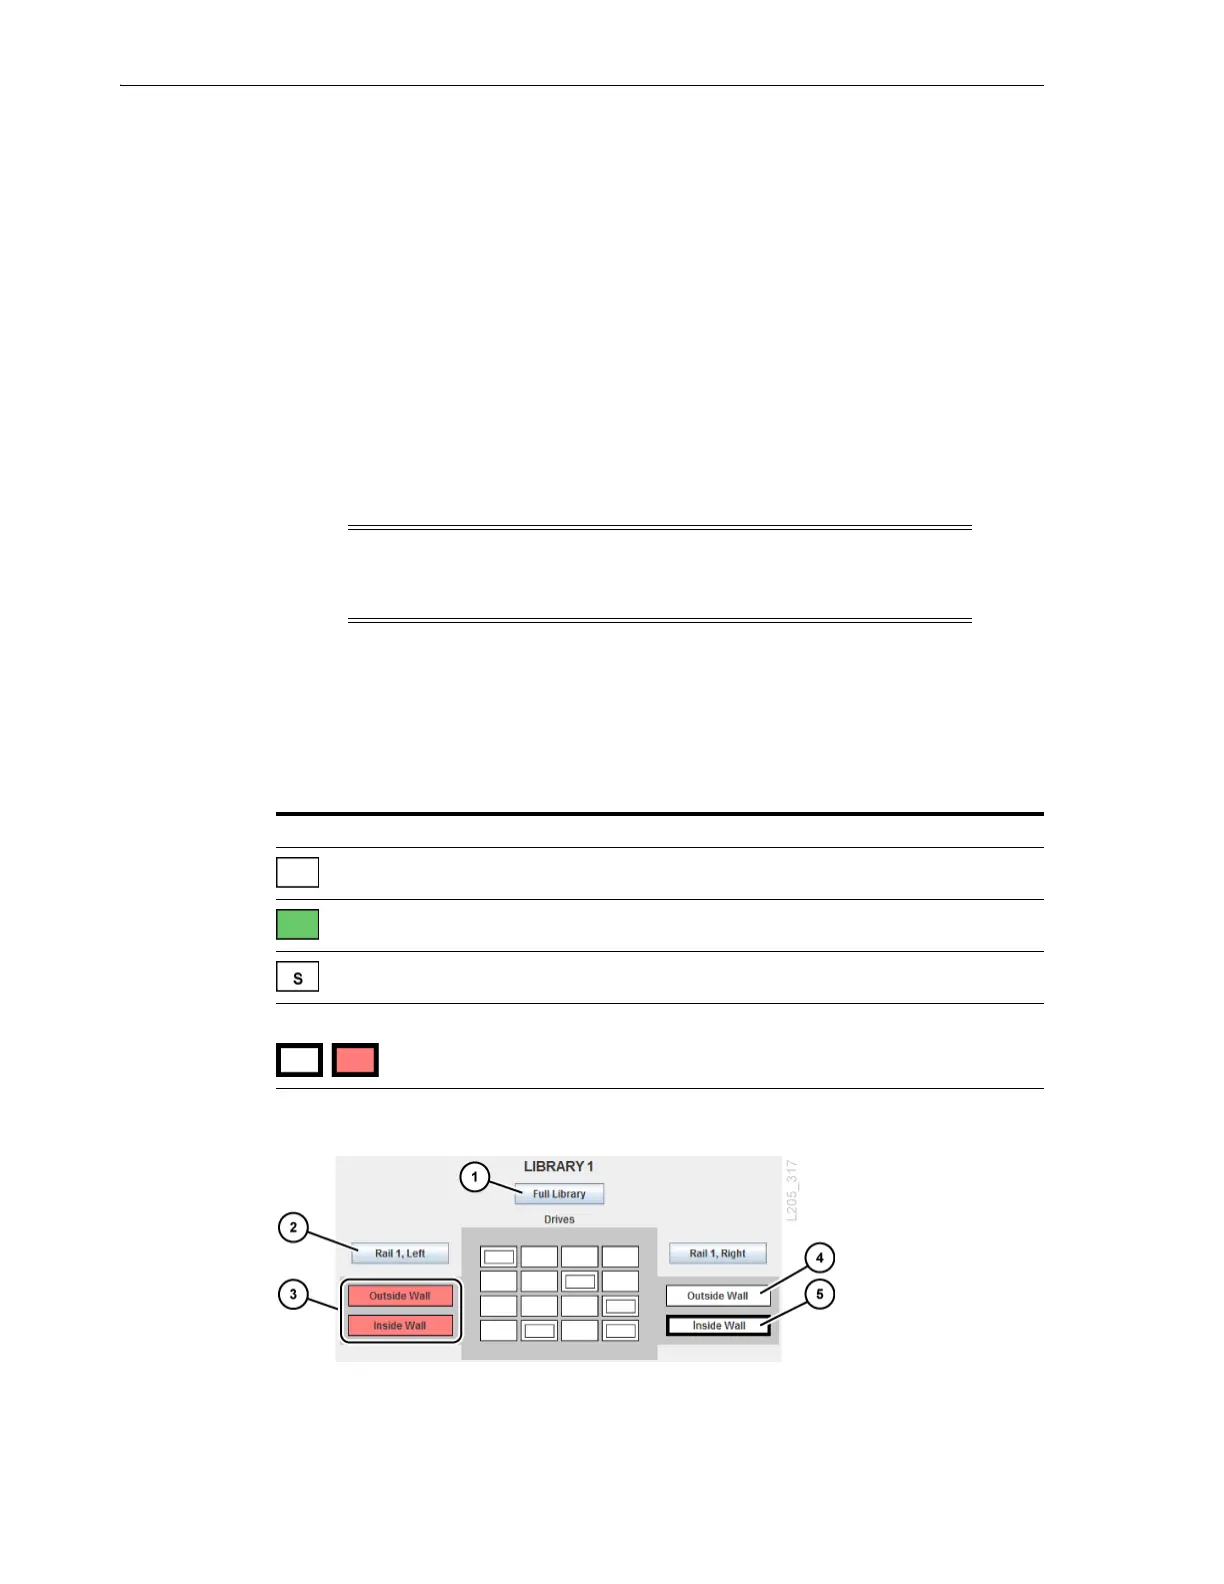
Figure 7–1 Library Complex Partitioning Example
Figure Legend:
1. Selects the full library
Caution: If there are warnings, DO NOT commit the changes. Click
Details >>. Then, perform recovery moves on the orphaned cartridges
(see "Moving Cartridges (Recovery Moves)" on page 10-1).
Table 7–1 Library Partitioning Icons
Icon Description
(white rectangle)
Available — area of rail not yet assigned to a partition
(colored rectangle)
Allocated — area of rail assigned to a partition
(white rectangle with S)
Shared Bulk CAP
Library complex partitioning only
(thick black border)
Selected — area chosen for modification. Clicking Add
assigns the area to a partition. Clicking Delete makes the
area available to other partitions.
 Loading...


