Current Section: Installation 85
Navigation:
17.3 Mount the controller
•
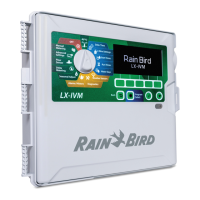
Before mounting the controller, we recommend that you remove the controller front panel, plus the LXME2
Base Module and/or any station modules if previously installed.
1 Using a level, tape the mounting template to the mounting surface at approximately
eye level. Make sure that at least one of the ve mounting hole marks is aligned on a
wall stud or other solid surface.
2 Use a tapping tool (or nail) and hammer to tap pilot holes through the ve mounting
hole marks and into the mounting surface.
3 Then remove the template and drill holes in the mounting surface, installing wall
anchors if necessary.
4 Drive the rst screw into the top most-center hole. Then hang the controller on the
screw by the key-hole slot on the back of the cabinet.
5 Line up the controller cabinet mounting holes with the remaining pilot holes and drive
the four remaining screws through the cabinet back plane into the mounting surface.
6 Connect Power to the Controller
7 Surge Protection and Grounding
8 The LXME2 controller is equipped with built-in electrical surge protection. For this
system to function, you must properly ground the controller.
WARNING
The LXME2 controller must be properly surge protected and grounded. Doing so can help prevent damage to the
controller and irrigation system and also signicantly reduce troubleshooting, repair time and expense. Failure to do so
could result in failure of your controller and voiding the warranty.
Ensure that all grounding devices are compliant with local electrical codes.
17.4 Connect source power
The ESP-LXME2 controller has an internal transformer that reduces supply voltage (120 VAC in U.S.
models; 230 VAC in international models; 240 VAC in Australian models) to 24 VAC. You will need to
connect power supply wires to the transformer’s three wires. (Line, Neutral, Ground)
 Loading...
