Current Section: Installation 89
Navigation:
A local weather sensor can be bypassed from the Weather sensor setup screen.
To Enable a Local Weather Sensor see Weather Sensors.
•
Follow the sensor manufacturer’s instructions to correctly install and make wire connections to the sensor.
Ensure the sensor installation is in compliance with all local codes.
•
If your weather sensor requires 24V power from the controller, the + and - connectors to the left of the sensor
and common connectors can be used.
1 Run continuous sensor wire from the weather sensor to the LXME2 controller.
2 Route wire through knockout on the bottom of the controller.
3 Remove the yellow jumper wire (if present). Connect the two sensor wires to
the sensor (Sen) inputs. When nished, tug gently on the wires to make sure the
connections are tight.
•
Ensure that the conguration for your controller and irrigation programs are set up correctly for your
sensor. For example, if one of your programs is set up to manage your landscape lighting you may
want to ensure that it’s stations ignore input from a local weather sensor. See Weather Sensor, for
more details.
4 Complete the installation
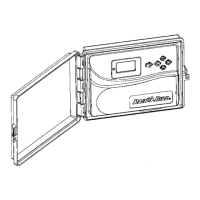
5 Install Front Door
6 Line up the three door hinges with the plastic posts on the controller.
7 Press the hinges onto the posts until the front door snaps into place.
17.5.3 Connect a Flow Sensor - Models Only
A Pro Smart Module (PSM-LXME2) is required to connect a Flow Sensor and use FloWatch, Learned
Flow utility and Flow Alarm/ water use recording.
•
You may have to replace the BM2-LXME Base Module with the PSM-LXME2 Flow Smart Module, depending
on the conguration you purchased.
•
The Pro Smart Module includes a jumper wire connecting the weather sensor (SEN) terminals. Do not
 Loading...