5.2Mounting-cSeriesandeSeries
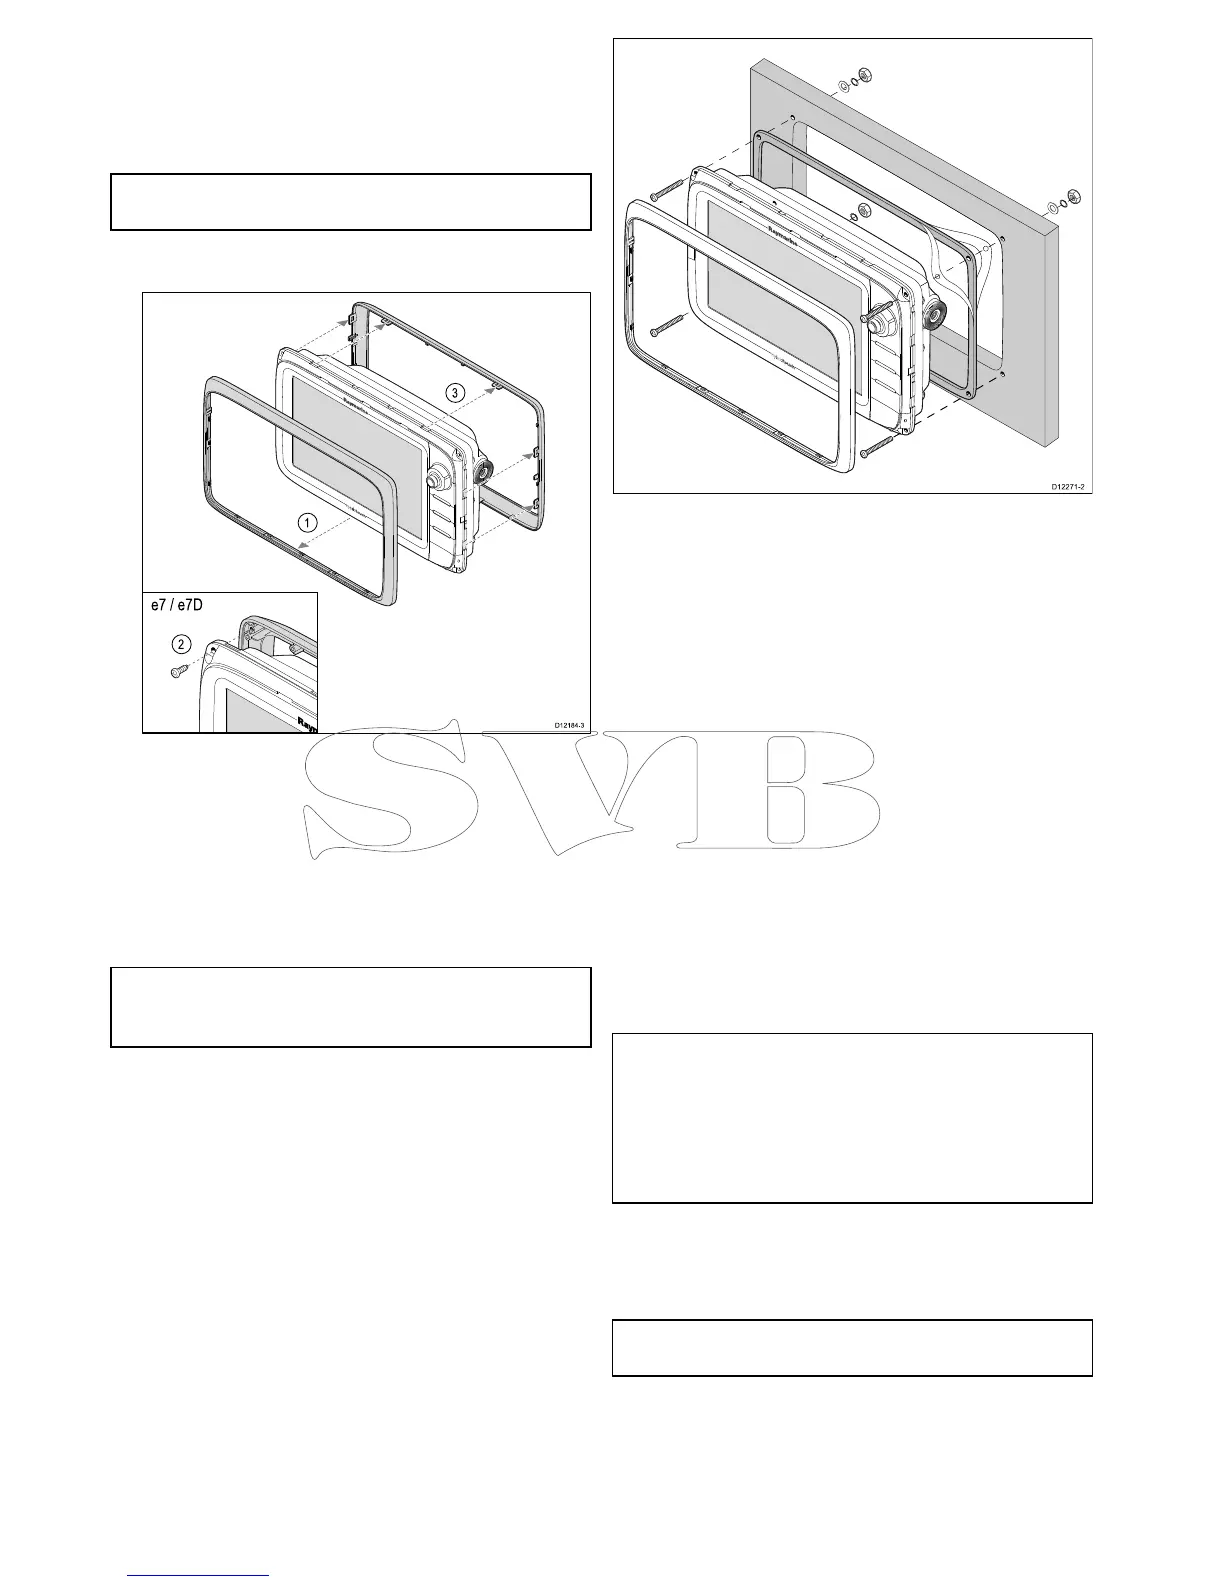
Removingtherearbezel
Youmustremovetherearbezelbeforesurface
mountingthedisplay.
Note:Thesestepsdonotapplytothee165asit
doesnotrequirearearbezel.
1.Removethefrontbezel.Refertotheseparate
instructionsprovidedforthatprocedure.
2.Removethescrewsthatsecurethebezeltothe
display(onlyrequiredfore7ande7D).
3.Carefullyremovethebezelfromtherearofthe
display,pullingthebezelgentlyalongthe:
i.Outeredges-workfromthesidesupwards
andthenalongthetopedge,ensuringthatthe
clipsarefullyreleasedfromthedisplay.
ii.Inneredges-ensurethatthebezelis
completelyremovedfromthedisplay.
Note:Onlythee7ande7Dhavexingscrewsfor
therearbezel,othermultifunctiondisplayvariants
haveclipswhichholdtherearbezelinplace.
Surfacemounting
Thedisplaycanbesurfacemounted.
Beforemountingtheunit,ensurethatyouhave:
•Selectedasuitablelocation.
•Identiedthecableconnectionsandroutethatthe
cableswilltake.
•Detachedthefrontbezel.
1.Checktheselectedlocationfortheunit.Aclear,
atareawithsuitableclearancebehindthepanel
isrequired.
2.Fixtheappropriatecuttingtemplatesupplied
withtheproduct,totheselectedlocation,using
maskingorself-adhesivetape.
3.Usingasuitableholesaw(thesizeisindicated
onthetemplate),makeaholeineachcornerof
thecut-outarea.
4.Usingasuitablesaw,cutalongtheinsideedge
ofthecut-outline.
5.Ensurethattheunittsintotheremovedarea
andthenlearoundtheroughedgeuntilsmooth.
6.Drill4holesasindicatedonthetemplateto
acceptthexings.
7.Placethegasketontothedisplayunitandpress
rmlyontotheange.
8.Connectthepower,dataandothercablestothe
unit.
9.Slidetheunitintoplaceandsecureusingthe
xingsprovided.
Note:Thesuppliedgasketprovidesaseal
betweentheunitandasuitablyatandstiff
mountingsurfaceorbinnacle.Thegasketshould
beusedinallinstallations.Itmayalsobe
necessarytouseamarine-gradesealantifthe
mountingsurfaceorbinnacleisnotentirelyatand
stifforhasaroughsurfacenish.
Attachingtherearbezel
Therearbezelmustbettedifyouwishtousea
mountingbrackettomounttheunit.
Note:Thesestepsdonotapplytothee165asit
doesnotrequirearearbezel.
1.Removethefrontbezel.Refertotheseparate
instructionsprovidedforthatprocedure.
2.Placethebezelovertherearofthedisplay,
ensuringthatitiscorrectlyalignedwiththe
display.Applyrmbutevenpressuretothebezel
alongthe:
84aSeries/cSeries/eSeries
 Loading...