81
3
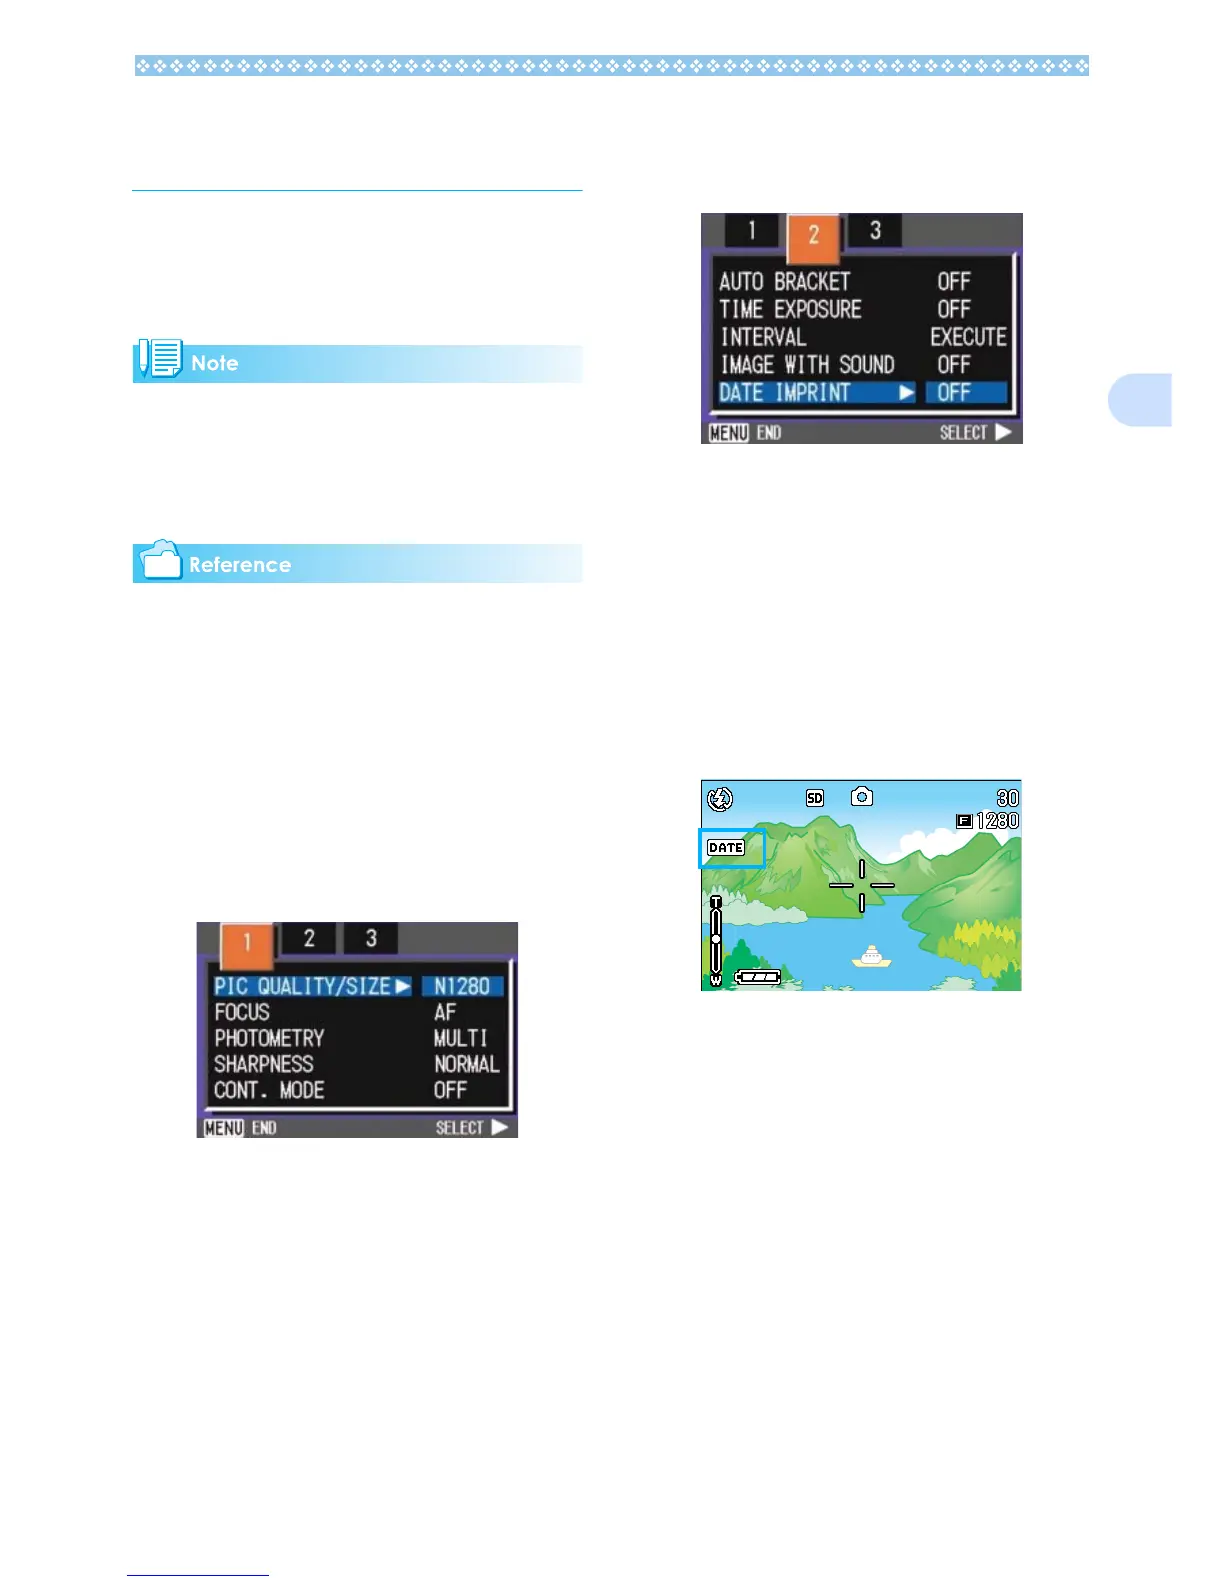
Inserting the Date into a
Still Image (DATE IMPRINT)
You can stamp the date on the bottom right of
your still images. You can choose to display
the date in one of two formats, Date (Y/M/D)
or Date and Time (Y/M/D/H:M).
• If the date and time have not been set,
DATE IMPRINT cannot be used. First
make the date and time settings.
• DATE IMPRINT cannot be used with mov-
ies.
For how to set date and time, see P.119.
To enter the date or date and time, follow the
steps below.
1. Turn the mode dial to 5
55
5 (Shoot-
ing Mode) or A/M (Aperture Pri-
ority/Manual Exposure Mode).
2. Press the M
MM
M button.
The Shooting menu appears.
3. Press the #$
#$#$
#$ buttons to switch
between displays as required.
4. Press the "
""
" button to select
[DATE IMPRINT] and then press
the O
OO
O button.
5. Press the !"
!"!"
!" buttons to select
the desired setting.
6. Press the O
OO
O or #
##
# button.
The Date Imprint settings are completed.
7. If you pressed the #
##
# button,
press also the M
MM
M button.
The Shooting Menu closes and [DATE]
appears at the left part of the screen.
This setting will be used for shooting until
you change it.
 Loading...