SM 3-45 G147
Replacement
Adjustment
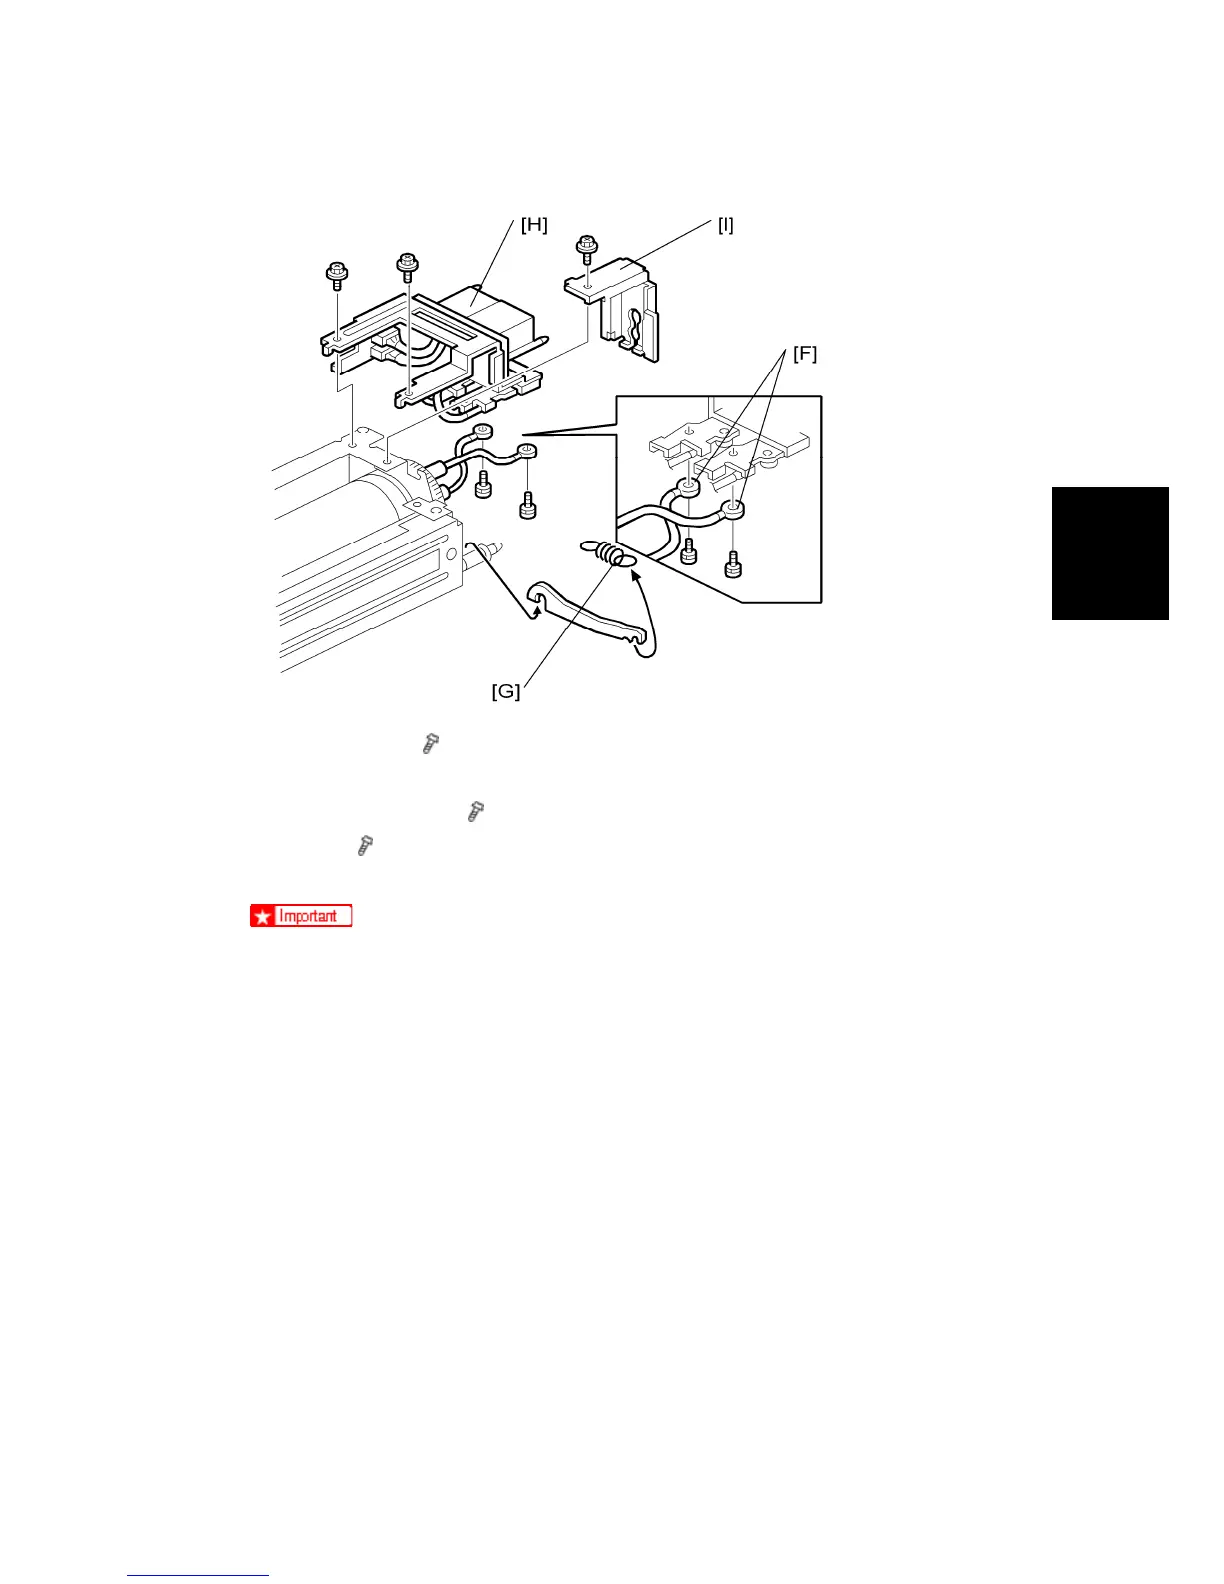
8. Two terminals [F] (
x2)
9. Spring [G]
10. Connector bracket [H] (
x2)
11. Bracket [I] (
x2)
12. Remove both fusing lamps.
To avoid breaking the fusing lamps, handle them with care.
Avoid touching the lamps with bare hands.
Note the top/bottom positioning of the fusing lamps as you remove them. The
sizes of the holes in the holder match the sizes of the ends of the 650 W lamp
(red) and 650 W lamp (brown).
3.11.5 THERMISTORS AND THERMOSTATS
1. Fusing unit (See ‘Fusing Unit Removal’.)
2. Fusing unit upper cover (See ‘Hot Roller Strippers’.
3. Fusing unit lower cover. (See ‘Fusing Lamps’.)