EasyManuals Logo

Ricoh G147 User Manual

Ricoh G147
496 pages
To Next Page IconTo Next Page
To Previous Page IconTo Previous Page
Page #52 background imageLoading...
Page #52 background image
G147 1-20 SM
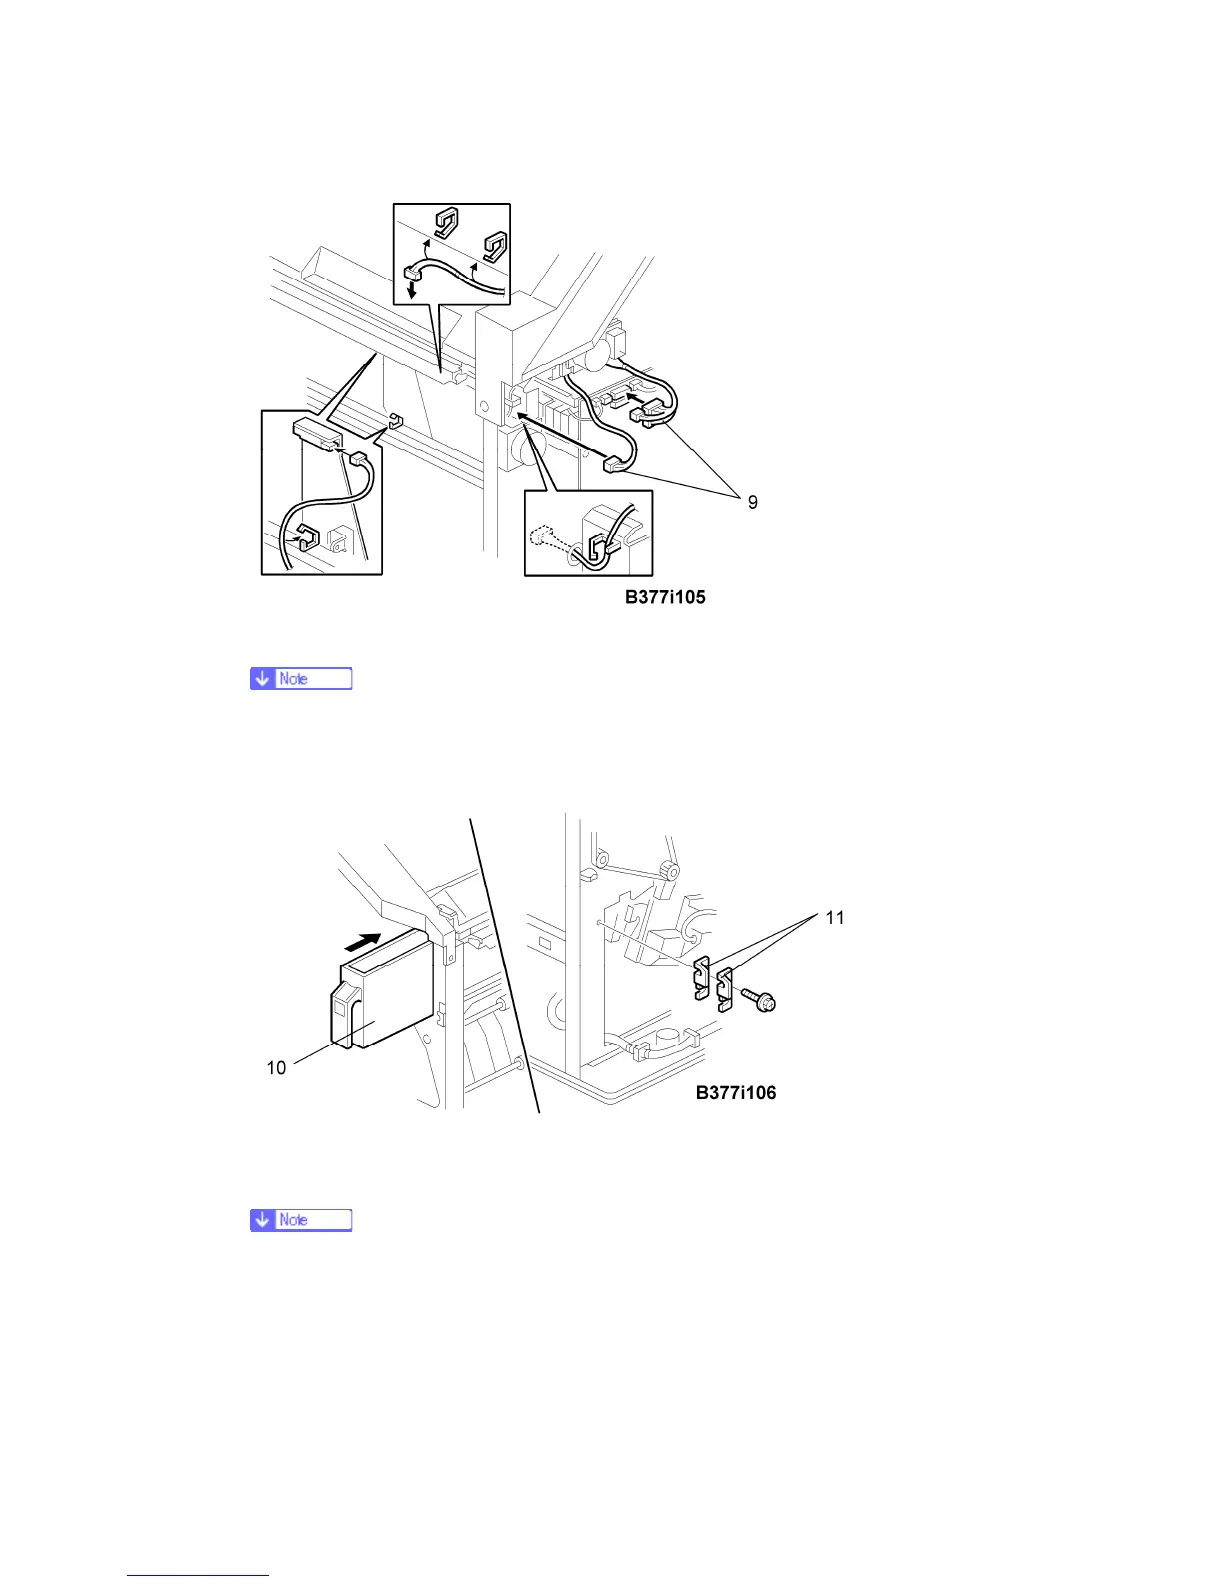
9. Connect the harnesses [9] and clamp them as shown.
 No special DIP switch settings are required for this punch unit.
 The punch unit has a unique ID that the machine detects automatically so it
knows what type of punch unit is installed.
10. Slide the hopper [10] into the machine.
11. Fasten the two 1 mm spacers [11] to the rear frame for future adjustment.
 The spacers are used to adjust the horizontal positioning of the holes.
12. Reassemble the finisher and check the punch operation.

Table of Contents

Questions and Answers:

Question and Answer IconNeed help?

Do you have a question about the Ricoh G147 and is the answer not in the manual?

Ricoh G147 Specifications

General IconGeneral
BrandRicoh
ModelG147
CategoryAll in One Printer
LanguageEnglish

Related product manuals