Image Correction
J007/J010/J011 4-26 SM
5. Wait for cleaning or flushing to finish. This may require a few minutes to
complete.
6. Push [Online] to leave the menu mode.
7. Print another Nozzle Check pattern (see previous section) to determine if the
problem has been solved.
8. Repeat Steps 2 to 7 for "Head-Cleaning" two more times.
9. If three "Head-Cleanings" does not solve the problem, do "Head-Flushing".
10. If "Head-Flushing" does not solve the problem, the print heads must be
replaced.
4.5.5 ADJUST PRINT HEAD POSITION
The print head is out of position if you see these:
Broken vertical lines
Smeared or streaked colors
Do the following procedure to correct these problems.
1. Push [Menu], select "Maintenance" and push [#Enter].
2. select "Head Position" and push [#Enter].
3. Select "Pr. Test Pattern" and push [#Enter].
4. Select the test pattern for print head position adjustment and push [#Enter]. The
test pattern prints.
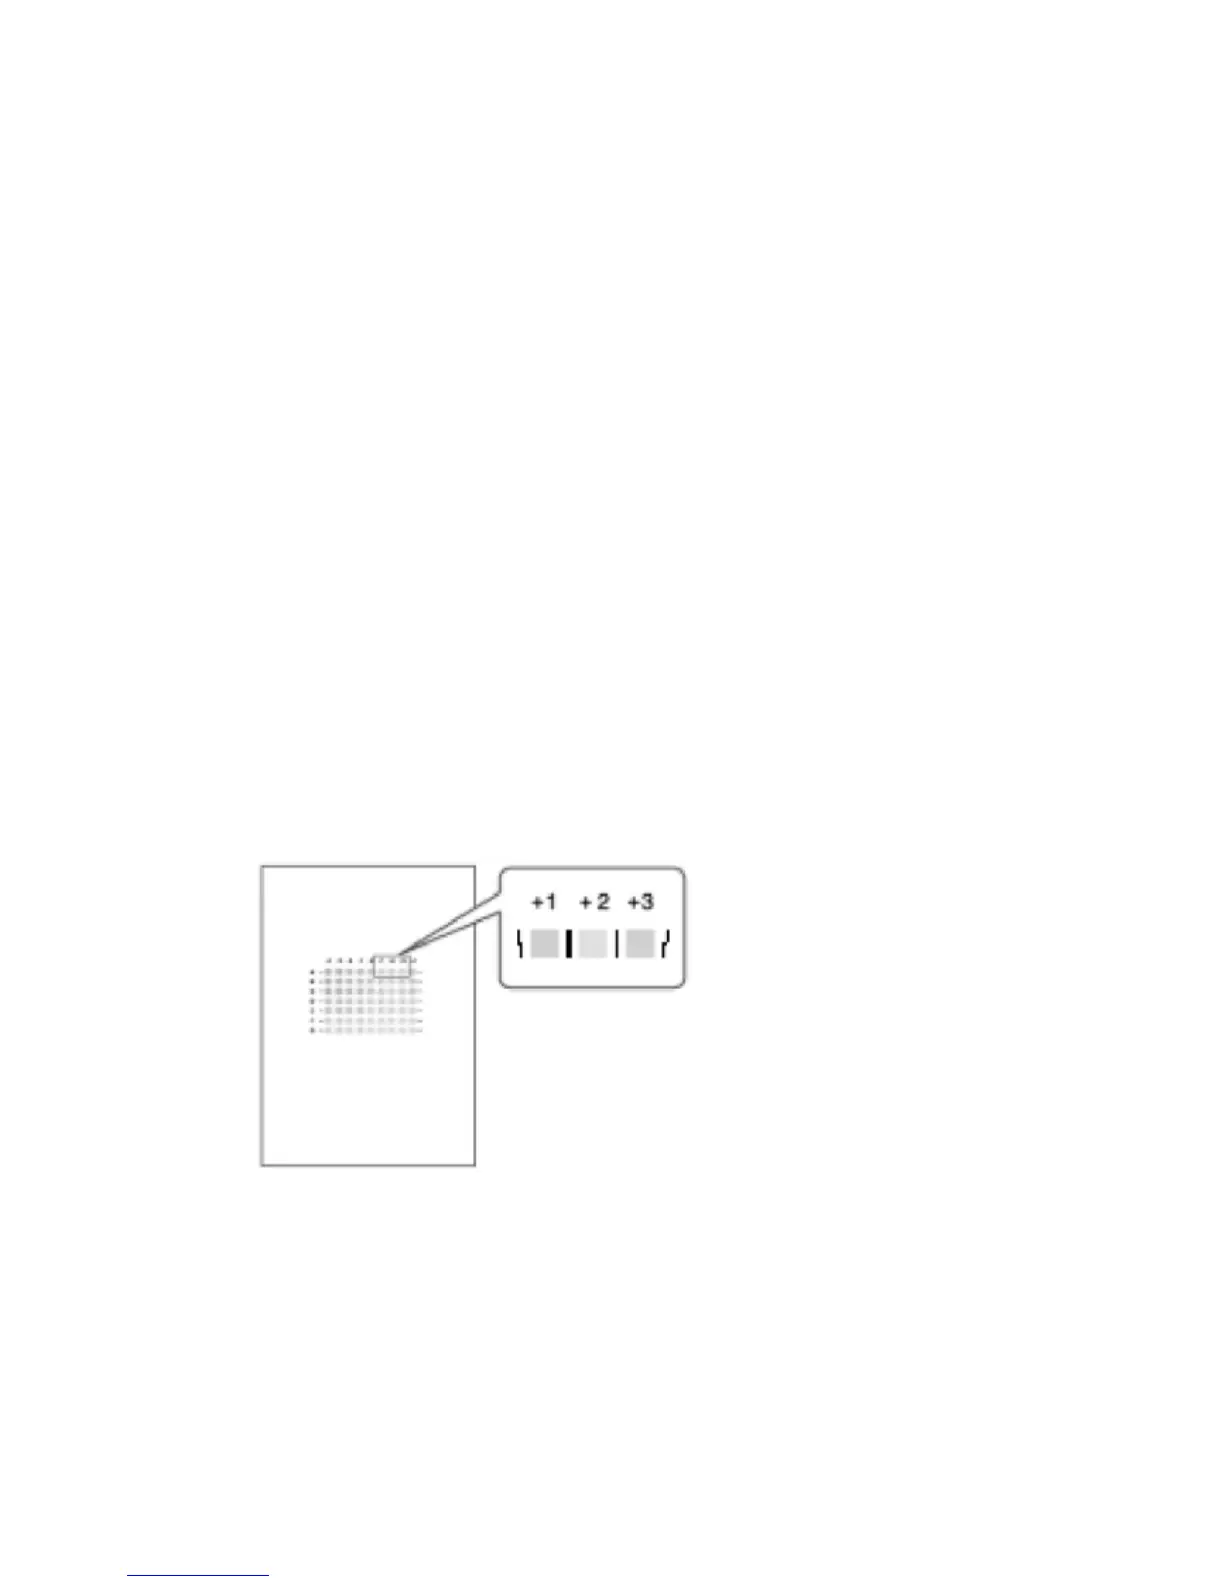
5. Select the best pattern.
The best pattern is the gray square with straight vertical lines on both sides.
The pattern setting is read as a matrix value from the pattern. For example, if the
best pattern is in column "+2", line "A", the entry for adjustment will be "A" then
"+2"
6. Select "Adjustment" and push [#Enter].
7. Select same setting selected for "Pr. Test Pattern" (High Speed, etc.) and push
 Loading...