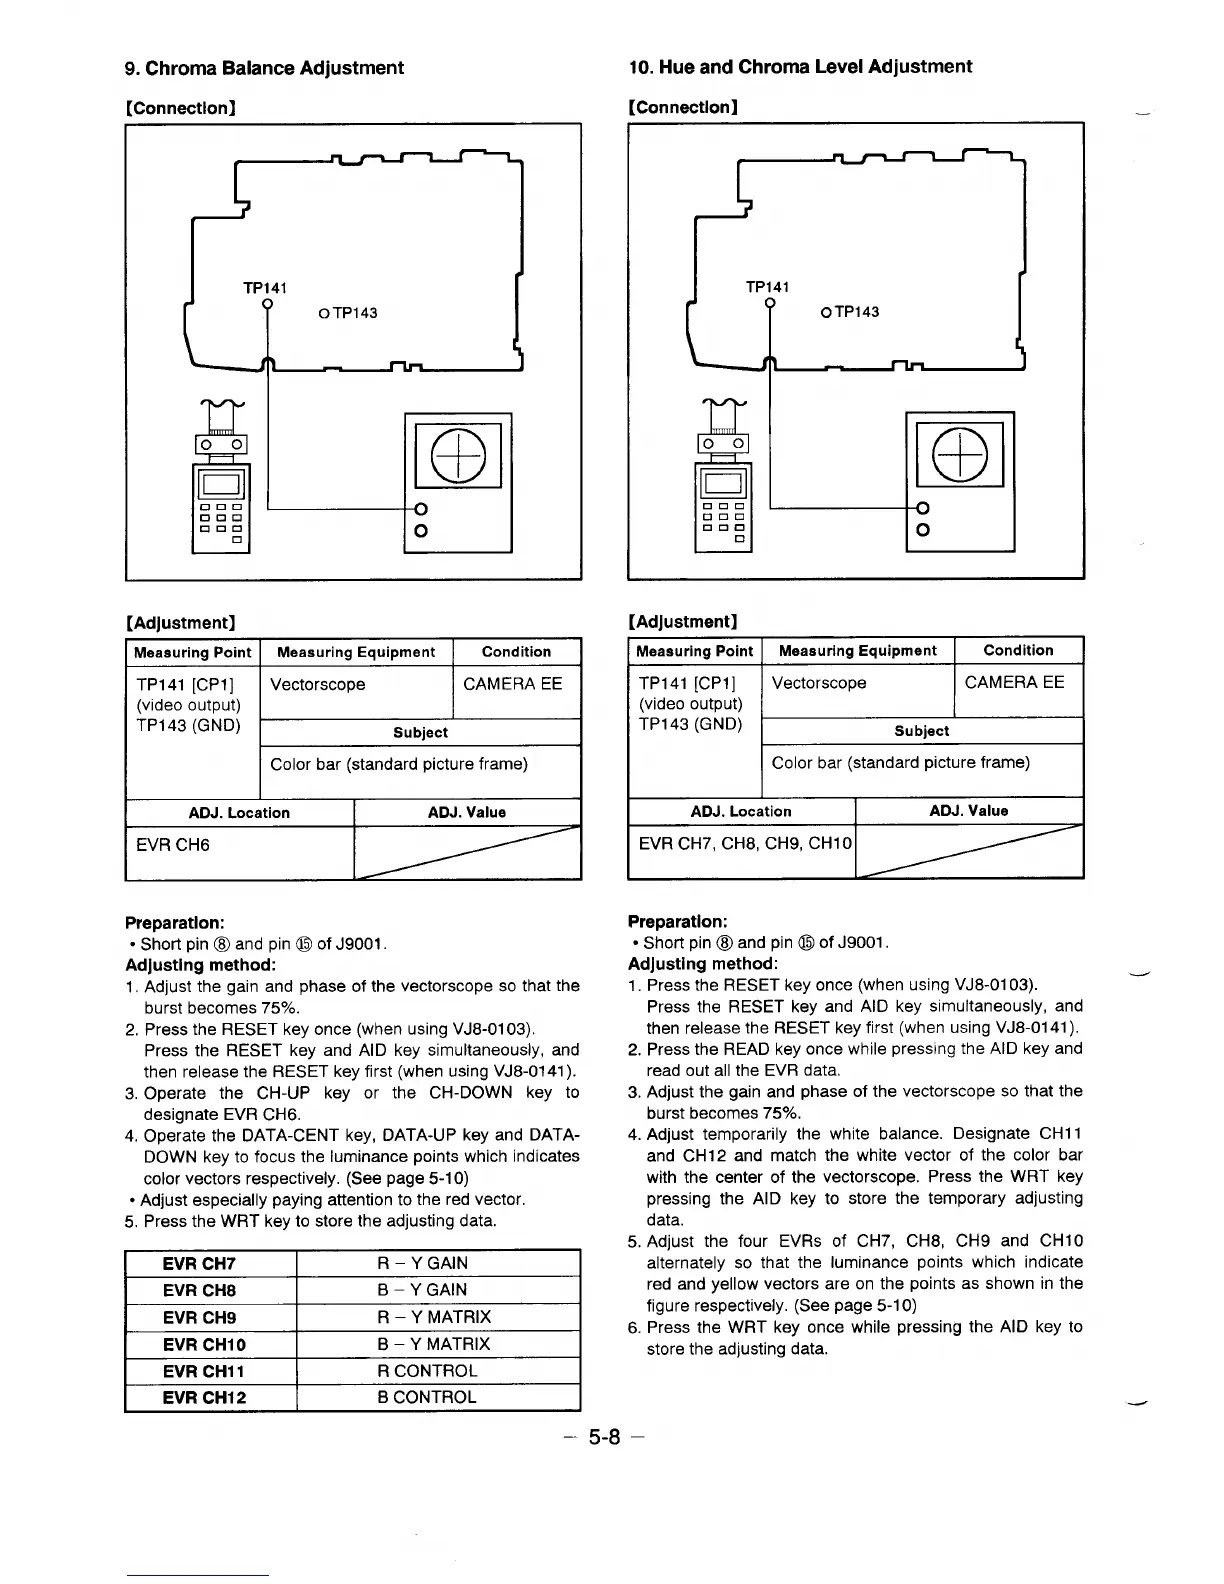
9. Chroma Balance Adjustment
[Connection]
10. Hue and Chroma Level Adjustment
[Connection]
[Adjustment]
Measuring Point
Meaauring Equipment
Condition
TP141 [CP1]
Vectorscope CAMERA EE
(video output)
TP143 (GNDj
r
Color bar (standard picture frame)
1
ADJ. Location
ADJ. Value
EVR CH6
I
Preparation:
● Short pin o and pin o of J9001.
Adjusting method:
1, Adjust the gain and phase of the vectorscope so that the
burst becomes 75%.
2. Press the RESET key once (when using VJ8-01 03).
Press the RESET key and AID key simultaneously, and
then release the RESET key first (when using VJ8-0141 ).
3. Operate the CH-UP key or the CH-DOWN key to
designate EVR CH6.
4. Operate the DATA-CENT key, DATA-UP key and DATA-
DOWN key to focus the luminance points which indicates
color vectors respectively. (See page 5-1 O)
● Adjust especially paying attention to the red vector.
5. Press the WRT key to store the adjusting data.
I EVR CH7 I
R – YGAIN
I
1
I
EVR CH8
B – YGAIN
I
I EVR CH9 I
R – Y MATRIX
I
1
I
EVR CHIO
B – Y MATRIX
I
TP141
L
[Adjustment]
Measuring point I
Meaauring Equipment
Condition
I
TP141 [CP1]
Vectorscope
CAMERA EE
(video output)
TP143 (GND)
Subject
Color bar (standard picture frame)
ADJ. Location
ADJ. Value
EVR CH7, CH8, CH9, CH1O
Preparation:
● Short pin @ and pin @ of J9001.
Adjusting method:
1. Press the RESET key once (when using VJ8-01 03).
Press the RESET key and AID key simultaneously, and
then release the RESET key first (when using VJ8-0141 ).
2. Press the READ key once while pressing the AID key and
read out all the EVR data.
3. Adjust the gain and phase of the vectorscope so that the
burst becomes 75’%..
4. Adjust temporarily the white balance. Designate CH11
and CH12 and match the white vector of the color bar
with the center of the vectorscope. Press the WRT key
pressing the AID key to store the temporary adjusting
data.
5. Adjust the four EVRS of CH7, CH8, CH9 and CH1O
alternately so that the luminance points which indicate
red and yellow vectors are on the points as shown in the
figure respectively. (See page 5-1 O)
6. Press the WRT key once while pressing the AID key to
store the adjusting data.
—
I EVRCH11 I
R CONTROL
I
EVR CH12
B CONTROL
– 5-8 –
 Loading...