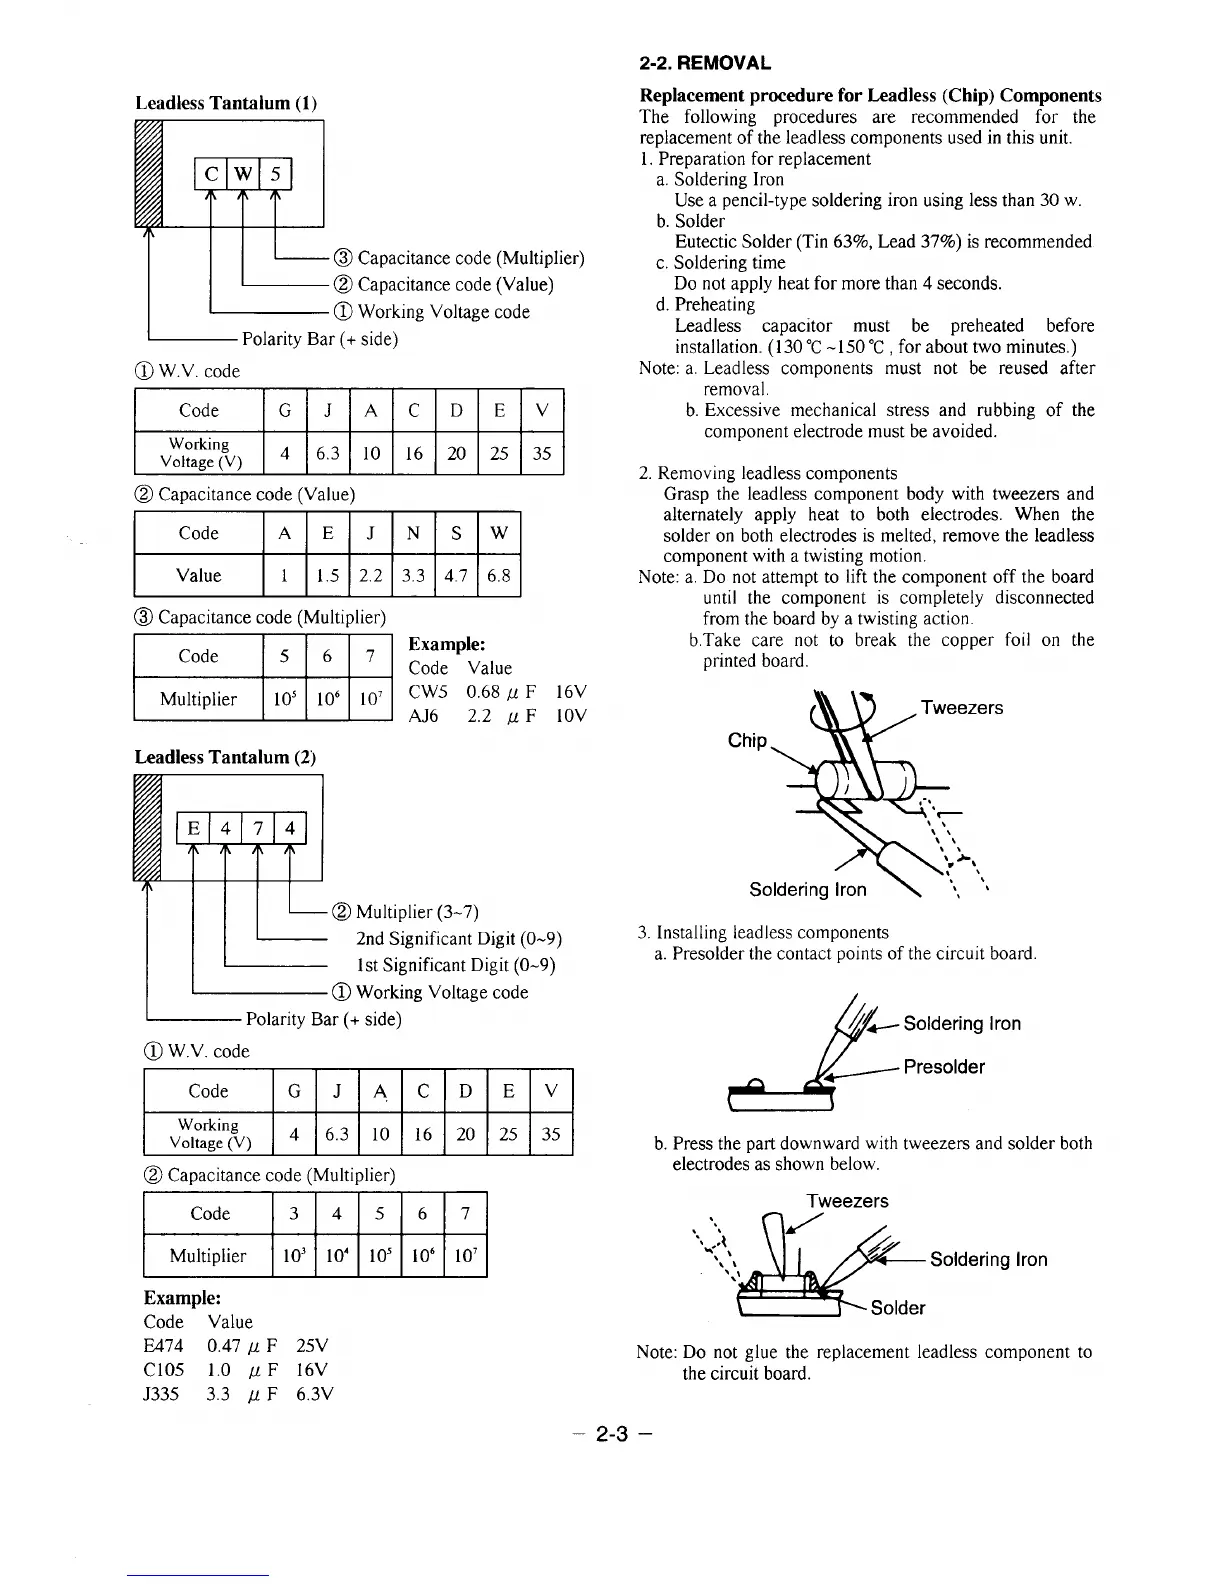
Leadless Tantalum (1)
p-
- @ Capacitance code (Multiplier)
@ Capacitance code (Value)
@ Working Voltage code
~ Polarity Bar (+ side)
@ W.V, code
@ Capacitance code (Value)
@ Capacitance code (Multiplier)
Code 5 6 7
Example:
Code Value
Multiplier
~~s ~06 ~07 CW5 0.68 P F 16V
AJ6 2.2 .u F IOV
Leadless Tantalum (2)
~@ Multiplier (3-7)
~ 2nd Significant Digit (O-9)
k
1st Significant Digit (O-9)
@ Working Voltage code
~ Polarity Bar (+ side)
@ W.V. code
@ Capacitance code (Multiplier)
Example:
Code Value
2-2.
REMOVAL
Replacement procedure for Leadless (Chip) Components
The following procedures are recommended for the
replacement of the leadless components used in this unit.
1. Preparation for replacement
a. Soldering Iron
Use a pencil-type soldering iron using less than 30 w.
b. Solder
Eutectic Solder (Tin 63%, Lead 37%) is recommended
c. Soldering time
Do not apply heat for more than 4 seconds.
d. Preheating
Leadless capacitor must be preheated before
installation. (130 “C-150 “C, for about two minutes. )
Note: a, Leadless components must not be reused after
removal.
b. Excessive mechanical stress and rubbing of the
component electrode must be avoided.
2. Removing Ieadless components
Grasp the leadless component body with tweezers and
alternately apply heat to both electrodes. When the
solder on both electrodes is melted, remove the leadless
component with a twisting motion.
Note: a. Do not attempt to lift the component off the board
until the component is completely disconnected
from the board by a twisting action.
b.Take care not to break the copper foil on the
printed board.
Chip
3. Installing ieadless components
a. Presolder the contact points of the circuit board
k
//-Soldering iron
(4
~ Presolder
b. Press the part downward with tweezers and solder both
electrodes as shown below.
Tweezers
Soldering
Iron
E474 0.47 ,u F 25V
Note: Do not glue the replacement Ieadless component to
C105 1.0 u F 16V
the circuit board.
J335 3.3 /u F 6.3V
– 2-3 –
 Loading...