Rackm ounting—434
Left rear
rail of
cabinet
rack
10-32
screw
Bar
nut
Adapter
rear support
Flat
washer
10-32 HHS
screw
A. Rail tapped.
_eft rear
rail of
cabinet
rack
10-32 PHS
screw
iwzm
Bracket
extension
Rack Adapter
rear support
B. Rail not tapped
10-32 HHS
screw
BMC
50-ohm
cable
Vt
N u t
R 434
front panel
t t t t / S r y lock'washer
BNC
thru-connector
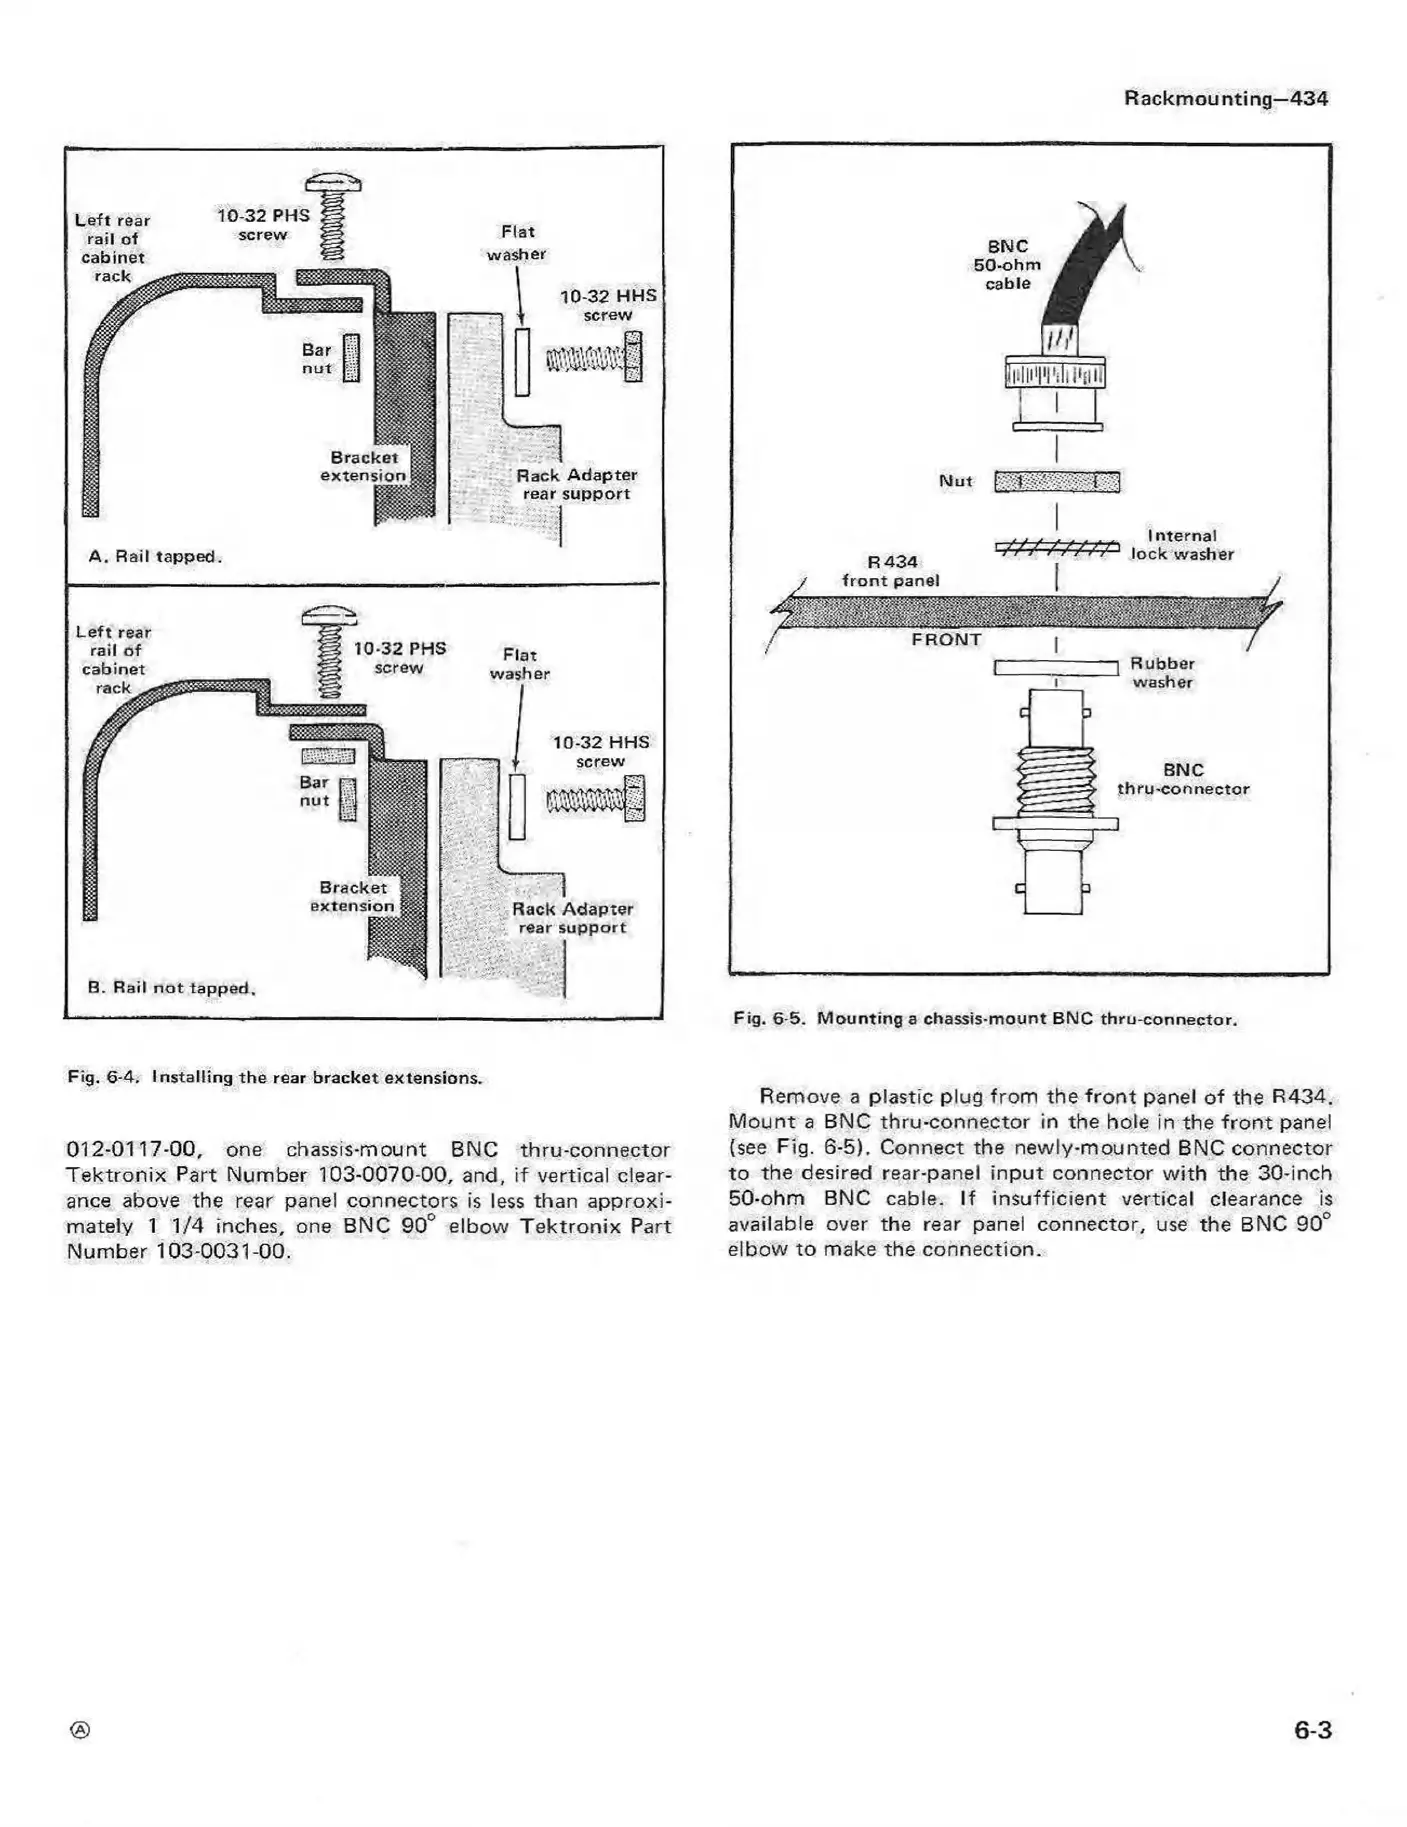
Fig. 6-5. Mounting a chassis-mount BNC thru-connector.
Fig. 6-4. Installing the rear bracket extensions.
012-0117-00, one chassis-mount BNC thru-connector
Te ktron ix Part Number 103-0070-00, and, if vertical clear
ance above the rear panel connectors is less than approxi
mately 1 1/4 inches, one BNC 90° elbow T ektronix Part
Number 103-0031-00.
Remove a plastic plug from the fro n t panel of the R434.
M ount a BNC thru-connector in the hole in the fro n t panel
(see Fig. 6-5). Connect the newly-mounted BNC connector
to the desired rear-panel input connector w ith the 30-inch
50-ohm BNC cable. If insufficient vertical clearance is
available over the rear panel connector, use the BNC 90°
elbow to make the connection.
6-3
 Loading...


