Calibration—434
7 SKT3QN0L ? V'
pMlHW|-
__
All ftigh?s ftf'>
G e om etry
B 1292
S S e M PwH I B B B 6
Lo w e r S tore |
Level “
R1276 1
Lo w er N on- j
Store Level I
Uppe r S tore
Level
R 1226
Uppe r N on-
Store Level
R 1224
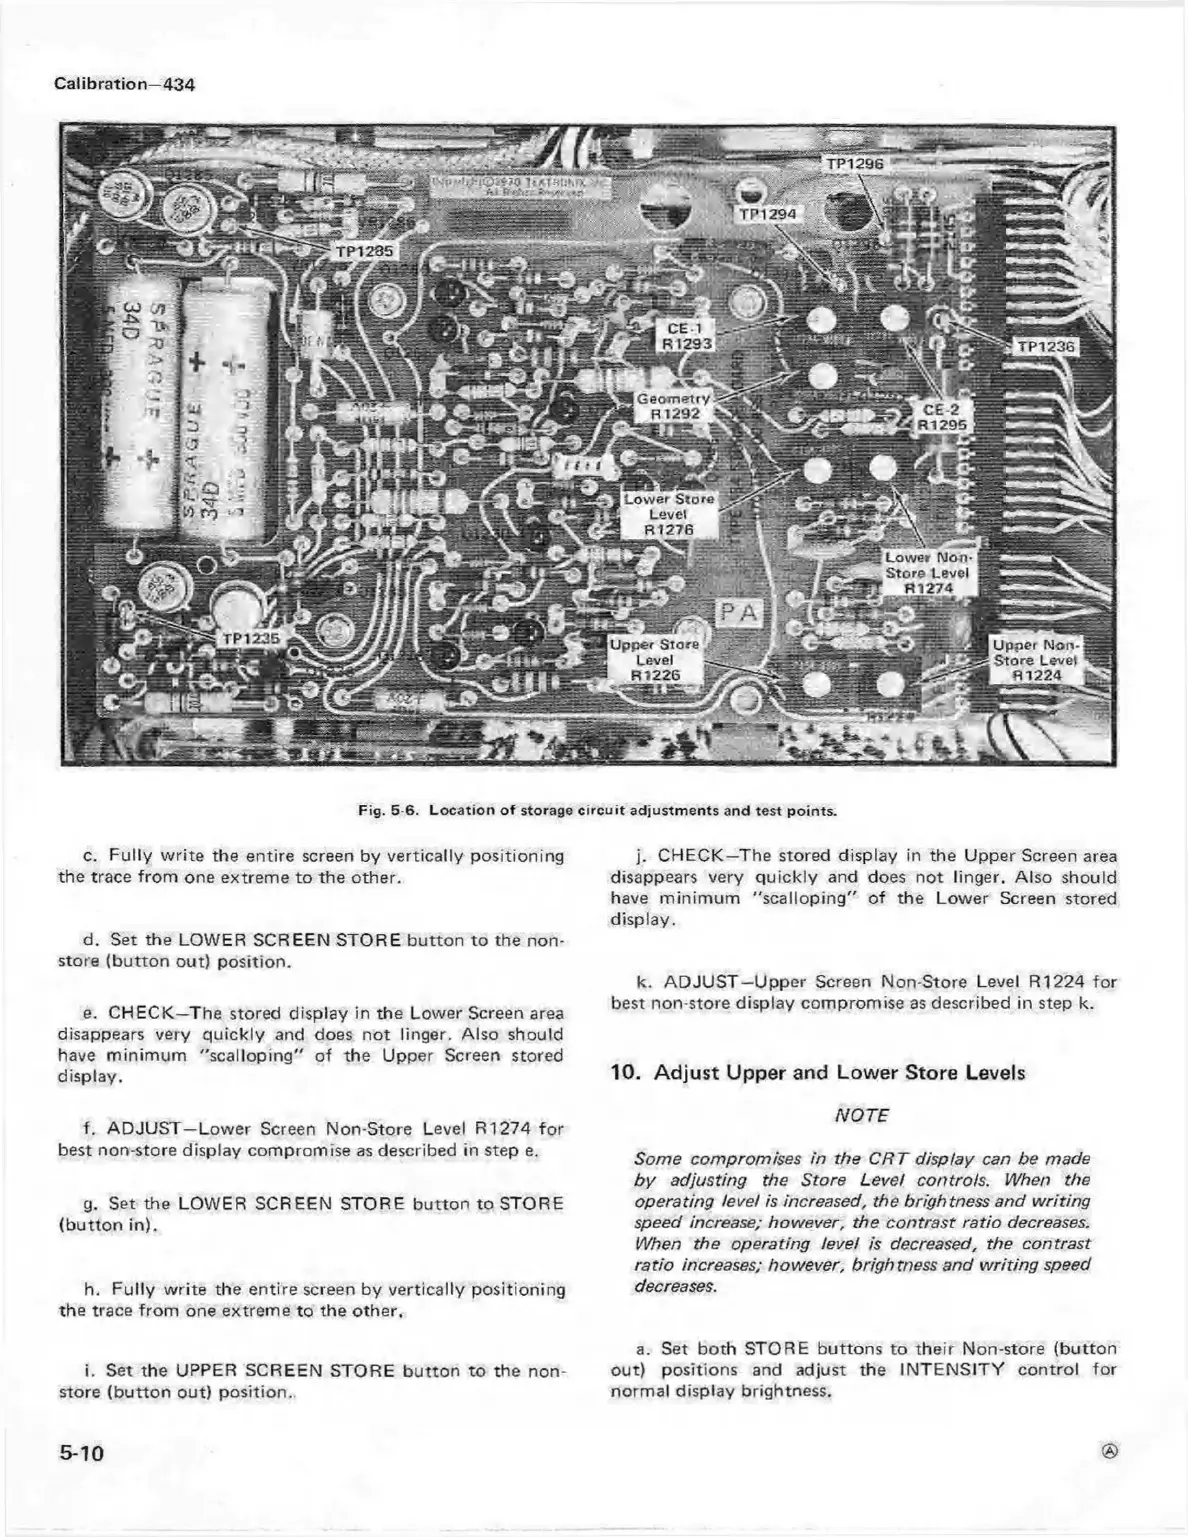
Fig. 5-6. L o ca tio n o f storage c irc u it ad justm en ts and test p oints.
c. Fully write the entire screen by vertically positioning
the trace from one extreme to the other.
d. Set the LOWER SCREEN STORE button to the non
store (button out) position.
e. CHECK—The stored display in the Lower Screen area
disappears very q uickly and does not linger. Also should
have m inim um "scalloping" of the Upper Screen stored
display.
f. AD JUST—Lower Screen Non-Store Level R1274 fo r
best non-store display compromise as described in step e.
g. Set the LOWER SCREEN STORE button to STORE
(bu tton in).
h. Fully write the entire screen by vertically positioning
the trace from one extreme to the other.
i. Set the UPPER SCREEN STORE button to the non
store (button out) position.
j. CH ECK—The stored display in the Upper Screen area
disappears very q uickly and does not linger. Also should
have m inim um "sca lloping" of the Lower Screen stored
display.
k. AD JU ST—Upper Screen Non-Store Level R1224 for
best non-store display compromise as described in step k.
10. Adjust Upper and Lower Store Levels
NO TE
Some compromises in the C R T display can be made
by adjusting the Store Level controls. When the
operating level is increased, the brightness and w riting
speed increase; however, the contrast ratio decreases.
When the operating level is decreased, the contrast
ratio increases; however, brightness and w ritin g speed
decreases.
a. Set both STORE buttons to their Non-store (button
out) positions and adjust the INT EN S ITY control for
normal display brightness.
5-10
 Loading...


