Multi Pro 1750Chassis Page 8 − 32
Tie Rod End Replacement
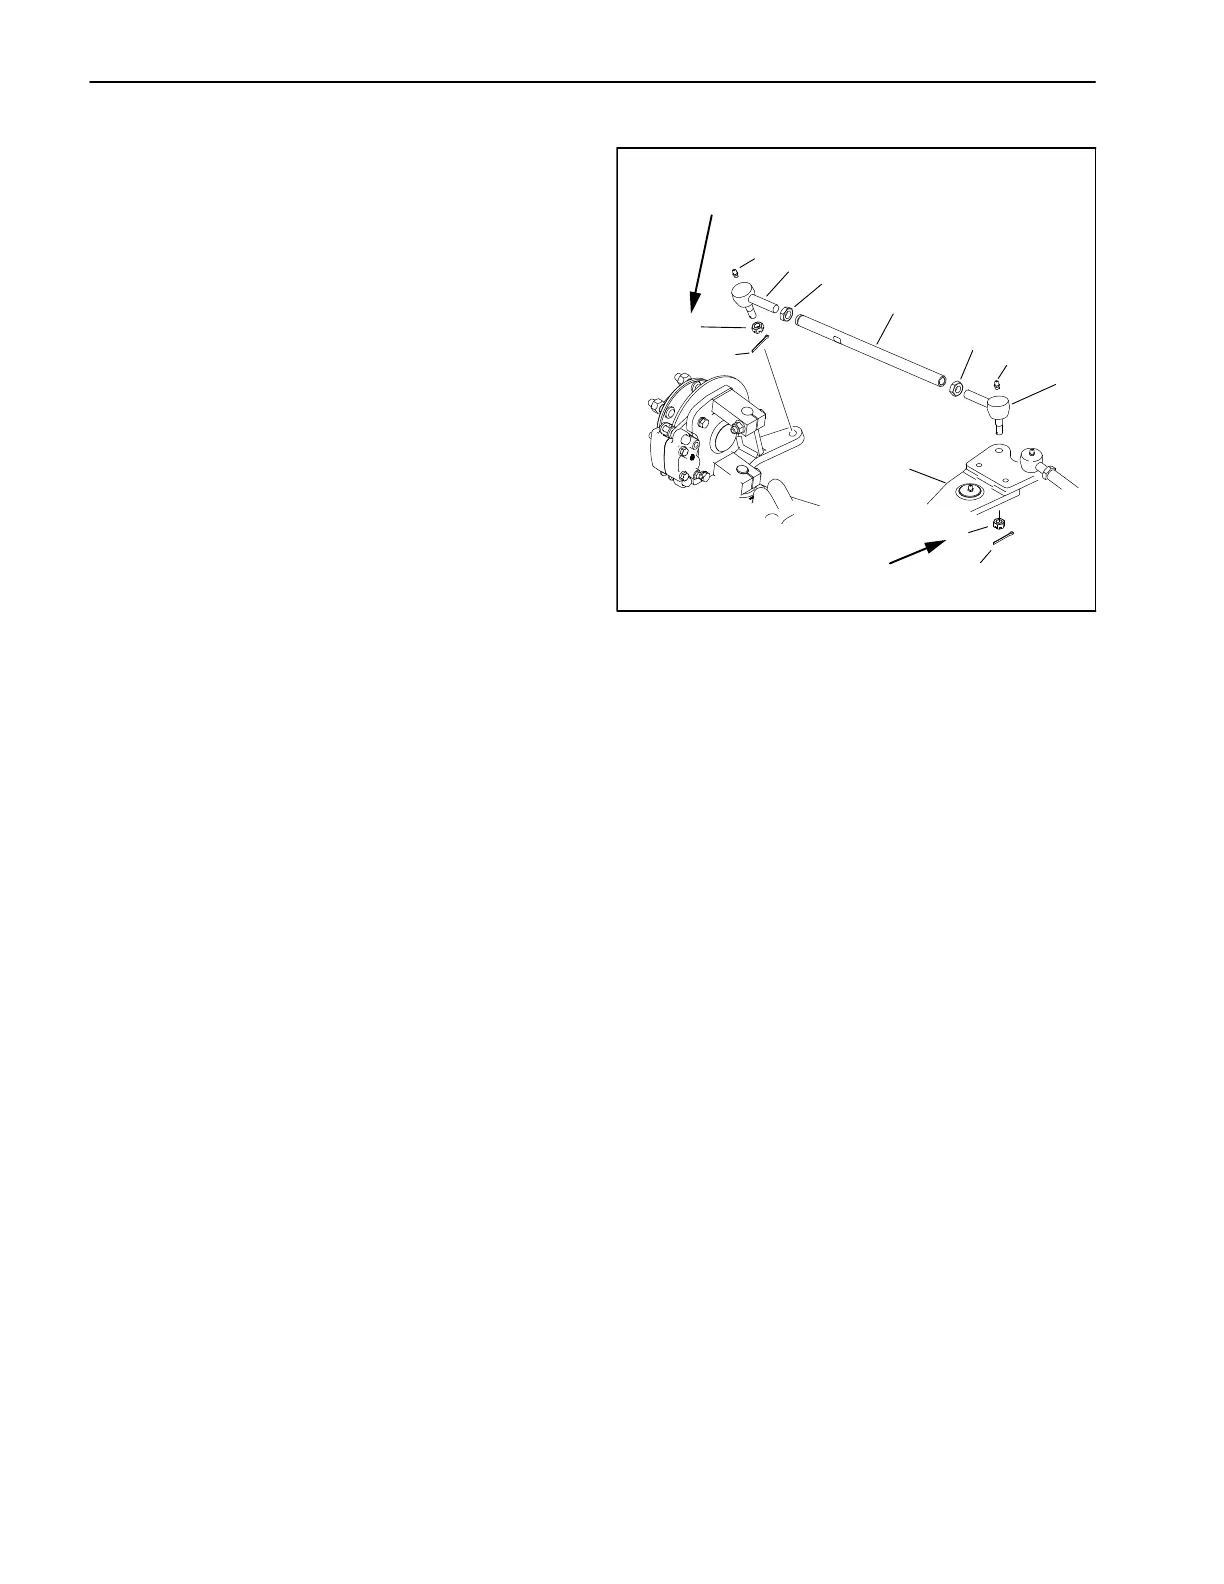
Removal (Fig. 21)
NOTE: The outside tie rod end (at spindle) has left hand
threads.
1. Loosen jam nut on tie rod end.
2. Remove cotter pin and slotted hex nut from tie rod
end to be removed. Discard cotter pin.
3. Use a suitable puller (pickle fork) to separate tie rod
end from spindle or steering pivot.
4. Record the number of revolutions it takes to remove
the tie rod ends so new tie rod end can be installed in ap-
proximately the same location.
Installation (Fig. 21)
1. Thread the new rod end into the tie rod the same
number of revolutions as the old one took to remove.
2. Install grease fitting into tie rod end.
3. Insert tie rod end shaft into spindle or steering pivot
and secure with castle nut. Tighten castle nut from 20 to
25 ft−lb (27 to 34 N−m) and install new cotter pin.
4. Grease tie rod end.
NOTE: Right and left tie rods should have the same
length.
5. Check and adjust front wheel toe−in (see machine
Operator’s Manual).
1. Tie rod end (RH thread)
2. Tie rod end (LH thread)
3. Jam nut (RH thread)
4. Jam nut (LH thread)
5. Slotted hex nut (2)
6. Cotter pin (2)
7. Tie rod
8. Grease fitting (2)
9. Steering pivot
Figure 21
7
5
5
6
6
8
8
9
1
2
3
4
20 to 25 ft−lb
(27 to 34 N−m)
20 to 25 ft−lb
(27 to 34 N−m)

 Loading...


