Multi Pro 1750 Page 3 − 23 Kohler Gasoline Engine
Removal (Fig. 15)
Engine removal is accomplished by first removing the
engine and pump mounting plate as an assembly from
the machine (see Engine and Pump Mounting Plate As-
sembly in this chapter).
1. Loosen two (2) set screws on pump hub (item 12).
2. Remove fasteners securing hydraulic pump assem-
bly (item 3) to engine and pump mounting plate. Slide
pump assembly from pump hub and set aside. See
Chapter 4 − Hydraulic System in this manual for addi-
tional hydraulic pump service information.
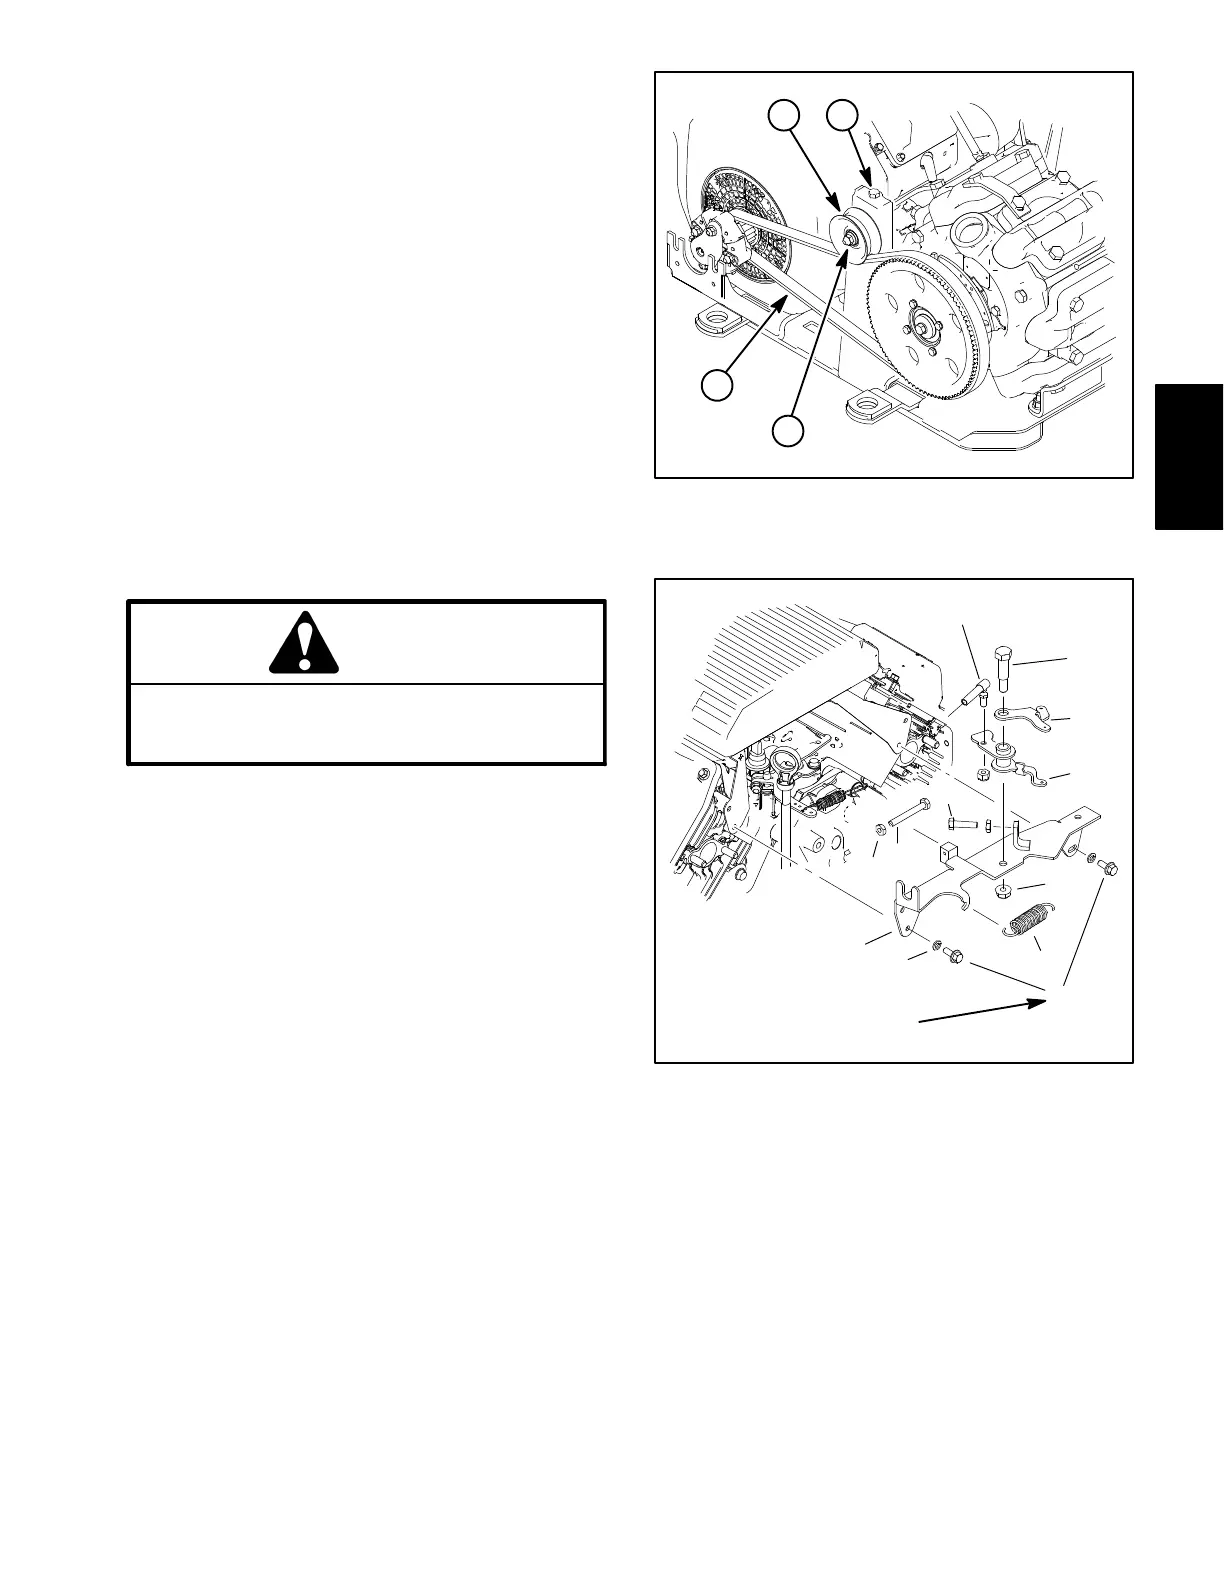
3. Loosen idler pulley flange nut and turn adjusting
screw counterclockwise to relieve drive belt tension
(Fig. 16). Remove spray pump drive belt.
4. Loosen and remove four (4) flange head screws and
flange nuts that secure engine to engine and pump
mounting plate.
CAUTION
Engine and clutch assembly weighs approxi-
mately 125 lbs (57 kg). Use an appropriate lifting
device to safely lift the engine assembly.
5. Carefully lift engine from mounting plate.
6. Remove hydraulic pump hub, rubber coupling, and
drive sprocket components from engine crankshaft if
necessary. Locate and retrieve hydraulic pump key and
drive pulley key.
7. Remove throttle bracket assembly if necessary
(Fig. 17).
8. Remove engine clutch assembly if necessary (see
Clutch in this chapter).
Installation (Fig. 15)
1. Make sure that all parts removed from the engine
during maintenance or rebuilding are correctly rein-
stalled to the engine.
2. Install engine clutch assembly if removed (see
Clutch in this chapter).
3. Install throttle bracket assembly if removed
(Fig. 17). Tighten mounting screws from 65 to 85 in−lb
(7.4 to 9.6 N−m).
Figure 16
1. Spray pump drive belt
2. Idler pulley
3. Flange nut
4. Adjusting screw
42
3
1
Figure 17
1. Throttle bracket
2. Lock washer(4)
3. Flange head screw (4)
4. Screw − high speed stop
5. Jam nut (2)
6. Screw − low speed stop
7. Throttle cable ball joint
8. Spring
9. Flange nut
10. Shoulder screw
11. Choke lever
12. Throttle lever
65 to 85 in−lb
(7.4 to 9.6 N−m)
1
2
3
4
6
7
10
8
9
5
11
12
Kohler
Gasoline Engine
 Loading...